 Skip to content
How to Grow Goji Berries in Your Home Garden
Understanding Goji Berries Goji berries, or wolfberries, are the fruit of Lycium barbarum, a deciduous shrub native to Asia. As
Understanding Goji Berries
Goji berries, or wolfberries, are the fruit of Lycium barbarum, a deciduous shrub native to Asia. As a member of the Solanaceae (Nightshade) family, they are related to tomatoes, peppers, and eggplant. These plants are valued for their resilience and the unique, tart flavor of their nutrient-dense berries. Understanding the plant’s fundamental nature is the first step to cultivating it successfully.
Goji Berry Characteristics
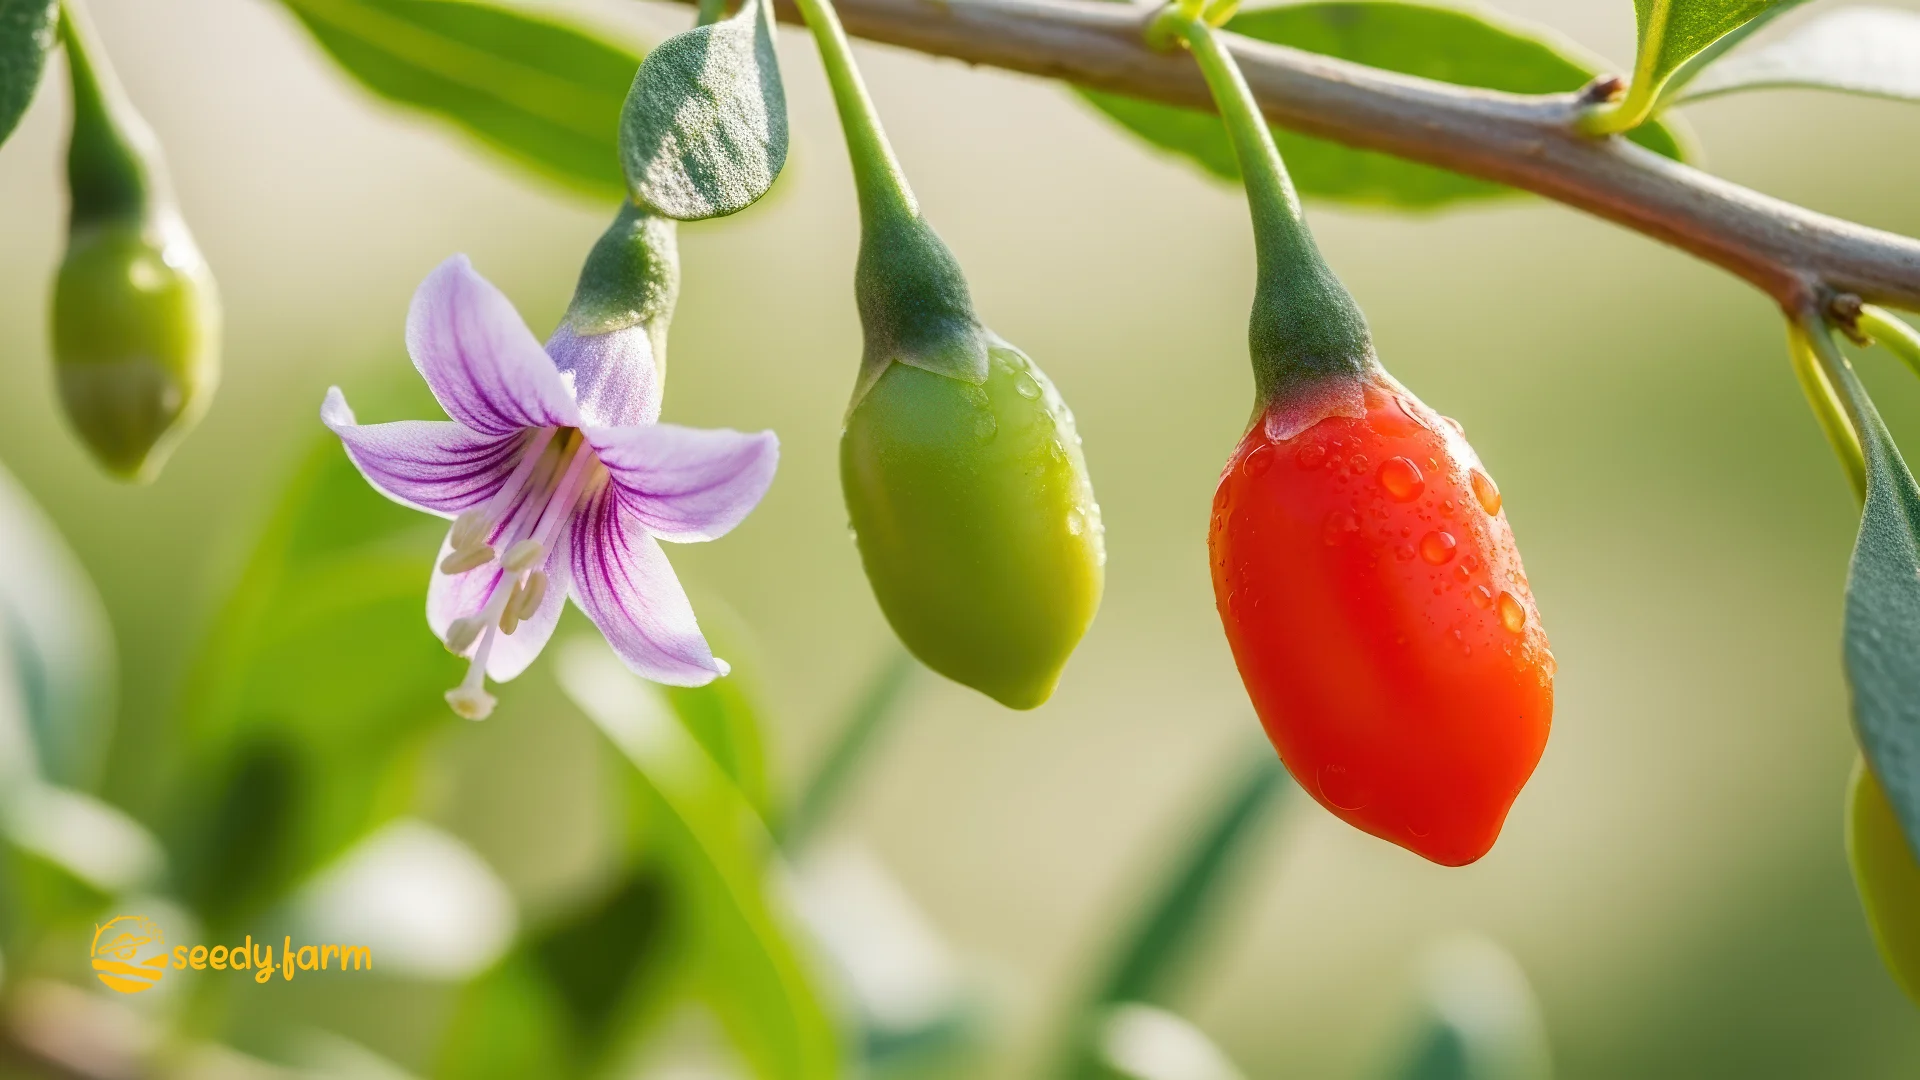
The goji is a woody, perennial shrub with a vigorous and often sprawling growth habit. Its long, flexible canes can arch gracefully or be trained to a trellis. Mature, unpruned plants can reach 3 meters (10 feet) in height and spread. The foliage consists of narrow, lance-shaped, gray-green leaves. In late spring, small, trumpet-shaped flowers, typically lavender to purple, appear along the stems. These self-pollinating flowers develop into the familiar oblong, bright red-orange berries that ripen from late summer into autumn.
Flowering, Pollination, and Fruiting Cycle
To answer the common question, are goji berries self pollinating? Yes, they are. Goji berry plants (Lycium barbarum) are self-fertile. This means a single plant has flowers with both male and female parts and can produce a full crop without a second plant for cross-pollination. While self-fertile, fruit set is significantly improved by insect activity. The small, lavender flowers attract native bees and hoverflies, which are highly effective pollinators. This self-sufficiency makes the goji berry an ideal fruit-bearing shrub for gardeners with limited space.

Flowers emerge on *new wood (this season’s growth) from late spring through summer, typically beginning 6-8 weeks after your region’s last frost. After a flower is pollinated, it will drop, and a tiny green berry forms. This development period takes approximately 30-45 days* for the berry to mature to its final red-orange color. Because flowering is indeterminate, you will often see flowers, green fruit, and ripe berries on the same branch simultaneously. It’s important to have a clear timeline for production. For a nursery-grown plant:
- Year 1: The focus is on root establishment. Expect vigorous cane growth but no fruit.
- Year 2: You may get a light ‘tasting’ crop of a few dozen berries.
- Year 3+: The plant reaches productivity. A healthy, well-pruned shrub can yield 2-4 lbs (1-2 kg) of berries per season, with yields increasing as the plant matures.
Common Pitfall: Healthy Plant, No Fruit?
If your goji is 3+ years old, looks lush and green, but is not flowering, the two most likely culprits are insufficient sun or excess nitrogen.
- Sunlight: The plant needs an absolute minimum of 6 hours, but 8+ hours of direct sun is required for prolific fruiting.
- Nitrogen: Excess nitrogen (often from lawn fertilizer runoff) signals the plant to produce leaves, not flowers. Cease all fertilizing immediately.
| Feature | Description |
|---|---|
| Scientific Name | Lycium barbarum |
| Family | Solanaceae (Nightshade) |
| Growth Habit | Deciduous, woody shrub with long, arching canes. Can be grown as a free-standing bush or trained on a support structure. |
| Leaf Characteristics | Lanceolate (lance-shaped), gray-green, 2.5-7.5 cm (1-3 inches) long. |
| Flower Characteristics | Small, five-petaled, lavender or light purple, trumpet-shaped flowers. They are self-fertile, meaning a single plant can produce fruit. |
| Blooming Time | Late spring through summer, depending on climate. |
| Fruit Characteristics | Bright red-orange, oblong berries, 0.6-1.3 cm (0.25-0.5 inches) long. Flavor is a unique blend of tart and slightly sweet. Fruit is produced on new wood. |
| Hardiness Zones | Reliably hardy in USDA zones 5-9. Some cold-hardy cultivars may survive in zone 4 with winter protection. |
| Climate Preferences | Thrives in temperate climates with hot summers and a distinct cold period for dormancy. Tolerant of dry conditions once established; dislikes high humidity. |
| Sunlight Requirements | Full sun is non-negotiable. Requires a minimum of 6-8 hours of direct sunlight daily for robust growth and maximum fruit production. |
| Soil Preferences | Extremely adaptable but demands well-drained soil. Tolerates a wide pH range but performs best in slightly alkaline soil (pH 6.8 to 8.1). Root rot is a serious risk in waterlogged soil. |
| Watering Needs | Young plants require consistent moisture to establish their root system. Mature plants are highly drought-tolerant but produce better fruit with occasional deep watering during dry spells. |
| Fertilization Requirements | A light feeder. Excessive nitrogen promotes leafy growth at the expense of flowers and fruit. An annual application of compost in the spring is typically sufficient. |
| Pruning Needs | Annual dormant-season pruning is essential to manage size, improve air circulation, and encourage the growth of new, fruit-bearing wood. |
| Pest and Disease Susceptibility | Generally resilient. Can be susceptible to aphids, spider mites, and powdery mildew, particularly in stressed conditions or humid climates. |
| Propagation Methods | Best propagated from nursery-grown plants. Propagation from cuttings is possible but can be challenging. Seed propagation is slow and produces genetically variable offspring. |
| Years to Maturity | Nursery-grown plants typically produce a light crop in their second year and a significant harvest by year three or four. |
| Harvesting Time | Late summer through the first frost, as berries ripen sequentially. |
| Storage Methods | Fresh berries are perishable and best refrigerated for a few days. They are most commonly preserved by drying or freezing for long-term storage. |
| Cultural Significance | A staple in Traditional Chinese Medicine (TCM) for centuries, valued for its role in wellness and cuisine. |
| Culinary Uses | Consumed fresh, but more often used dried in teas, soups, trail mixes, and baked goods. Can be processed into juices and powders. |
### Goji Berries: From Ancient Remedy to Modern Superfood
The history of goji berries is deeply intertwined with traditional agriculture and medicine in Asia, particularly China, where they have been cultivated for at least 2,000 years. In Traditional Chinese Medicine (TCM), they were not seen as a cure-all, but as a valuable food for maintaining wellness.
Nutritional science validates some of this historical reverence. Goji berries are a source of antioxidants, particularly zeaxanthin (which gives them their vibrant color), as well as vitamins A and C, iron, and fiber. While the term “superfood” is a marketing creation, the berry’s nutrient density is undisputed.
Historically, goji berries were a significant food crop, consumed fresh in season and dried for year-round use in soups, teas, and rice dishes. Their journey to global prominence began in the late 20th century, fueled by interest in nutrient-dense foods. This demand spurred commercial cultivation in new regions, including North America.
For the home gardener, the goji berry’s appeal lies in its resilience and productivity. It is a hardy, drought-resistant plant that can yield abundant harvests in suitable climates with proper care, bridging the gap between an ancient crop and a modern garden staple.
Preparing Your Goji Berry Patch
Choosing the Ideal Goji Berry Variety for Your Garden
Success begins with selecting a named cultivar from a reputable nursery. These plants have been selected for superior traits like fruit size, flavor, yield, and growth habit. Avoid generic, unnamed plants, as their performance is unpredictable. ‘Crimson Star’ and ‘Big Lifeberry’ are two excellent, widely available choices.
| Characteristic | ‘Big Lifeberry’ | ‘Crimson Star’ |
|---|---|---|
| Berry Size and Taste | Large berries, up to 2.5 cm (1 inch). Flavor is balanced between sweet and tart. | Medium-sized, plump berries. Consistently sweet flavor. |
| Yield | Very high potential yield on a mature, well-managed plant. | Reliably high yields. A productive and consistent choice. |
| Adaptability | Well-suited for USDA zones 5-9. Thrives with summer heat. | Slightly more cold-tolerant, performing well in USDA zones 4-8. |
| Self-Fertile | Yes, self-fertile. A single plant will produce fruit. | Yes, self-fertile. A single plant will produce fruit. |
| Growth Habit | Extremely vigorous, with long, vining canes. Requires a sturdy trellis or support system to manage its sprawling nature and keep fruit off the ground. Reaches 3-3.5 m (10-11.5 ft). | A more compact, upright, and shrub-like habit. Easier to manage in smaller spaces or as a freestanding bush. Typically grows 0.9-1.5 m (3-5 ft) tall. |
| Disease Resistance | Good overall disease resistance. | Excellent resistance to common pests and diseases. |
| Hardiness | Cold hardy once established. Mulch well in colder zones. | Very cold hardy once established. A better choice for colder climates. |
Your choice depends on your space and goals. For large yields and gardeners willing to install a trellis, ‘Big Lifeberry’ is an excellent producer. For smaller gardens, containers, or those seeking a lower-maintenance shrub, ‘Crimson Star’ is a superb, manageable, and resilient option.
Sourcing Your Plant: Where to Buy Goji Berries and What to Look For
Local Nurseries vs. Online Retailers
- Local Garden Centers: - Pros: Ability to inspect plant health firsthand; no shipping stress; potential for local advice. When searching for goji berry plants near me, an independent garden center is your best bet to buy goji berry plants that are acclimated to your area. - Cons: Limited cultivar selection; often sell smaller, younger plants.
- Specialty Online Nurseries: - Pros: Excellent selection of named cultivars; option to buy larger, 2-3 year old plants for a faster harvest. They are often the best source for high-quality goji berry plants for sale. - Cons: Cannot inspect before purchase; risk of shipping damage; higher cost.
Your 4-Point Healthy Plant Checklist
- Check the Stem: Look for a plant with a sturdy, woody base at least the thickness of a pencil. Avoid weak, spindly plants.
- Inspect the Foliage: Leaves should be a healthy, uniform color. Carefully check the undersides for the fine webbing of spider mites or the sticky ‘honeydew’ from aphids.
- Examine the Roots: If possible, gently slide the plant from the pot. You want to see healthy, white roots holding the soil mass. If you see a thick, dense mat of brown roots circling the bottom, the plant is severely *root-bound and will struggle to establish. This is a major red flag—do not buy it.*
- Verify the Tag: Ensure the plant has a clear tag identifying its cultivar (e.g., ‘Crimson Star’). Avoid generic ‘Goji Berry’ plants, as their genetics and performance are unpredictable.
Common Pitfall: The ‘Bargain Bin’ Trap
Be cautious of heavily discounted plants at big-box stores. They are often stressed, root-bound, or potentially carrying pests. Investing an extra $10-$15 in a vigorous, healthy plant from a reputable source is the single most important decision you will make. It will save you years of poor performance and frustration.
### Choosing a Location
- Sunlight and Growth: Goji berries require full sun. This means a minimum of 6, and preferably 8 or more, hours of direct, unfiltered sunlight each day. Sunlight fuels photosynthesis, the process that creates the sugars needed for vigorous growth and flavorful fruit. Insufficient light results in sparse, leggy growth and poor to no fruit production.
- Soil and Drainage: Excellent drainage is non-negotiable. Goji berries are native to regions with sandy, alkaline soils and their roots will not tolerate being waterlogged, which leads to root rot. While they adapt to various soil types, from sandy loam to clay, the site must drain well. To test drainage, dig a hole 30 cm (1 ft) deep and fill it with water. If it doesn’t drain within a few hours, the site is unsuitable. In such cases, amend the soil heavily with compost to improve its structure or, better yet, plant in a raised bed.
- Space to Grow: Respect the plant’s mature size. Space freestanding shrubs 1.2 to 1.5 meters (4 to 5 feet) apart. This spacing ensures adequate air circulation through the canopy, which is your primary defense against fungal diseases like powdery mildew. If planting vining varieties along a trellis, space them at least 1.8 meters (6 feet) apart.
- Protection from the Elements: While tough, the long, fruit-laden canes can be damaged by high winds. Planting on the leeward side of a building or a windbreak can offer protection. However, do not sacrifice sun exposure for wind protection; sun is the more critical factor.
Planting, Caring for Goji Berries
Planting Methods
a. From Seeds
Mentor’s Corner: A Note on Growing from Seed
Growing goji from seed is an excellent educational project to understand germination, but it is not the recommended method for fruit production. Seeds from a hybrid cultivar will not grow “true to type,” meaning the resulting plant will be genetically different from its parent and may produce small, inferior-tasting fruit, or none at all. Furthermore, a seed-grown plant can take 5-7 years to mature enough to flower. For a reliable harvest of high-quality fruit, always start with a named cultivar from a nursery.
For those interested in the experiment:
- Step 1 – Obtain Seeds: Purchase seeds from a reputable supplier or extract them from fully ripe, fresh berries. Seeds from dried commercial berries often have low viability. To extract, mash a fresh berry in water and allow the viable seeds to sink to the bottom.
- Step 2 – Stratify the Seeds (Recommended): Cold-moist stratification can improve germination. Mix seeds with a small amount of damp sand or peat moss in a sealed plastic bag. Refrigerate at 4°C (40°F) for 30 days. This mimics winter and breaks the seed’s dormancy.
- Step 3 – Sow the Seeds: Sow seeds 0.6 cm (¼ inch) deep in a sterile seed-starting mix. Keep the medium consistently moist but not saturated, and provide warmth (20-25°C or 68-77°F) and bright light.
- Step 4 – Germination and Transplanting: Germination can be erratic, taking anywhere from 2 to 6 weeks. Once seedlings have their second set of leaves (their first true leaves), carefully transplant them into individual pots to grow until they are large enough for the garden.
b. Cuttings
Mentor’s Corner: Propagating from Cuttings
Taking cuttings creates a genetic clone of the parent plant, which is how commercial growers propagate millions of identical plants. However, for the home gardener, rooting goji cuttings can have a low success rate without professional equipment like a misting system to maintain high humidity. It is a fun experiment, but purchasing a healthy, nursery-grown plant is a far more reliable path to success.
For those who wish to try:
- Step 1 – Take Cuttings: In late spring, take 10-15 cm (4-6 inch) cuttings from semi-hardwood—this is current season’s growth that is firm but still flexible. Make the bottom cut just below a leaf node.
- Step 2 – Prepare Cuttings: Remove the leaves from the bottom half of the cutting. Wounding the base by lightly scraping the bark on two sides can encourage rooting. Dip the base in a rooting hormone powder to increase the chance of success.
- Step 3 – Plant Cuttings: Insert the bottom half of the cutting into a pot filled with a sterile, well-draining medium like a 50/50 mix of perlite and peat moss.
- Step 4 – Provide Proper Care: Water the medium thoroughly. Cover the pot with a plastic bag or humidity dome to maintain high humidity, but open it daily to allow for air exchange and prevent mold. Place in a warm location with bright, indirect light.
- Step 5 – Rooting and Transplanting: Roots should form in 4 to 8 weeks. A gentle tug that meets with resistance indicates successful rooting. Once a healthy root system has developed, the new plant can be moved to a larger pot or a protected spot in the garden.
c. Container-Grown Plants:

This is the most reliable and highly recommended method for establishing goji berries in the home garden. You begin with a healthy, well-rooted plant of a known cultivar that will produce fruit within a few years.
- Step 1 – Purchase Healthy Plants: Select a plant from a reputable nursery with vigorous, green foliage and no signs of pests or disease. Avoid plants with roots that are heavily circling the bottom of the pot, as this indicates it is root-bound.
- Step 2 – Plant at the Right Time: The ideal time to plant is in the spring after all danger of frost has passed. This gives the plant the entire growing season to establish its root system before winter. Fall planting is possible in milder climates, but should be done at least 6-8 weeks before the ground freezes.
- Step 3 – Dig Planting Holes: Dig a hole that is twice as wide and just as deep as the plant’s container. The width allows roots to expand into loosened soil easily.
- Step 4 – Plant Goji Berries: Carefully slide the plant out of its pot. Inspect the root ball. If roots are circling, gently tease them apart with your fingers or make a few shallow vertical cuts with a knife to encourage outward growth. Place the plant in the hole, ensuring the top of the root ball is level with the surrounding soil. Planting too deep can lead to stem rot.
- Step 5 – Water Thoroughly: Backfill the hole with the native soil, gently firming it around the root ball to eliminate large air pockets. Immediately water the plant deeply and slowly, allowing the water to saturate the entire root zone and settle the soil.
- Step 6 – Space Plants Appropriately: Follow the spacing recommendations for your specific cultivar to ensure good health and productivity as the plant matures.
General Planting Tips
- Timing: Spring planting is best for all zones, as it maximizes establishment time before winter.
- Location: Remember the non-negotiables: full sun and excellent drainage. Get this right, and you are halfway to success.
- Watering After Planting: Keep the soil consistently moist—but not soggy—for the first few weeks after planting to help the plant recover from transplant shock and encourage new root growth.
### Goji Berry Care and Maintenance
a. Watering
Proper watering is about establishing deep, resilient roots.
- Initial Growth Phase: For the first growing season, check the soil every few days. Water deeply whenever the top 5 cm (2 inches) of soil feels dry. This consistent moisture is critical for the plant to establish a robust root system.
- Established Plants: After the first year, goji plants are quite drought-tolerant. However, for the best fruit quality and yield, provide a deep watering every 1-2 weeks during prolonged hot, dry periods, especially when the plant is flowering and fruiting. One deep soak is far better than many shallow sprinklings.
- Watering Approach: Always water at the base of the plant using a soaker hose, drip irrigation, or a watering can. This delivers water directly to the root zone and keeps foliage dry, which is key to preventing fungal diseases.
- Mulching: A thick layer of organic mulch is your best friend. It conserves soil moisture, suppresses weeds, and keeps the root zone cool.
b. Fertilizing
Goji berries thrive on lean soil; over-fertilization is a common mistake.
- Organic vs. Synthetic Approaches: The best practice is to top-dress with 2-5 cm (1-2 inches) of well-rotted compost around the base of the plant each spring. This provides a slow, balanced release of nutrients and improves soil structure. If you must use a synthetic fertilizer, choose a balanced granular formula (e.g., 10-10-10) and use it sparingly, at half the recommended rate, only once in early spring.
- Timing: Apply any fertilizer or compost in early spring as new growth begins. Never fertilize after mid-summer, as this can force tender new growth that will be damaged by an early frost.
- Moderation is Key: Avoid high-nitrogen fertilizers. Excess nitrogen tells the plant to produce lush, leafy growth (vegetative growth) instead of flowers and fruit (reproductive growth). If your plant is large and green with few berries, excess nitrogen is the likely culprit.
c. Pruning Practices
Annual pruning is essential for managing size and maximizing fruit production. Goji berries fruit on new wood, so pruning stimulates the growth that will bear next season’s crop.
- Optimal Timing: Prune in late winter or very early spring while the plant is fully dormant. The plant’s structure is clearly visible, and the pruning cuts will heal quickly once growth resumes.
- Pruning Objectives: - Remove the 3 D’s: Start by cutting out any wood that is Dead, Damaged, or Diseased. - Improve Airflow: Thin out the center of the shrub, removing any crossing branches or weak, twiggy growth. The goal is an open structure that allows sunlight and air to penetrate all parts of the plant. - Control Size: Cut back the main canes to a desired height (e.g., 1.5-1.8m or 5-6 ft). This makes harvesting easier. - Encourage Fruiting Wood: After trimming the main canes for height, shorten the lateral (side) branches that grew off them last year, leaving them about 20-40 cm (8-15 inches) long. These laterals will produce the most fruit.
- Technique: Use clean, sharp bypass pruners. Make your cuts about 0.6 cm (¼ inch) above an outward-facing bud to direct new growth away from the center of the plant.
- Training: For vining varieties like ‘Big Lifeberry’, select 3-5 of the strongest canes as your main framework and tie them to your trellis. Prune all other canes to the ground. Then, apply the principles above to the lateral branches growing from your main framework.
d. Mulching and Weed Control
- Mulching Benefits: Apply a 5-10 cm (2-4 inch) layer of organic mulch like wood chips, straw, or shredded leaves around the base of the plant. Keep the mulch a few inches away from the main stem to prevent rot. Mulch suppresses weeds, conserves water, moderates soil temperature, and slowly breaks down to enrich the soil with organic matter.
- Weed Vigilance: Weeds compete directly with your plant for water and nutrients. Remove them by hand or with a hoe when they are small. A thick layer of mulch will dramatically reduce your weeding workload. Avoid using herbicides, which can harm your plant and the surrounding soil life.
e. Pest & Disease Management
Common Pests
- Aphids: Small, pear-shaped insects that cluster on new growth, sucking sap and weakening the plant. Their excretions, called honeydew, can lead to sooty mold.
- Spider Mites: Tiny arachnids that are difficult to see with the naked eye. They thrive in hot, dry conditions, especially when temperatures are consistently above 80°F (27°C) and humidity is low. They cause fine, yellow stippling on leaves, and telltale signs include delicate webbing on the undersides of leaves.
- Whiteflies: Small, moth-like insects that swarm up when disturbed. They feed on the undersides of leaves, causing yellowing.
Organic Pest Control Methods
- Neem Oil: A broad-spectrum botanical oil that works as an antifeedant, hormone disruptor, and repellent. It is most effective when applied early in an infestation. Follow label directions carefully and do not spray in direct sun or high heat to avoid burning leaves.
- Insecticidal Soap: A specially formulated soap that dissolves the protective outer layer of soft-bodied insects like aphids and spider mites, causing them to dehydrate. It requires direct contact to work and has no residual effect. Thoroughly coat all plant surfaces, especially leaf undersides.
- Diatomaceous Earth: The fossilized remains of diatoms create a fine powder with microscopic sharp edges that abrade the exoskeleton of insects, causing them to dry out. Best used as a dry powder around the base of the plant. It is ineffective when wet.
- Water Spray: A strong jet of water from a hose is often the only control needed for a minor aphid or spider mite population. It physically dislodges them from the plant.
Common Goji Berry Diseases
- Powdery Mildew: One of the most visible goji berry plant problems is powdery mildew. - Identification: Look for a distinct white, talcum-powder-like coating on leaves, stems, and sometimes fruit. - Context: It thrives in high humidity (over 70%) combined with warm days and cool nights, making it a common issue in late spring or early fall. - Rationale: The fungal layer blocks sunlight, hindering photosynthesis. This stresses the plant, reduces fruit quality, and can lead to premature leaf drop if left unchecked. - Organic Treatment: Control outbreaks with a potassium bicarbonate spray. To make: Mix 1 tablespoon of potassium bicarbonate and 1/2 teaspoon of liquid, non-detergent castile soap with 1 gallon (3.8 liters) of water. Spray all affected plant surfaces until dripping. The bicarbonate raises the leaf surface pH, creating an inhospitable environment for the fungus. - Prevention: Prevention is your best defense. The pruning techniques discussed earlier—thinning the center of the plant for an open, airy canopy—are the number one way to prevent powdery mildew by allowing leaves to dry quickly after rain or dew.
- Root Rot: - Identification: Symptoms above ground include stunted growth, yellowing leaves (chlorosis), and wilting even when the soil is moist. A common cause for goji berry leaves turning yellow is root rot, a clear sign the roots are failing. - Rationale: This isn’t a traditional disease but a condition caused by waterlogged soil. Goji roots require oxygen to live; in saturated, anaerobic soil, they suffocate and are attacked by water molds like Phytophthora. The rotted roots can no longer absorb water or nutrients, leading to the plant’s decline. - Prevention & Treatment: Be direct: There is no cure for advanced root rot; prevention is the only viable strategy. This reinforces the non-negotiable site requirement discussed in ‘Choosing a Location.’ If your soil fails the drainage test (a 1-ft hole doesn’t drain in 2-3 hours), you must amend the soil by working in a 3-inch layer of compost or, better yet, plant in a raised bed at least 12-18 inches (30-45 cm) high.
Expert Tip: The Humidity Challenge
Gardeners in humid climates (e.g., Southeastern US) often find goji berries challenging due to constant fungal pressure. If this is your climate, you must prioritize practices that promote airflow. Space plants wider than recommended (a full 5-6 feet / 1.5-1.8m apart), perform rigorous dormant-season pruning to open the canopy, and always water at the soil level in the morning so foliage has the entire day to dry.
##### Preventive Strategies
- Encourage Beneficial Insects: The best pest control is a garden predator. Plant flowers like alyssum, dill, and cilantro nearby to attract ladybugs, lacewings, and hoverflies, which are voracious predators of aphids.
- Regular Monitoring: Walk through your garden regularly and inspect your plants, looking under leaves for early signs of trouble. It’s much easier to control a small pest population than a large one.
- Promote Plant Health: The most important strategy is to provide proper sun, soil, and water. A healthy plant can defend itself from most pest attacks.
f. Companion Planting
Companion planting aims to create a beneficial garden ecosystem rather than relying on simple pairings.
- Beneficial Insect Attractants: This is the most effective form of companion planting. Incorporate a diverse array of flowering herbs and perennials to provide a season-long habitat for predatory insects and pollinators. Good choices include: - Yarrow (Achillea millefolium) - Dill (Anethum graveolens) - Fennel (Foeniculum vulgare) - Cilantro/Coriander (Coriandrum sativum) - Alyssum (Lobularia maritima)
- Pest Repellents: Strongly scented herbs can help confuse pests that locate plants by smell. While not a guaranteed defense, interplanting with aromatic plants can be beneficial. - Marigolds (Tagetes spp.): Some varieties release a substance that can suppress root-knot nematodes in the soil. - Nasturtiums (Tropaeolum spp.): Can serve as a “trap crop,” attracting aphids away from your goji plants. - Alliums (Garlic, Chives): The strong sulfur compounds in their scent may deter some pests.
- Nitrogen Fixers: Legumes like bush beans or clover planted as a living mulch can capture atmospheric nitrogen and make it available in the soil. Ensure they don’t compete directly with the goji’s root zone.
- General Considerations: - Avoid Nightshade Relatives: Do not plant goji berries near tomatoes, potatoes, peppers, or eggplant. They belong to the same family and can share pests and diseases, such as blight and hornworms. - Respect Sun Requirements: Ensure companion plants are not tall enough to cast shade on the sun-loving goji plant.
Harvesting Goji Berries: Timing, Technique, and Preservation
When to Harvest
- Plant maturity: A nursery-grown plant will likely produce a few berries in its second year, with substantial yields beginning in the third or fourth year.
- Season: The harvest window typically runs from late summer through the first hard frost of fall. The exact timing depends on your climate and the specific cultivar.
- Ripeness: Harvest berries when they are a uniform, vibrant red-orange color, feel plump but firm (like a ripe cherry tomato), and detach from the stem with a gentle tug. Unripe berries will taste bitter and will not ripen further after being picked. Taste is your best guide; a ripe berry will have a pleasant tartness.
- Frequency: Berries ripen sequentially, not all at once. Plan to harvest every few days during the peak of the season to gather berries at their optimal stage and to encourage the plant to continue producing.

### Harvesting Methods
Hand Picking
This is the preferred method as it ensures only ripe berries are picked and minimizes damage to the fruit and plant.
- Gentle Touch: Grasp the ripe berry between your thumb and forefinger and give a slight twist. It should come off easily with its small stem attached. Be gentle, as the berries can bruise.
- Stem Snipping: If berries are clustered tightly or difficult to pull without squishing, use a pair of small, sharp scissors (like bonsai or floral snips) to clip the stem.
- Containers: Use a shallow container to collect the berries. Piling them too deep in a bucket can crush the fruit at the bottom.

#### Shaking Technique
This method is faster for large, mature plants but is less selective.
- Tarp Collection: Spread a clean tarp or old sheet on the ground beneath the plant. Grasp a branch and shake it firmly but gently. Ripe berries will fall onto the tarp.
- Selective Shaking: Target branches that have the highest concentration of ripe fruit.
- Sorting: This method will inevitably dislodge some unripe berries, leaves, and twigs. You will need to carefully sort your harvest afterward.
Harvesting Schedule
- Regular Inspection: Check your plants every 2-3 days once the berries start to turn color.
- Optimal Timing: The best time of day to harvest is in the morning after the dew has evaporated but before the heat of the day. The berries will be cool, firm, and at their highest sugar content.
Handling and Storage of Goji Berries
a. Immediate Handling
Gentle Washing: Only wash berries right before you plan to eat or process them. Place them in a colander and rinse gently with cool water. Drying: Pat the berries completely dry with a soft towel or lay them in a single layer on a paper-towel-lined tray. Moisture is the enemy of storage and will encourage mold.
b. Short-term Storage
Refrigeration: Place clean, completely dry berries in a shallow, breathable container lined with a paper towel. Store in the refrigerator for up to one week. Do not seal in an airtight bag, as this traps moisture.
c. Long-term Storage

Drying
- Spread clean, dry goji berries in a single layer on dehydrator trays or parchment-lined baking sheets. Ensure they are not touching to allow for even air circulation.
- Dehydrator: This is the most reliable method. Set your food dehydrator to a low temperature (around 50-57°C or 125-135°F) to preserve nutrients. Drying can take 8-24 hours depending on berry size and humidity.
- Air Drying: In arid climates, you can thread berries on a string or spread them on screens in a warm, dry, well-ventilated location away from direct sun. This can take several days to weeks.
- Oven Drying (Use with Caution): Set your oven to its lowest possible temperature, prop the door ajar to allow moisture to escape, and turn the berries periodically. This method is fast but risks cooking or scorching the berries.
- Doneness Test: Properly dried berries will be leathery and slightly pliable, not hard and brittle, and will show no signs of interior moisture when torn open.
- Storage: Allow dried berries to cool completely before storing them in an airtight glass jar in a cool, dark pantry. They can last for up to a year.
Freezing

Freezing preserves the fresh flavor of goji berries exceptionally well.
- Preparation: Wash and thoroughly dry the berries.
- Flash Freeze: Spread the berries in a single layer on a parchment-lined baking sheet. This crucial step, known as flash freezing, prevents them from clumping into a solid block.
- Transfer: Place the baking sheet in the freezer for 1-2 hours until the berries are frozen solid.
- Storage: Transfer the individually frozen berries into a zip-top freezer bag or airtight container. Remove as much air as possible to prevent freezer burn. They will keep for up to a year.
Additional Tips
- Check for Spoilage: Before using any stored berries (dried or frozen), inspect them for mold or off-smells. Discard anything that seems questionable.
- Labeling: Always label your storage containers with the contents and the date they were preserved. This helps you use the oldest stock first.

### Enjoying Your Goji Berry Harvest: Flavor, Nutrition, and Uses
Flavor Profile: What Do Goji Berries Taste Like?
Fresh goji berries have a complex, savory-sweet flavor profile. Imagine the slight sweetness of a tomato combined with the tartness of a cranberry, followed by a mildly bitter, herbal aftertaste. They are not sugary like a raspberry. When dried, the sugars concentrate, and the flavor shifts towards that of a tart raisin.
How to Eat Goji Berries: From Fresh to Dried
- Fresh: Enjoy raw straight from the bush. Their unique flavor profile makes them an excellent addition to savory salads, especially with goat cheese and nuts. Also, blend into smoothies or sprinkle over yogurt.
- Dried: The most common form. For best results, rehydrate by soaking goji berries in warm water for 5-10 minutes. Use the plumped berries and the nutrient-rich soaking liquid in oatmeal, trail mixes, baked goods, or simmered in rice, quinoa, and savory soups.
- Teas & Infusions: Create a traditional wellness tea by steeping 1 tablespoon of dried berries in 8 oz (240 ml) of hot water for 10 minutes. The berries become soft and are typically eaten after finishing the tea.
Nutritional Snapshot & Traditional Uses
Goji berries are a nutrient-dense food. They are an excellent source of Vitamin A (from beta-carotene) and Vitamin C. They are most prized for their high concentration of antioxidants, particularly zeaxanthin, a carotenoid studied for its role in protecting eye health. This aligns with the long-held benefits of goji berries in traditional medicine, where they were used to support overall vitality.
Expert Tip: Don’t Discard the Leaves!
A fact unknown to most Western gardeners is that goji berry leaves are edible and highly valued as a nutritious cooking green in Asia. In late spring, harvest the tender, top 4-6 inches of new shoots. They have a flavor similar to spinach with a slightly more bitter note. Quickly stir-fry them with garlic and a splash of soy sauce or add them to soups, broths, and omelets for a boost of nutrients.
## FAQ: Growing Goji Berries in Your Home Garden
My goji plant is large and leafy but produces few or no berries. What’s wrong? This is a classic sign of excessive nitrogen. The plant is directing all its energy into vegetative (leafy) growth instead of reproductive (fruit) growth. Stop all fertilizing, especially high-nitrogen lawn fertilizers that may be washing into the area. Ensure the plant receives at least 8 hours of direct sun. Pruning in the dormant season to encourage new lateral growth will also promote fruiting.
Can goji berries be grown in containers? Absolutely, and it’s an excellent option for small spaces or for gardeners in zones colder than 4-5. Select a large container, at least 60 liters (15 gallons), with ample drainage holes. Use a high-quality potting mix, not garden soil. A more compact cultivar like ‘Crimson Star’ is ideal. Container plants require more consistent watering and will need to be fertilized annually with compost or a slow-release fertilizer. In cold climates, the pot must be moved to a protected, unheated location like a garage or shed for the winter.
Why are the leaves on my goji plant turning yellow? Yellowing leaves (chlorosis) can have several causes. The most common is overwatering or poorly drained soil, which suffocates the roots. Check the soil moisture before watering. Another cause can be a nutrient deficiency, typically iron or nitrogen. If the soil is consistently dry and the plant hasn’t been fed, a top-dressing of compost may help. Finally, pests like spider mites can cause stippling that appears yellow from a distance; inspect the undersides of leaves closely.
How often should I water my goji berry plants? For the first year, water deeply when the top 5 cm (2 inches) of soil is dry. Once established, they are very drought-tolerant. Water mature plants deeply every 1-2 weeks only during extended periods of heat and drought, especially when they are setting fruit. Inconsistent watering during fruit development can lead to smaller, lower-quality berries.
How do I protect goji berry plants from birds? Birds can be significant pests as the berries ripen. The most effective protection is to cover the entire shrub with lightweight bird netting. Drape the netting over the plant or a simple frame a few weeks before the berries start to ripen, and secure it at the bottom to prevent birds from getting underneath.
How fast do goji berry plants grow? Goji plants are vigorous growers. In ideal conditions, a young plant can easily put on more than a meter (3-4 feet) of new growth in a single season. This rapid growth is why annual pruning is so important to maintain a manageable and productive structure.
When is the best time to plant goji berries? Plant in the spring after the last frost. This gives the plant the entire growing season to develop a strong root system before facing the stress of winter, significantly increasing its chances of survival and vigorous growth the following year.
Comments (0)
No comments yet. Be the first to share your thoughts.