 Skip to content
The Essential Guide to Mulching for Home Gardeners and Urban Farmers
Mulching is a cornerstone technique in successful gardening, offering remarkable benefits for plant health, soil vitality, and the overall look
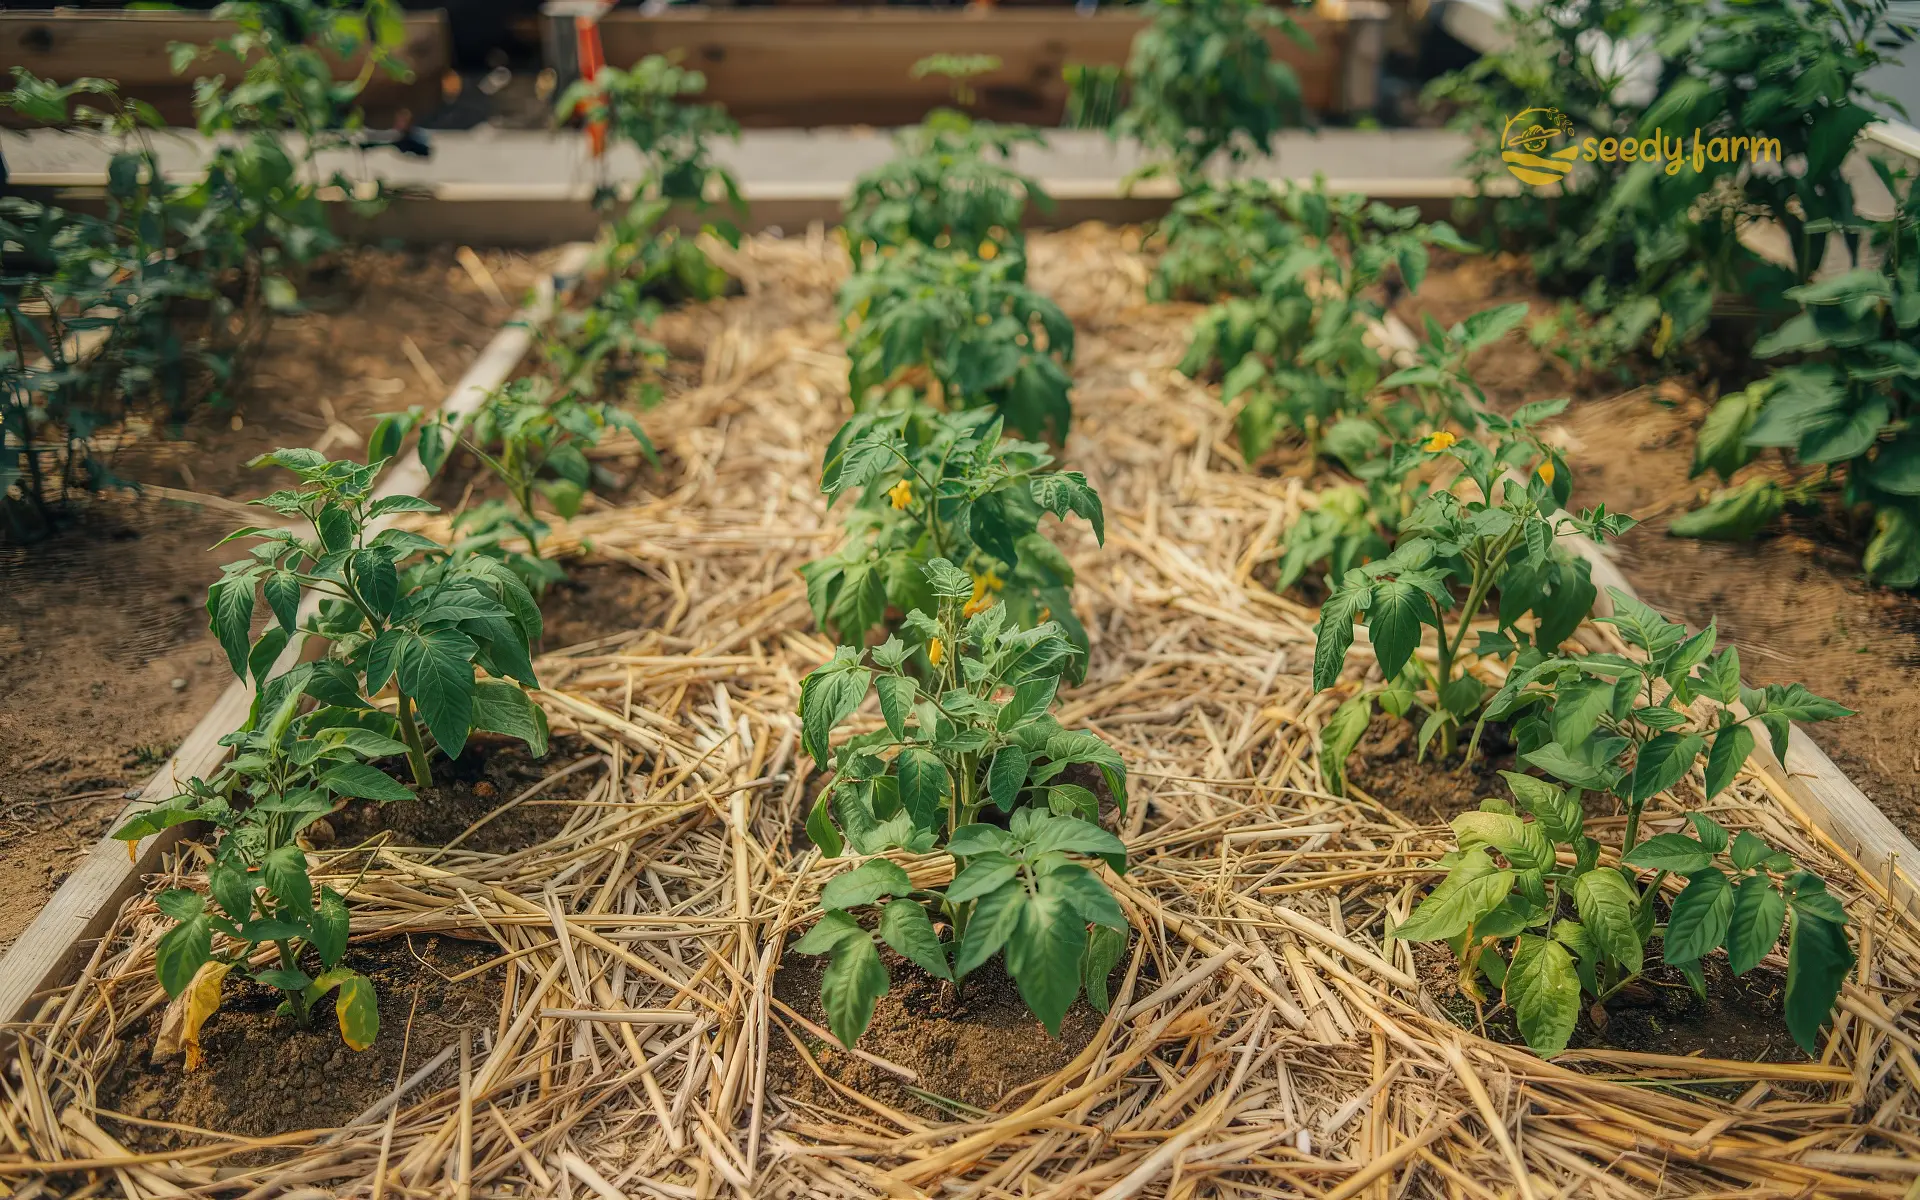
Mulching is a cornerstone technique in successful gardening, offering remarkable benefits for plant health, soil vitality, and the overall look of your landscape. While it might seem like simply covering the ground, understanding the specifics—what to use, when to apply it, and how to do it correctly—makes all the difference. This guide provides clear, practical advice tailored for home gardeners and urban farmers, helping you harness the power of mulch for a thriving garden.
I. Understanding Mulch: Definition and Core Benefits
1. What is Mulch?
Simply put, mulch is any material applied as a layer on top of the soil surface. Think of it as a protective blanket for the earth around your plants, whether they’re in garden beds, pathways, raised planters, or containers. Mulches are broadly categorized into organic materials (like bark or compost) that break down over time, and inorganic materials (like gravel) that are more permanent. Its primary purpose is to improve the growing environment for your plants.
2. Key Benefits of Mulching
Applying mulch effectively brings a wealth of advantages to your garden ecosystem:
- Moisture Retention: Significantly reduces water evaporation from the soil surface. This means you’ll need to water less often, conserving precious water resources and keeping your plants hydrated longer.
- Weed Suppression: Acts as a physical barrier, blocking the sunlight that weed seeds need to sprout. This dramatically reduces weed competition, saving you time and effort.
- Soil Improvement (Organic Mulches): As organic mulches decompose, they steadily release nutrients and add valuable organic matter, improving soil structure (making it easier for roots, water, and air to move through), boosting fertility, and feeding beneficial soil life over the long term. This is key for sustainable soil health.
- Temperature Regulation: Insulates the soil, acting like a buffer. It helps keep roots cooler during intense summer heat and protects them from extreme cold and damaging freeze-thaw cycles (which can cause ‘frost heaving’) in winter.
- Erosion Control: Shields the soil surface from the impact of heavy rain and prevents it from being blown away by wind, protecting your valuable topsoil.
- Enhanced Plant Health: Healthy soil leads to healthier plants. Mulch contributes to a thriving soil environment, supporting vigorous growth, better nutrient uptake, and encouraging populations of beneficial soil organisms like earthworms and microbes.
- Reduced Maintenance: By suppressing weeds and conserving moisture, mulch significantly cuts down on routine gardening chores.
- Improved Appearance: Provides a neat, uniform, and finished look to garden beds and pathways, enhancing your garden’s aesthetic appeal.
- Pest Management: While some mulches can unfortunately harbor slugs in damp conditions, others (like cedar bark) may deter certain insects. Importantly, keeping mulch away from plant stems prevents hiding spots for rodents and some damaging insects.
- Crop Protection: Creates a clean barrier between the soil and low-growing fruits (like strawberries) or leafy greens, reducing soil splash-back and potential disease issues.

II. Types of Mulch: Organic vs. Inorganic
Choosing the right mulch depends on your goals, budget, and garden style. Mulches fall into two main categories:
1. Organic (Biodegradable) Mulches
These are derived from plant or animal materials. They break down over time, contributing to soil health, but require periodic replenishment. Common organic mulch options include:
- Wood Chips / Shredded Bark: Popular, widely available, and relatively long-lasting (1-3 years). Choose medium-textured chips for good balance. Sustainability Note: Source from reputable suppliers who use untreated wood, ideally from local tree work or sustainable forestry. Avoid artificially dyed mulches. Fresh wood chips can temporarily ‘tie up’ soil nitrogen as microbes work to decompose the high-carbon material; this is usually only significant at the soil surface. If concerned, apply a nitrogen source (like blood meal or a balanced organic fertilizer) to the soil before applying fresh chips, or let chips age for a few months. Bark nuggets can sometimes float away in heavy rain.
- Garden Compost / Well-Rotted Manure: Excellent soil conditioners, rich in nutrients. Ideal for vegetable gardens and enriching flower beds. Ensure manure is thoroughly composted or aged (typically at least 6 months to 2 years, depending on source – it should be dark, crumbly, and have an earthy smell, not ammoniac) to prevent burning plant roots. Compost may contain viable weed seeds unless produced using a hot composting method. Best applied as a thinner layer (1-2 inches) or mixed into the topsoil layer before applying another mulch on top for better weed suppression. Sustainability Note: Making your own compost recycles garden and kitchen waste beautifully.
- Shredded Leaves / Leaf Mould: A fantastic, free resource! Shredding leaves with a lawn mower before application prevents them from forming a dense, water-repelling mat. Leaf mulch encourages earthworm activity and breaks down into nutrient-rich leaf mould over a year or two. It can be light and prone to blowing in windy spots unless slightly moistened or mixed with heavier materials. Sustainability Note: Utilizes readily available yard waste.
- Straw / Hay: Excellent for vegetable gardens. Straw (the dried stalks of grains) is generally preferred over hay (dried grasses/legumes) as hay often contains more weed and grass seeds. Offers great insulation, moisture retention, weed suppression, and habitat for beneficial spiders and insects. Ensure it is certified seed-free and, crucially, herbicide-free, as persistent herbicides used on grain fields can harm sensitive garden plants. Pine straw (pine needles) is long-lasting and slightly acidic, making it ideal for acid-loving plants like blueberries, azaleas, and rhododendrons.
- Grass Clippings: Another free resource. Apply in thin layers (no more than 1 inch at a time) and allow each layer to dry before adding more to prevent compaction, foul odors, and anaerobic conditions (lack of oxygen). Ensure clippings are from lawns not recently treated with herbicides. Like fresh wood chips, fresh grass clippings can temporarily tie up nitrogen if applied thickly. Sustainability Note: Recycles lawn waste directly back into the garden.
- Sugar Cane Mulch: Popular in some regions, lightweight, breaks down relatively quickly, adding organic matter. Can be dusty and may blow away easily in exposed sites. Check local regulations, as it can sometimes carry prohibited weed seeds.
- Newspaper / Cardboard: Excellent for weed suppression (‘sheet mulching’), especially as a base layer beneath other mulches like wood chips or compost. Use plain cardboard (remove all plastic tape and glossy labels) or newspaper with black, soy-based ink (avoid glossy inserts or colored inks). Overlap edges well. Needs to be covered with another mulch for aesthetics and to prevent it blowing away. Typically breaks down within one growing season. Sustainability Note: Recycles paper products.
- Coir Mulch (Coconut Fiber): Made from coconut husks, often compressed into bricks. Has excellent water retention, a neutral pH, and provides good aeration. Breaks down slowly. Sustainability Note: A byproduct of the coconut industry, but consider the energy used in transport.
- Wool Pellets / Mats: A sustainable option offering good water retention, insulation, slow-release nitrogen, and slug/snail deterrence. Can last 1-2 years. May have a slightly alkaline pH initially.
- Other Plant Matter: Includes spent hops (use caution, can be toxic to dogs if ingested), seaweed (rinse if very salty), cocoa bean hulls (can be toxic to dogs, sometimes mold issues), or ‘chop-and-drop’ mulches from cover crops or dynamic accumulator plants like comfrey or borage cut in place.
2. Inorganic (Non-Biodegradable) Mulches
These materials don’t break down or add nutrients but offer long-lasting weed control and moisture conservation. They are often used for paths or specific landscape styles. Common inorganic mulch options include:
- Gravel / Stone / Pebbles / Crushed Rock: Very durable, excellent for pathways, rock gardens, alpine plantings, or areas needing good drainage. Available in various colours and sizes for decorative effects. Light colours reflect heat; dark colours absorb it, which can be beneficial or detrimental depending on the climate and plants. Can be difficult to plant through later and challenging to remove if you change your mind. Can slowly mix with soil unless a permeable landscape fabric is used underneath (though fabric itself has downsides). Sustainability Note: Sourcing and transport require significant energy.
- Landscape Fabric / Weed Mat: A synthetic fabric laid on the soil surface, usually covered with another mulch (like bark or gravel) for appearance. Designed to block weeds while allowing water and air through. Choose high-quality, permeable (woven or spun-bond) types. Over time, cheaper fabrics can tear, degrade (potentially shedding microplastics), and weeds may eventually grow through them or in the mulch layer on top. Can sometimes impede the natural incorporation of organic matter into the soil.
- Plastic Sheeting (Black or Clear): While effective at blocking weeds and retaining moisture (black) or warming soil (clear – solarization), solid plastic sheeting is generally not recommended for long-term landscape mulching. It prevents air and water exchange, leading to unhealthy anaerobic soil conditions, potential root suffocation, and water runoff. It can also overheat the soil significantly. Degrades over time, fragmenting into plastic pollution. Sustainability Note: Environmentally detrimental due to soil health impacts and plastic pollution. Better alternatives exist for most situations.
- Other: Crushed seashells or tumbled recycled glass can be used decoratively, often in containers or small feature areas.
III. Planning Your Mulching Project
1. When is the Best Time to Mulch?
Mulch provides benefits year-round, but timing your application can maximize its effectiveness:
- Mid-to-Late Spring: This is often considered the ideal time. Wait until the soil has had a chance to warm up after winter (applying too early can keep soil cold and slow plant growth), but apply before summer heat arrives and annual weeds become established. Apply when the soil is moist, such as after a good rain, to lock in that moisture. Spring mulching also gives beds a fresh, tidy look for the growing season.
- Autumn/Fall: Applying mulch after the ground has cooled but before the first hard freeze (in colder climates) helps insulate the soil. This protects plant roots from extreme temperature fluctuations and reduces winter damage like frost heaving (where repeated freezing and thawing pushes plants out of the ground). It also helps retain soil moisture over winter.
- Anytime for New Plantings: Whenever you install new plants, trees, or shrubs, mulching immediately around them (remembering spacing rules!) helps them establish by conserving moisture and reducing weed competition right from the start.
Important Note: In spring, gently pull back any thick winter mulch layer from the base of perennials and bulbs to allow the soil to warm up more quickly and encourage new growth.
2. Calculating How Much Mulch You Need
Estimating correctly saves time and avoids waste. Here’s how:
- Step 1: Calculate the Area: Measure the length and width of each garden bed in feet. Multiply Length (ft) x Width (ft) to get the Area in Square Feet (sq ft). For circular beds, Area = 3.14 x Radius (ft) x Radius (ft). (A quick estimate: one average adult pace is roughly 2.5-3 feet).
- Step 2: Determine Desired Depth: Aim for 2-4 inches (which is 1/6 to 1/3 of a foot) for most organic mulches. Let’s use 3 inches (1/4 foot or 0.25 ft) as a common target depth.
- Step 3: Calculate Volume Needed (Cubic Feet): Multiply the Area (sq ft) by the Depth (in feet). Example: A 10 ft x 10 ft bed = 100 sq ft. For a 3-inch depth (0.25 ft): 100 sq ft x 0.25 ft = 25 cubic feet of mulch.
- Step 4: Convert to Bags or Cubic Yards: - Bags: Mulch bags commonly come in 2 or 3 cubic foot sizes. Divide your total cubic feet needed by the bag size. Example: 25 cubic feet / 2 cu ft per bag = 12.5 bags. So, buy 13 bags. Example: 25 cubic feet / 3 cu ft per bag = 8.33 bags. So, buy 9 bags. - Cubic Yards (for bulk delivery): There are 27 cubic feet in 1 cubic yard. Divide your total cubic feet by 27. Example: 25 cubic feet / 27 cu ft per yard ≈ 0.93 cubic yards. So, order 1 cubic yard.
- Quick Estimation Rule: One cubic yard of mulch covers approximately 100 sq ft at a 3-inch depth.
Pro Tip: It’s wise to buy slightly more (around 10%) than your calculation suggests to account for uneven ground or slight variations in spreading depth.
3. Essential Tools for Mulching
Gathering these tools beforehand makes the job much smoother:
- Wheelbarrow or Garden Cart: Essential for moving bulk mulch or multiple bags around your yard efficiently.
- Pitchfork or Shovel: A pitchfork works well for lighter, looser mulches (like straw or shredded bark); a shovel is better for denser materials (like compost or gravel).
- Rake: A sturdy bow rake helps spread mulch evenly. For a finer finish, gently use the back (flat side) of a leaf rake.
- Gloves: Protect your hands from splinters, dirt, and potential skin irritants.
- Garden Spade or Edger: Useful for creating a crisp, defined edge around beds before mulching.
- Bucket (Optional): Handy for carrying smaller amounts of mulch for precise application around delicate plants.
IV. How to Apply Mulch Correctly
Proper application technique is key to unlocking mulch’s benefits and avoiding potential problems.
1. Preparing the Area
Don’t just dump mulch on unprepared ground! Take these preparatory steps:
- Weed Thoroughly: Remove all existing weeds, ensuring you get the roots out. Mulch suppresses new weeds but won’t kill established perennial weeds effectively.
- Clean Up Debris: Rake away fallen leaves (unless using them as mulch!), sticks, rocks, and any other debris. Remove excessive buildup of old, decomposed mulch if it’s preventing water penetration.
- Prune Plants: Trim any overhanging branches or foliage that might interfere with spreading mulch. Remove any dead or diseased plant parts.
- Define the Edge: Use a spade or half-moon edger to create a clean, sharp edge along lawns or pathways. This physical barrier helps keep mulch in the bed and grass out.
- Improve Soil (Optional but Recommended): If needed, amend the soil with compost or other organic matter before mulching, especially in new beds.
- Water the Soil: Water the area thoroughly before applying mulch. Mulch is most effective at conserving moisture that’s already present in the soil. Applying mulch to dry soil can sometimes hinder subsequent watering from reaching the roots effectively.
- Apply Pre-emergent Herbicide (Optional): If dealing with heavy weed pressure, you might consider applying a pre-emergent herbicide according to label directions after weeding and before mulching. Water it in as instructed. Sustainability Note: Consider this a last resort; thorough weeding and adequate mulch depth are often sufficient and more eco-friendly. Corn gluten meal is sometimes used as an organic pre-emergent, though its effectiveness can be variable.
2. Application Technique
Transport mulch to the bed using your wheelbarrow. Deposit mulch in several small piles throughout the area rather than one large mound – this makes spreading much easier. Use a rake or your gloved hands to spread the mulch evenly over the soil surface to the desired depth. Using hands allows for more careful placement around delicate plants.
3. Proper Mulch Depth
The thickness of your mulch layer is critical:
- General Guideline: For most common organic mulches (shredded bark, wood chips, shredded leaves, straw), aim for a consistent depth of 2 to 4 inches (5 to 10 cm) after settling.
- Finer Materials: Compost or finely shredded bark can be effective at a slightly shallower depth, around 2 inches (5 cm).
- Coarser Materials: Larger wood chips or straw can be applied up to 4 inches (10 cm) deep, as they allow more air circulation. Straw, especially in vegetable gardens, might even be applied slightly thicker initially as it compresses significantly.
- Inorganic Materials: Gravel, stone, or pebbles are typically applied 1 to 2 inches (2.5 to 5 cm) deep.
- Containers: Use a thinner layer, generally 1 to 2 inches (2.5 to 5 cm), to avoid taking up too much valuable pot volume.
Why depth matters: Too shallow, and mulch won’t effectively suppress weeds or retain moisture. Too deep (especially with fine materials), and it can block oxygen and water from reaching the soil, potentially leading to root suffocation, anaerobic conditions, or moisture buildup around plant stems.
4. Critical Spacing Around Plants and Structures
This is one of the most important—and often overlooked—aspects of mulching:
- Plant Stems and Trunks: DON’T VOLCANO MULCH! Always pull mulch back several inches (at least 3-6 inches or 7.5-15 cm) from the base of plant stems, shrub canes, and tree trunks. Create a mulch-free “donut” ring around the base. Piling mulch directly against stems or trunks traps moisture, invites fungal diseases (like crown rot), prevents air circulation, and provides cover for damaging insects (like borers) and rodents (like voles) that can chew bark.
- Building Foundations: Maintain a gap of at least 6 to 12 inches (15 to 30 cm) between mulch and your home’s foundation or any wooden structures. This helps prevent moisture problems and discourages pests like termites from finding a pathway indoors.
- Seedlings and Small Plants: Be gentle around young, tender plants. Don’t bury their crowns or stems; a light layer is sufficient.
5. Optional Final Watering
Lightly watering the newly applied mulch helps settle it into place, removes dust, and can create a slightly more cohesive layer, especially for lighter materials. It’s not essential if the underlying soil is already well-moistened, but it provides a nice finishing touch.
V. Mulching Specific Garden Areas
Adapt your mulching approach based on the specific needs of different garden areas:
1. Flower Beds and Perennial Borders
Follow the general rules for depth (2-4 inches) and spacing around plant crowns. In spring, wait until perennials have clearly emerged so you don’t accidentally bury dormant crowns. Well-shredded bark, compost, shredded leaves, or pine straw (for acid-lovers) are excellent choices. Remember to keep mulch pulled back from the base of herbaceous perennials to prevent crown rot.
2. Vegetable Gardens
Organic mulches that break down relatively quickly are often preferred here, as beds may be tilled or replanted frequently. Straw (herbicide-free!), compost, shredded leaves, and dried grass clippings (applied thinly) work very well. These add valuable organic matter as they decompose. Unlike ornamentals, you can often mulch slightly closer to the base of established vegetable plants (like tomatoes or peppers) to maximize moisture retention, but still avoid direct contact with stems. Mulching pathways heavily helps keep weeding manageable. Using straw keeps produce like pumpkins, cucumbers, and lettuce clean from soil splash. Sustainability Note: Prioritize organic, easily renewable options and avoid synthetic herbicides.
3. Trees and Shrubs
Apply organic mulch like wood chips or shredded bark 2-3 inches deep, extending outwards ideally to the tree’s drip line (the edge of its canopy) or at least several feet out from the trunk in a wide circle. The most critical rule: maintain that mulch-free “donut” zone of several inches around the trunk base to prevent rot and pests. Never pile mulch up against the trunk in a “volcano.”
4. Containers, Planters, and Hanging Baskets
Yes, mulch is beneficial even in containers! It reduces watering frequency, keeps roots cooler, suppresses weeds, and provides a finished look (hiding bare soil or liner edges). Use a thinner layer, typically 1-2 inches (2.5-5 cm). Finer textured mulches like small bark chips, compost, coir, or even decorative pebbles (especially for succulents) work well. Ensure the mulch doesn’t block drainage holes. Wood chips are particularly good for larger containers like potted fruit trees.
5. Pathways
Durability is key for paths. Coarse wood chips or shredded bark (applied 3-4 inches deep) are good organic options, providing a soft surface, but will need topping up every couple of years. For longer-lasting, low-maintenance paths, consider inorganic options like gravel, crushed stone, or decomposed granite (applied 1-2 inches deep, potentially over landscape fabric for added weed control, though fabric has drawbacks). Ensure pathways allow for proper drainage.
VI. Maintenance and Troubleshooting
Mulching isn’t a one-time task; some upkeep ensures continued benefits.
1. Maintaining Your Mulch
- Replenishing: Organic mulches naturally decompose. Check the depth annually, typically in spring. Top up as needed to maintain the desired thickness (usually 2-4 inches). Finer materials like compost may need refreshing more often than coarser wood chips. Add fresh mulch over the old layer; removal isn’t usually necessary unless there’s excessive buildup.
- Checking Depth: Periodically scratch through the mulch in a few spots to ensure it hasn’t become too thin or overly compacted.
- Fluffing/Aeration: If organic mulch becomes matted or compacted (especially unshredded leaves or thick grass layers), gently fluff it with a rake. This improves water penetration and air exchange, and freshens its appearance.
- Fertilizing: There’s no need to remove mulch before applying granular fertilizers. Simply broadcast the fertilizer over the mulched area according to product instructions, ideally just before rain is expected or water it in afterwards. Nutrients will wash down through the mulch to the soil.
- Weeding: Even with mulch, occasional weeds may poke through, especially persistent perennial types or seeds blown in on top. Pull these by hand promptly before they become established. Avoid deep cultivation around perennials and shrubs, as this can damage shallow roots.
2. Common Mulching Problems and Solutions
- Stem/Crown Rot or Bark Damage: Almost always caused by piling mulch directly against plant bases (“volcano mulching”). Solution: Always maintain a mulch-free zone of several inches around all stems, canes, and trunks.
- Nitrogen Immobilization (‘Tie-up’): Microbes decomposing fresh, high-carbon materials (like fresh sawdust or wood chips) use nitrogen from the surrounding environment, temporarily making less available for plants. This effect is usually minor and confined to the soil surface. Solution: Use aged or partially composted wood materials. If using fresh wood chips, apply a nitrogen source (like blood meal, feather meal, or organic fertilizer) to the soil *before* mulching, or simply accept that surface soil nitrogen might be slightly reduced initially – established plants are rarely affected significantly.
- Matting / Water Repellency: Can occur with thick layers of fine sawdust, unshredded leaves, or wet grass clippings, forming a crust that sheds water. Solution: Shred leaves before applying. Apply grass clippings in thin, dry layers. Rake or fluff any matted layers periodically to break them up.
- Slime Molds and Fungi: You might occasionally see bright yellow or orange slime molds (“dog vomit fungus”) or various mushroom types popping up on organic mulch, especially during damp weather. These are typically harmless saprophytes – organisms that decompose dead organic matter – and indicate healthy decomposition is occurring. Solution: Usually no action is needed. If unsightly, you can scoop them up or break them apart with a rake to dry them out. Ensure mulch isn’t excessively deep or waterlogged. Artillery fungus (small black dots) can shoot spores onto light-coloured surfaces – using bark mulch instead of wood chips may reduce its likelihood.
- Pests (Slugs, Snails, Rodents, Termites): Thick, constantly moist mulch can provide shelter. Solution: Maintain proper depth (not too thick). Keep mulch away from foundations (critical for termite prevention). Raking occasionally disrupts habitats. Some mulches (cedar, cypress, wool) may have repellent qualities. Using coarser mulches allows better air circulation.
- Weed Seeds or Diseases Introduced: Low-quality mulch sources (some bulk wood chips, hay, uncomposted manure) can potentially introduce weed seeds or plant diseases. Solution: Source mulch from reputable suppliers. Ask about the origin and processing. Use fully composted manure. Choose straw (low seed count) over hay (high seed count). Hot composting kills most weed seeds and pathogens.
- Herbicide Contamination: A serious potential issue, especially with straw, hay, manure from animals fed treated forage, or grass clippings from treated lawns. Persistent herbicides can severely damage or kill sensitive plants (especially vegetables and flowers). Solution: Know your source! Ask suppliers explicitly if materials might contain persistent herbicides (e.g., aminopyralid, clopyralid). If unsure, test the mulch on a few sensitive plants (like tomatoes or beans) in pots before applying widely, or avoid suspect sources altogether.
- Overheating Soil: Dark-colored mulches (especially black plastic, but also dark compost or bark) in full sun can absorb significant heat, potentially stressing plant roots in hot climates. Solution: Use lighter-colored organic mulches (like straw, shredded leaves, or lighter wood chips) in very hot, sunny locations, or ensure plants are adequately watered during heat waves.
- Floating / Blowing Away: Lighter materials (pine bark nuggets, unshredded leaves, straw, sugar cane) can be displaced by strong winds or heavy rain/runoff. Solution: Choose heavier or shredded materials for exposed sites. Create a slight lip or defined edge for beds. Wetting mulch after application can help it settle.
By understanding these principles and applying them thoughtfully, you can use mulch as a powerful ally in creating a garden that is not only beautiful but also healthier, more resilient, water-wise, and lower-maintenance. Consistent, proper mulching is a fundamental practice for nurturing both your plants and the precious soil they rely on.
Comments (0)
No comments yet. Be the first to share your thoughts.