 Skip to content
The Ultimate Guide to Growing Dill in Your Garden
Dill, Anethum graveolens, is an annual herb in the Apiaceae family, making it a relative of parsley, celery, and carrots. It is characterized by its slender,…
I. Understanding the Dill Plant
1. Appearance and Characteristics
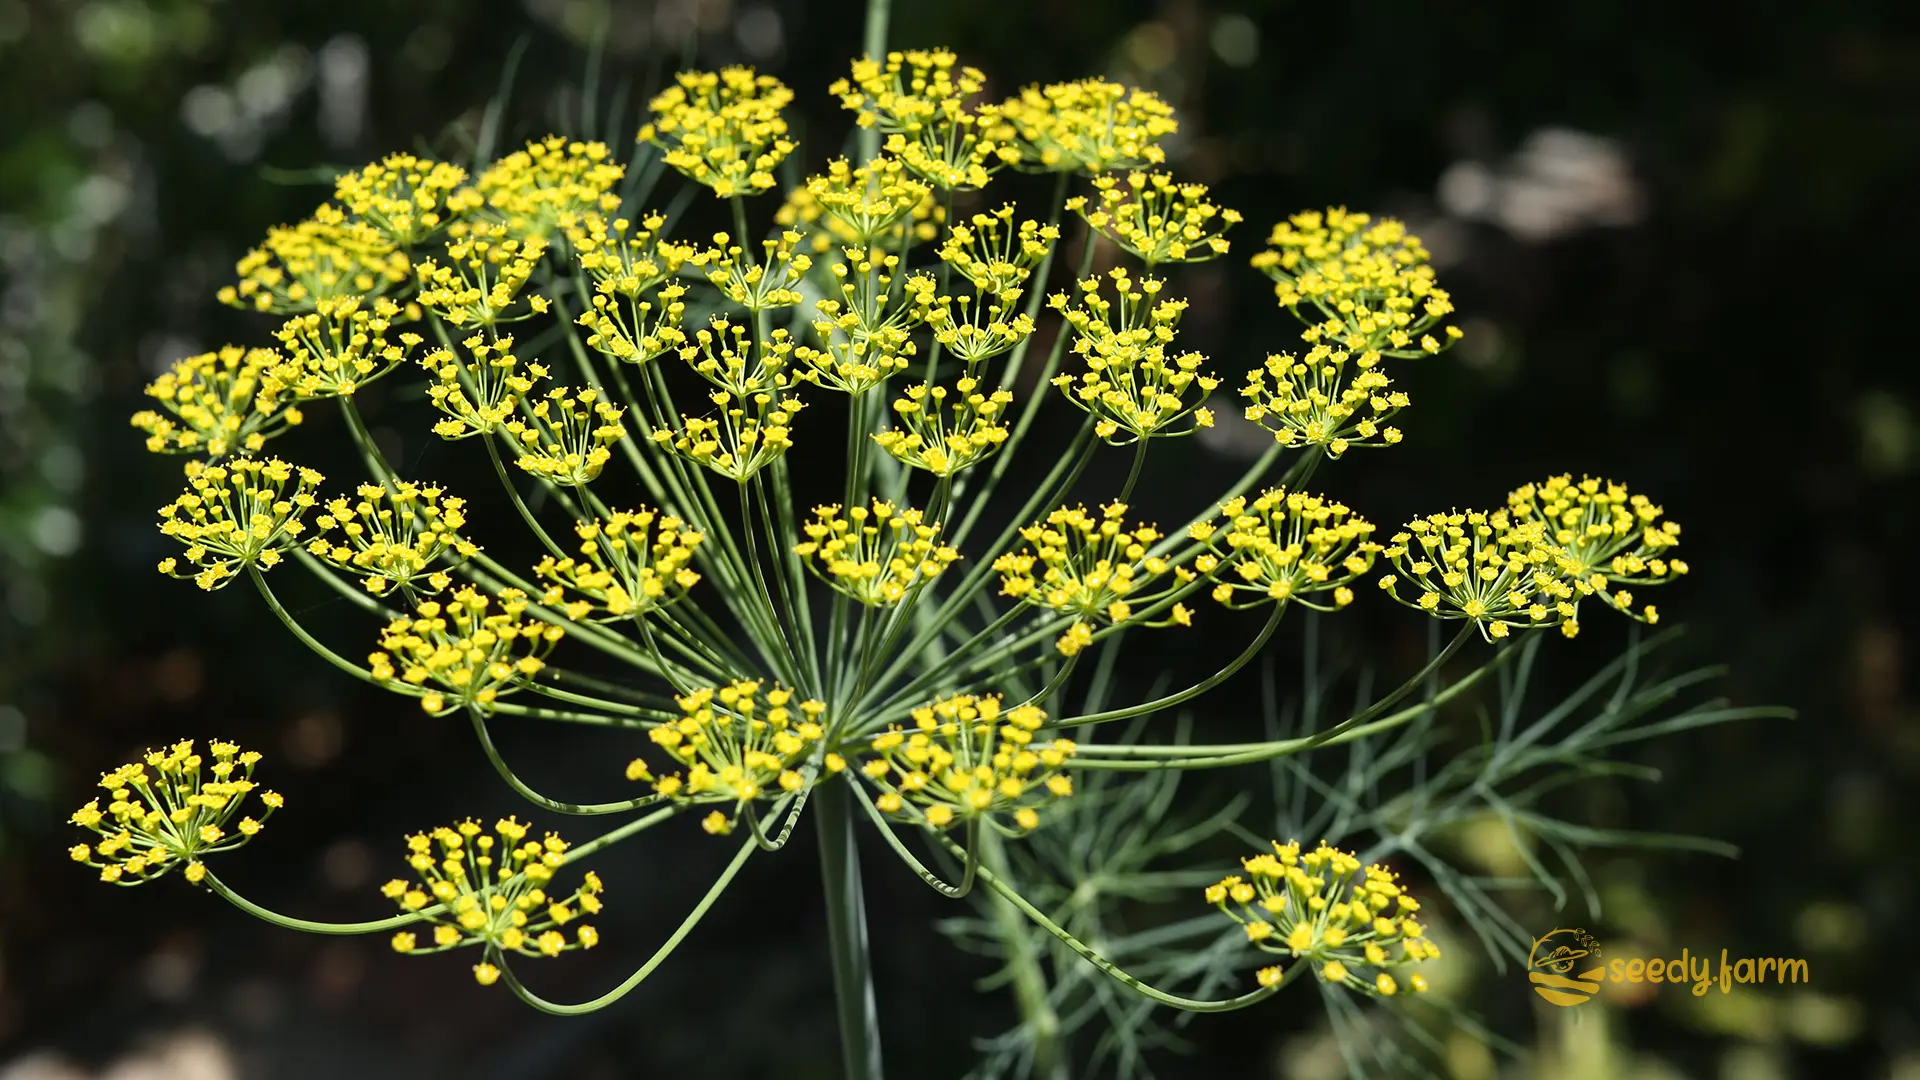
Dill, Anethum graveolens, is an annual herb in the Apiaceae family, making it a relative of parsley, celery, and carrots. It is characterized by its slender, hollow stems and finely dissected, feathery leaves, often called “dill weed.” Plants typically form a single, upright stalk that can reach 2-5 feet in height, depending on the variety and conditions. Mature plants produce large, flat-topped flower clusters known as umbels, which are composed of many small, yellow flowers. These umbels eventually produce the flat, oval seeds used in pickling and cooking. The entire plant has a distinct, pungent aroma due to its high concentration of essential oils.
| Characteristic | Specification |
|---|---|
| Scientific Name | Anethum graveolens |
| Family | Apiaceae (The Carrot & Parsley Family) |
| Plant Type | Hardy Annual Herb |
| Mature Height | 2-5 feet (60-150 cm) |
| Spread | 1-2 feet (30-60 cm) |
| Sun Exposure | Full sun (6-8+ hours/day) |
| Soil Type | Well-draining, loose, moderately fertile |
| Soil pH | 5.8-7.0 (slightly acidic to neutral) |
| Hardiness Zones | Annual in USDA Zones 2-11 |
| Planting Time | Early spring after last frost; late summer for fall harvest |
| Germination Time | 7-21 days |
| Days to Maturity | 40-60 days for leaves; 85-100 days for seeds |
| Water Requirements | Consistent moisture, especially during germination |
| Fertilizer Needs | Light feeder; avoid high-nitrogen fertilizers |
| Companion Plants | Cabbage family, cucumbers, lettuce, corn, onions |
| Incompatible Plants | Carrot, Fennel, Lavender |
| Primary Pests | Aphids, Parsleyworms (Black Swallowtail caterpillars) |
| Primary Diseases | Powdery mildew, leaf spot, root rot (in poor drainage) |
| Harvesting | Leaves can be harvested anytime after plant is established |
| Uses | Culinary (leaves, flowers, seeds), beneficial insect attractant |
| Optimal Soil Temperature | 60-70°F (15-21°C) |
| Seed Planting Depth | 1/8 to 1/4 inch (3-6 mm), requires light to germinate |
| Plant Spacing | Thin to 6-12 inches (15-30 cm) apart |
| Row Spacing | 18-24 inches (45-60 cm) apart |
### 2. Choosing a Dill Variety
Select a variety based on your primary use. Leaf-focused cultivars are shorter and slower to bolt, while those grown for seed and pickling are taller and produce large flower heads.
| Variety | Description | Height | Days to Maturity | Best Use |
|---|---|---|---|---|
| Bouquet | Industry standard for pickles. Abundant foliage and large seed heads. | 36 inches (90 cm) | 40-50 (leaf), 90 (seed) | Excellent for both leaves and pickling seeds. |
| Fernleaf | A dwarf, bushy variety. Very slow to bolt, ideal for pots. | 18 inches (45 cm) | 40-60 days (leaf) | Container gardening, continuous leaf harvest. |
| Mammoth (Long Island) | A very tall, traditional variety. Can be less productive for leaves. | 48-60 inches (120-150 cm) | 65-70 (leaf), 100+ (seed) | Primarily for seed production and large flower heads. |
| Dukat | High essential oil content makes it exceptionally aromatic. Slower to bolt than Bouquet. | 36-48 inches (90-120 cm) | 40-50 days (leaf) | Fresh use, flavored vinegars, and oils where flavor is key. |
| Superdukat | A more compact version of Dukat with very dark green leaves. | 18-24 inches (45-60 cm) | 40-50 days (leaf) | Container growing, fresh leaf production. |
| Vierling | Slow-bolting variety, extending the window for leaf harvesting. | 36-48 inches (90-120 cm) | 50-60 (leaf), 90-100 (seed) | Long-season leaf harvest. |
### 3. Culinary Uses and Garden Function
a. In the Kitchen
Every part of the dill plant is edible and useful. The feathery leaves (dill weed) provide a bright, tangy flavor perfect for fish, potatoes, yogurt-based sauces (like tzatziki), and salads. The edible yellow flowers make a beautiful and flavorful garnish. The seeds have a stronger, more pungent flavor, essential for pickling cucumbers and flavoring breads, soups, and stews.
b. In the Garden Ecosystem
Dill’s benefits extend beyond the kitchen. Its umbel-shaped flowers are a powerful attractant for beneficial insects. They provide an easily accessible nectar source for ladybugs, lacewings, hoverflies, and tiny parasitic wasps. These insects are voracious predators of common garden pests like aphids, mites, and caterpillars, making dill a functional component of an integrated pest management (IPM) strategy.
II. Site Selection and Planting
1. Choosing the Right Spot
a. Sunlight Requirements
Dill requires a minimum of 6-8 hours of direct sun per day. This isn’t just for robust growth; ample sunlight is crucial for the production of the essential oils that give dill its potent flavor and aroma. In extremely hot climates (Zone 8+), some light afternoon shade can help slow bolting.
b. Soil Preferences
Dill performs best in well-draining, moderately rich, and loose soil.
- Excellent Drainage is Non-Negotiable: Dill develops a long, sensitive taproot that will quickly rot in heavy, waterlogged soil. If you have clay soil, amend it generously with compost to improve its structure or grow in raised beds or containers.
- Fertility and pH: A soil pH between 5.8 and 7.0 is ideal. A soil rich in organic matter, like well-rotted compost, provides all the nutrients dill needs without additional fertilizer.
c. Space Considerations
Give dill room to grow. Although the foliage is light and airy, tall varieties can easily reach 4-5 feet and will shade out smaller neighbors. Spacing plants 6-12 inches apart ensures good air circulation, which is the primary defense against fungal diseases like powdery mildew.
Mentor’s Note on Planting Time
- Succession Sowing is Key: Dill is a short-lived annual programmed to bolt (flower and set seed) quickly, especially in summer heat. For a continuous supply of fresh leaves, sow a new batch of seeds every 2-3 weeks from spring until late summer.
- Fall Planting: In regions with mild winters, a late summer or early fall sowing can produce a high-quality crop as the weather cools.
### 2. Planting: The Case for Direct Sowing
Dill’s long, slender taproot makes it notoriously difficult to transplant. Disturbing this root almost always results in transplant shock, leading to stunted growth and premature bolting. For this reason, direct sowing seeds in the garden where they will grow is the standard and most reliable method. While starting seeds indoors is possible in biodegradable pots, success rates are lower and the effort rarely outweighs the benefits of simply waiting for the right outdoor conditions.

- Prepare the Bed: Ensure the soil is free of weeds and raked to a fine, crumbly texture. Lightly amend with compost.
- Sow the Seeds: Dill seeds require light for germination. Sow seeds no more than 1/4 inch (6 mm) deep. You can scatter seeds over the prepared area or plant in rows.
- Cover and Firm: Lightly rake to cover the seeds with a whisper of soil. Gently press the soil down with your hand or the back of a hoe to ensure good seed-to-soil contact.
- Water Carefully: Use a watering can with a fine rose or a gentle mist setting on your hose to water the area thoroughly without dislodging the seeds.
- Maintain Moisture: The soil surface must remain consistently moist until germination, which can take 1-3 weeks. Do not let the seedbed dry out.
- Thin the Seedlings: Once seedlings are 2-3 inches tall and have a few true leaves, thin them to their final spacing of 6-12 inches apart. Use small scissors to snip the extras at the soil line to avoid disturbing the roots of the remaining plants.
Pro Tip: Germination Success
The most common reason for dill germination failure is planting the seeds too deep. Remember the rule: seeds need light. A very thin covering of soil is all that’s required. Consistent moisture is the second critical factor.
### 3. Cultivating Dill in Containers
a. Advantages and Disadvantages of Container Growing
Growing dill in pots is an excellent solution for urban gardeners or anyone with limited space. However, it requires more attentive care than growing in the ground.
| Growing Method | Advantages | Disadvantages |
|---|---|---|
| In-ground soil | Allows for full taproot development, leading to larger, more resilient plants. Soil retains moisture longer; less frequent watering needed. Integrates into the garden ecosystem, supporting beneficial insects. | Requires dedicated garden space. Soil conditions are less controllable (pH, drainage). Immobile; cannot be moved to escape extreme weather. |
| Pots | Ideal for balconies, patios, and small spaces. Complete control over soil mix and drainage. Can be moved to optimize sun exposure or provide shade in heatwaves. | Restricts taproot growth, resulting in smaller plants. Pots dry out very quickly, requiring daily watering in summer. Nutrients leach out, requiring light but regular feeding. |
#### b. Choosing the Right Pot
Size is Critical
To accommodate dill’s taproot, your pot choice is paramount. Select a container that is at least 12 inches (30 cm) deep and 10-12 inches wide. A 5-gallon pot is an excellent size for a small clump of dill. Using a pot that is too shallow will lead to a stunted, unhappy plant that bolts prematurely.
Material and Drainage
Any material (terracotta, plastic, glazed ceramic) is fine, but the single most important feature is at least one large drainage hole. Dill cannot tolerate “wet feet.” Terracotta is porous and dries out fastest, while plastic and glazed pots retain more moisture.
c. Potting Soil Mix for Containers
Do not use garden soil in pots, as it compacts and drains poorly. Use a high-quality, well-draining potting mix. A good custom blend consists of:
- 2 parts high-quality potting mix: Provides the basic structure.
- 1 part compost or worm castings: Supplies slow-release nutrients.
- 1 part perlite or coarse sand: Ensures sharp drainage and aeration for the roots.
Special Care for Potted Dill
Container-grown dill is less forgiving than its in-ground counterpart.
- Water Diligently: Check the soil daily, especially in warm weather. Water thoroughly whenever the top inch of soil feels dry.
- Fertilize Lightly: After the first 4-6 weeks, begin feeding every 2-3 weeks with a half-strength balanced liquid fertilizer, such as fish emulsion or a kelp-based product.
- Rotate the Pot: Turn the pot a quarter turn every few days to promote even, upright growth and prevent it from leaning excessively towards the sun.
## III. Care and Maintenance
1. Watering Needs
Dill requires consistent moisture to thrive, but overwatering is a greater danger than underwatering.
- Water Deeply, Less Frequently: This encourages the taproot to grow deep into the soil in search of water, creating a more drought-resilient plant. A thorough soaking once or twice a week is better than a light sprinkle daily.
- Check the Soil: The best guide is your finger. Water when the top 1-2 inches of soil are dry.
- Water at the Base: Apply water directly to the soil around the plant. Wetting the delicate foliage unnecessarily can encourage fungal diseases like powdery mildew.
2. Fertilizing
Dill is a light feeder. Over-fertilizing is a common mistake that compromises flavor.
- Compost is Best: Amending the soil with compost before planting is typically sufficient for the entire season.
- Avoid High Nitrogen: If you must fertilize, use a balanced formula (e.g., 5-5-5) or one lower in nitrogen. Excess nitrogen produces rapid, weak, leafy growth with significantly less essential oil, resulting in bland-tasting dill.
- Container Feeding: Potted plants are the exception and benefit from light, regular feeding with a diluted liquid fertilizer as described in the container section.
3. Pruning and Maintenance
a. Pruning through Harvesting
The best way to prune dill is to harvest it regularly.
- Pinch for Bushiness: When the plant is young, pinching off the top growing point will encourage it to send out side shoots, creating a fuller, bushier plant.
- Harvest Often: Regularly snip outer leaves and stems for kitchen use. This continuous harvesting delays bolting and extends your leafy harvest.
b. Mulching
Apply a 1-2 inch layer of organic mulch (such as straw, shredded leaves, or grass clippings) around the base of your plants.
- This conserves soil moisture, reducing your watering duties.
- It suppresses weed competition.
- It keeps the soil temperature stable.
- Keep mulch an inch away from the plant’s stem to prevent rot.
c. Support for Tall Varieties
Taller varieties like ‘Mammoth’ may flop over in wind or rain, especially once the heavy seed heads form.
- Use a single bamboo stake or a grow-through grid support placed early in the season.
d. Managing Bolting (Flowering)
Bolting is the natural end of dill’s life cycle. You can manage it based on your goals.
- For Leaves: Snip off flower heads as soon as you see them forming to redirect the plant’s energy back into leaf production.
- For Seeds & Pollinators: Allow the plants to flower. The blooms are invaluable for beneficial insects, and you can harvest the seeds for pickling later.
4. Companion Planting with Dill
Companion planting is the practice of grouping plants that form a mutually beneficial relationship. Dill is a superb garden teammate, known for attracting beneficial insects that protect neighboring crops.
a. Good Companions for Dill
Plant dill alongside crops that will benefit from the predatory insects it attracts.
Vegetables
- Brassicas (Cabbage, Broccoli, Kale): Dill’s flowers attract parasitic wasps that prey on cabbage worms and other brassica pests. The dill’s aroma may also help confuse cabbage moths.
- Cucumbers: A classic pairing in the kitchen and the garden. Dill is thought to improve the growth and health of cucumbers.
- Onions and Garlic: Their strong scent helps deter pests like aphids from finding the dill.
- Lettuce and Spinach: Tall dill plants can provide welcome, light shade to cool-season greens during the heat of the day, helping to slow bolting.
- Corn: Dill attracts many beneficial insects that help control corn earworm.
Flowers
- Marigolds: Help repel a variety of pests from the garden bed.
- Nasturtiums: Act as a “trap crop” for aphids, luring them away from the dill itself.
b. Plants to Avoid Planting Near Dill
Some plants are poor neighbors for dill due to chemical interactions, cross-pollination risks, or conflicting needs.
- Lavender: These plants have opposite needs. Lavender requires dry, lean soil, while dill prefers consistent moisture and richer soil.
- Peppers and Potatoes: Some gardeners report that dill can inhibit the growth of nightshades, though this is largely anecdotal. It’s best to give them their own space.
Critical Incompatibilities
- Fennel: This is the most important rule. Do not plant dill and fennel near each other. They are closely related and will readily cross-pollinate, resulting in seeds on both plants that have a muddled, undesirable flavor.
- Carrots: As a close relative, dill can attract pests that also target carrots, such as carrot rust flies and parsleyworms. Cross-pollination can affect the flavor of carrot seeds if you are saving them, but it does not affect the taste of the carrot root itself.
Tips for Strategic Companion Planting
- Let It Flower: The primary benefit of dill as a companion comes from its flowers. Always allow at least some of your dill plants to bolt and bloom.
- Interplant, Don’t Monoculture: Weave dill plants throughout your vegetable beds rather than planting them in one single block. This distributes their pest-control benefits more widely.
- Consider Its Height: Use dill’s tall, airy structure to your advantage. Plant it on the north side of sun-loving plants so it doesn’t cast unwanted shade.
## IV. Harvesting and Storing Your Dill

### 1. When and How to Harvest
a. Harvesting Leaves (Dill Weed)
- Begin harvesting as soon as the plant is established and has several sets of leaves, typically around 6-8 inches tall.
- Use clean scissors or snips. Harvest in the morning, after the dew has dried, when the plant’s essential oils are most concentrated.
- You can snip individual fronds or entire stems. Regular harvesting of the outer, older stems encourages new growth from the center.
b. Harvesting Flowers and Seeds
- For edible flowers, harvest them just as they fully open.
- For seeds, allow the flowers to fade and the seeds to form and mature on the plant. Harvest when the seed heads have turned tan-brown and feel dry.
- Cut the entire stalk with the seed head attached. Place the heads upside down inside a paper bag and hang in a dry, airy location. The seeds will fall into the bag as they finish drying.
2. Storing Fresh and Dried Dill
a. Short-Term Fresh Storage
- In a Jar: Trim the stems and place the dill bouquet in a jar with an inch of water, like fresh flowers. Cover loosely with a plastic bag and store in the refrigerator. It will stay fresh for up to two weeks.
- In a Towel: Gently wrap unwashed dill sprigs in a slightly damp paper towel, place inside a zip-top bag, and store in your refrigerator’s crisper drawer for up to a week.
b. Long-Term Storage (Freezing)
Dill freezes exceptionally well, retaining much more flavor than when dried.
- Chopped in Bags: Finely chop fresh dill, pack it into small freezer bags, and press flat to remove air. Break off pieces as needed.
- Ice Cube Trays: Pack chopped dill into ice cube trays. Top with either water or olive oil and freeze solid. Transfer the cubes to a freezer bag. The oil method is superior for preserving flavor compounds.
c. Storing Dried Dill and Seeds
- Store dried leaves and seeds in airtight glass jars in a cool, dark cabinet. Light and heat will quickly degrade their flavor.
- Dried dill weed loses much of its character, so use it more generously than fresh. Dried seeds, however, retain their potent flavor for up to a year.
V. Common Problems, Solutions & FAQ
1. Troubleshooting Common Dill Problems
a. Pests
- Aphids Symptom: Tiny, pear-shaped insects (green, black, or yellow) clustered on new growth and stems. Leaves may look curled or distorted. A sticky “honeydew” substance may be present. Cause: Sap-sucking insects that multiply rapidly in warm weather. Solution: A strong jet of water from the hose can dislodge most of them. For heavy infestations, use insecticidal soap, ensuring complete coverage. Encouraging beneficial insects by allowing some dill to flower is the best long-term control.
- Parsleyworms (Black Swallowtail Caterpillars) Symptom: Large, conspicuous green caterpillars with black stripes and yellow dots, feeding on the foliage. Cause: These are the larvae of the beautiful Black Swallowtail butterfly. Dill is one of their host plants. Solution: If the damage is minimal, consider this a contribution to your local ecosystem. Plant enough dill to share. If they are consuming too much, they can be hand-picked and moved to a “sacrificial” dill, parsley, or fennel plant elsewhere in the yard. Avoid pesticides.
b. Diseases
- Powdery Mildew Symptom: A white, powdery coating on the leaves, starting as small spots and spreading. Cause: A fungal disease that thrives in high humidity and poor air circulation. Solution: Prevention is key. Ensure proper spacing between plants for good airflow. Water at the soil level, not on the foliage. Remove and dispose of affected leaves immediately. For persistent issues, a horticultural oil or a fungicide containing potassium bicarbonate can be effective.
- Leaf Spot (Cercospora) Symptom: Small, water-soaked spots on leaves that enlarge and turn tan or gray with dark borders. Cause: A fungus that spreads via water splash and thrives in warm, wet conditions. Solution: Remove infected plant parts. Avoid overhead watering. Ensure good air circulation. Rotate crops; do not plant dill in the same spot for 2-3 years.
c. Growing Problems
- Bolting (Premature Flowering) Symptom: The plant rapidly shoots up a central stalk and produces a flower head while still small. Cause: A stress response triggered by heat, root disturbance (from transplanting), or inconsistent watering. Solution: Use succession planting to ensure a continuous supply. Choose slow-bolt varieties like ‘Fernleaf’ or ‘Vierling’. Provide afternoon shade in hot climates. Maintain consistent soil moisture.
- Yellowing Leaves Symptom: Lower leaves turn yellow and may die back. Cause: Most often caused by overwatering or poor drainage leading to root stress. Can also indicate a nitrogen deficiency in very poor soil or in containers. Solution: Check soil moisture. Allow the soil to dry out more between waterings. Ensure pots have excellent drainage. If in a container and soil is not soggy, apply a half-strength balanced liquid fertilizer.
- Spindly or Leggy Growth Symptom: Long, weak, pale stems with sparse foliage. Cause: Insufficient sunlight. Solution: Dill needs at least 6 hours of direct sun. Move containers to a sunnier location. If growing indoors, supplement with a strong grow light. There is no fix for existing leggy growth; ensure new sowings receive adequate light.
2. Frequently Asked Questions (FAQ)
a. Will my dill plant come back next year?
Dill (Anethum graveolens) is a true annual, meaning a single plant completes its entire life cycle—from seed to flower to seed—in one growing season and then dies. However, it is an exceptionally effective self-seeder. If you allow some plants to flower and drop their mature seeds in the fall, you will very likely find a new crop of “volunteer” dill seedlings emerging in the same spot the following spring. For a more controlled garden, you can collect the mature seeds yourself and replant them exactly where you want them next season.
b. Why does my homegrown dill taste weak or bland?
The flavor of dill comes from its essential oils, and the production of these oils is directly linked to growing conditions. The two most common culprits for weak flavor are:
- Insufficient Sunlight: Dill needs at least 6-8 hours of direct sun per day. In shadier conditions, it will grow but will not develop a robust, pungent flavor.
- Excessive Nitrogen: Over-fertilizing, especially with high-nitrogen fertilizers, encourages fast, lush, watery foliage at the expense of oil production. Stick to compost-amended soil and avoid chemical fertilizers.
c. Why did my dill plant go to flower almost immediately?
This is called premature bolting and it’s a very common issue. Bolting is a plant’s survival response to stress. For dill, the main triggers are:
- Heat: Hot weather is the number one signal for dill to flower quickly.
- Root Disturbance: Transplanting dill often shocks the sensitive taproot, triggering bolting. This is why direct sowing is strongly recommended.
- Inconsistent Watering: Both drought stress and waterlogged soil can cause the plant to rush to produce seed.
The solution isn’t to prevent bolting, but to plan for it. The best strategy is succession sowing—planting a new small batch of seeds every 2-3 weeks. This ensures you always have young, leafy plants ready for harvest as the older ones begin to flower.
d. How much of the plant can I harvest at one time?
For a continuous harvest, a good rule of thumb is to never remove more than one-third of the plant’s foliage at once. This leaves enough leaves for the plant to continue photosynthesizing effectively and produce new growth. Focus on harvesting the older, outer stems first, which allows the young growth in the center to develop.
e. Can I successfully grow dill indoors on a windowsill?
It is possible, but often challenging. Standard indoor light from a window, even a south-facing one, is usually insufficient for dill to grow strong and flavorful. It will likely become tall, leggy (spindly), and pale with very little aroma. For a successful indoor crop, you must supplement with a full-spectrum grow light placed just a few inches above the plant for 12-14 hours a day. Also, be sure to use a deep pot (10-12 inches) to accommodate its taproot.
f. I found big green and black striped caterpillars on my dill. How do I get rid of them?
Before you take any action, take a closer look! These are almost certainly Parsleyworms, the larvae of the beautiful Black Swallowtail butterfly. Dill is a primary host plant for this native pollinator. We strongly encourage you to practice “gardening for sharing.” Plant a few extra dill plants specifically for the caterpillars. If they are on a plant you need for the kitchen, you can gently move them to one of the “sacrificial” plants. By leaving them be, you are supporting a vital part of your local ecosystem.
Comments (0)
No comments yet. Be the first to share your thoughts.