 Skip to content
The Complete Guide to Growing Malabar Spinach in Your Garden
Malabar spinach, botanically known as Basella alba, is not a true spinach at all. True spinach, Spinacia oleracea, is a cool-season crop that quickly…
I. Getting to Know Malabar Spinach
1. What is Malabar spinach?
a. Origins and characteristics
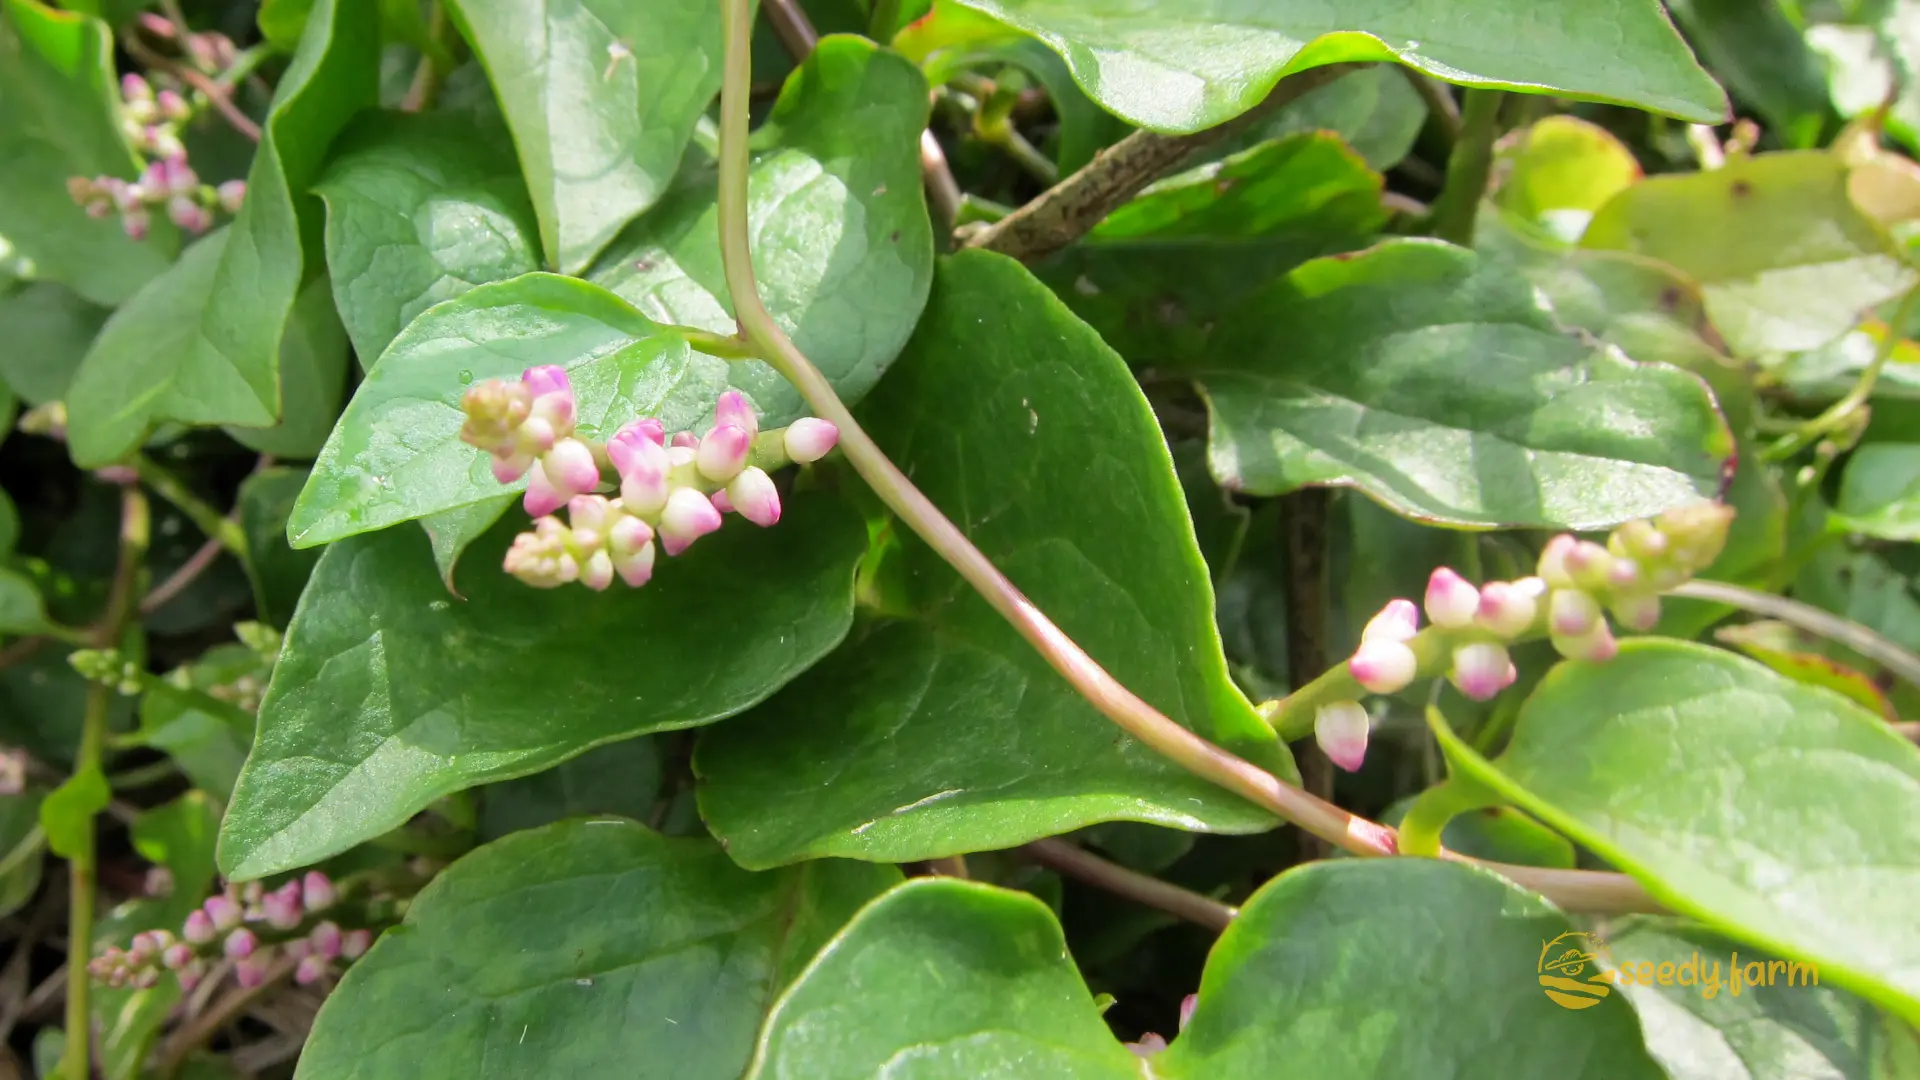
Malabar spinach, botanically known as Basella alba, is not a true spinach at all. True spinach, Spinacia oleracea, is a cool-season crop that quickly “bolts”—or flowers prematurely—in summer heat. Malabar spinach, a tropical vine from the Indian subcontinent, does the exact opposite: it thrives in the heat that makes other greens fail, providing a continuous harvest all summer long.
Its succulent, glossy leaves have a mild, earthy flavor similar to spinach but with notes of citrus and pepper. When cooked, the leaves release a soluble fiber that gives them a slightly mucilaginous, or slick, texture. Think of it like okra; this quality is prized for its ability to naturally thicken soups and stews.
There are two common types you’ll encounter:
- **Basella alba:** This is the classic variety with thick, green stems and lush, heart-shaped green leaves.
- **Basella rubra:** Often called Red-Stemmed Malabar Spinach, this variety features striking reddish-purple stems and veins, making it a beautiful “edible ornamental.” The color comes from betalains, the same potent antioxidants found in beets.

| Malabar Spinach Specifications |
|---|
| Scientific Name |
| Plant Type |
| Native Region |
| Growth Habit |
| Height |
| Sunlight Requirements |
| Soil Type |
| Soil pH |
| Watering Needs |
| Optimal Temperature Range |
| USDA Hardiness Zones |
| Days to First Harvest |
| Propagation Methods |
| Spacing |
| Companion Plants |
| Incompatible Plants |
| Common Pests |
| Common Diseases |
| Edible Parts |
#### b. Nutritional benefits
Malabar spinach is exceptionally nutrient-dense. It is an excellent source of vitamin A (as beta-carotene), crucial for vision and immune health, and vitamin C, a powerful antioxidant. It also provides significant amounts of iron, calcium, folate, and potassium. The soluble fiber that contributes to its texture is also beneficial for digestive health.
| Malabar Spinach Nutrition Facts |
|---|
| Nutrient |
| Calories |
| Total Carbohydrates |
| Dietary Fiber |
| Protein |
| Total Fat |
| Vitamin A |
| Vitamin C |
| Vitamin K |
| Folate |
| Calcium |
| Iron |
| Magnesium |
| Potassium |
| Sodium |
| * Percent Daily Values are based on a 2,000 calorie diet. Nutritional data from USDA. |
### 2. Why grow Malabar spinach at home?
a. Easy to grow and maintain
Malabar spinach is exceptionally resilient and forgiving, making it a superb choice for beginners. Its key advantages include:
- Heat-tolerant: It produces prolifically during peak summer when lettuce and true spinach have long since given up.
- Pest and disease resistant: It has few natural enemies, minimizing the need for intervention.
- Fast-growing: You can begin harvesting leaves in under two months and continue until the first frost.
- Low-maintenance: Once established on a trellis with good soil and adequate water, it largely takes care of itself.
b. Space-saving vertical growth
This plant’s vining habit is a major asset for urban and small-space gardeners. It grows vertically, allowing you to produce a substantial amount of food in a minimal ground footprint. A trellis, fence, or even strings running up a balcony wall can become a living screen of edible leaves. The ornamental quality, especially of the red-stemmed variety, makes it a perfect candidate for “edible landscaping”—a plant that is both beautiful and productive.
II. Preparing to Grow Malabar Spinach
1. Choosing the right location
a. Sunlight requirements
Provide a location that receives at least six hours of direct sunlight per day. This full sun exposure fuels the rapid, leafy growth you want. In climates with extremely intense summer sun (e.g., the desert Southwest), a spot that gets some light afternoon shade can be beneficial to prevent leaf stress, but it’s not a requirement in most regions. Insufficient light will result in a “leggy” plant—one with long, thin stems and fewer, smaller leaves.
b. Temperature considerations
This is a true heat-loving tropical. Plant it out when nighttime temperatures are consistently above 60°F (15°C) and the soil has warmed. It performs best in daytime temperatures between 77°F and 95°F (25°C to 35°C). It is not frost-tolerant; the first frost in autumn will kill the foliage. In cooler climates (Zones 2-8), treat it as a summer annual, starting seeds indoors 4-6 weeks before your last frost date to get a head start.
2. Soil preparation
a. Ideal soil type
Malabar spinach thrives in fertile soil that is both moisture-retentive and well-draining. The ideal texture is a “friable loam”—it should feel like a wrung-out sponge, holding moisture but releasing excess water freely. If you squeeze a handful, it should form a loose ball that crumbles easily. Heavy, compacted clay soil must be amended to improve drainage and prevent root rot. Sandy soil will need amendments to help it hold water and nutrients.

#### b. Improving your garden soil organically
Building healthy soil is the single most important investment you can make for a productive garden. Before planting, enrich your soil by incorporating one or more of the following:
- Compost: This is the best all-around soil amendment. Work 2-4 inches (5-10 cm) of mature compost into the top 6-8 inches of your soil. It provides balanced, slow-release nutrients, improves drainage in clay soil, and increases water retention in sandy soil.
- Aged Manure: Well-rotted cow, horse, or poultry manure adds significant nitrogen for leafy growth. Ensure it is fully composted to avoid burning your plants.
- Leaf Mold: Decomposed leaves create a fantastic soil conditioner that boosts moisture retention and supports beneficial fungal networks.
- Worm Castings: This premium amendment is rich in plant-available nutrients and beneficial microbes that stimulate healthy growth.
III. Planting Malabar Spinach
1. When to plant
a. Best time of year
Direct sow seeds or transplant seedlings into the garden only after all danger of frost has passed and the soil has warmed to at least 65°F (18°C). This is typically 2-3 weeks after your region’s last average frost date. Planting too early in cool soil will lead to poor germination and stunted growth. In frost-free climates (zones 10+), you can plant it nearly year-round, though growth may slow in the coolest part of the year.
b. Using seeds vs. cuttings
These are two excellent propagation methods, each suited to different situations.
- Seeds: This is the most common and reliable way to start. The tough seed coat can slow germination, so give them a head start. Scarify the seeds by gently nicking them with a file or rubbing them with sandpaper, then soak them in warm water overnight before planting. Plant seeds about 1/2 inch (1 cm) deep. Germination typically occurs in 1-3 weeks.
- Cuttings: This is a fantastic method for cloning an existing plant. If you or a friend has a healthy vine, you can create new plants for free. Take a 6-inch (15 cm) cutting from a vigorous stem tip. Remove the leaves from the bottom half and place the stem in a jar of water. Roots will form in 1-2 weeks, at which point it can be planted in soil. This is much faster than starting from seed.
2. How to plant
a. Proper spacing
Give each plant adequate room to access sun, water, and nutrients.

- Space individual plants 12 inches (30 cm) apart.
- If planting in rows, space the rows at least 3 feet (90 cm) apart to allow for airflow and easy harvesting.
- Spacing can be slightly closer if you are diligent about vertical training and regular harvesting.
b. Providing support for climbing
Support is not optional; it is essential. This vine needs something to climb to stay healthy and productive. Install your support structure at the time of planting to avoid disturbing the root system later.
- Trellises: A simple fan trellis, lattice panel, or wire mesh grid works perfectly.
- Stakes or Poles: A bamboo teepee or a single sturdy stake at least 6-8 feet tall is effective.
- Fences: A chain-link or wire fence makes an excellent, ready-made support.
- Arches or Arbors: Grow it over a walkway for a stunning and productive garden feature.
- Netting or Twine: Strong horticultural netting or jute twine strung between two posts creates a simple, effective climbing wall.

### 3. Planting in containers
a. Choosing the right container size
Select a large container to accommodate the plant’s vigorous root system and reduce the frequency of watering. A minimum size of 5 gallons (19 liters), which is about 12 inches (30 cm) deep and wide, is recommended for a single plant. A larger pot, such as a 10- or 15-gallon size, is even better and will result in a more robust vine.
b. Drainage and soil mix considerations
Proper drainage is non-negotiable in containers. Ensure your pot has multiple large drainage holes. Use a high-quality potting mix, not garden soil, which compacts easily in pots. For an ideal custom blend, mix:
- 60% high-quality potting mix
- 30% compost or worm castings for fertility
- 10% perlite or coarse sand to ensure sharp drainage and aeration
This mix provides structure, nutrients, and the excellent drainage that Malabar spinach requires.
IV. Caring for Your Malabar Spinach
1. Watering needs
a. Frequency and amount
The goal is consistently moist, but not waterlogged, soil. This promotes the development of thick, succulent leaves.
- Water deeply when the top 1-2 inches (2-5 cm) of soil feel dry to the touch.
- In hot weather, this may be every other day for garden beds and daily for containers.
- Always water at the base of the plant, directly onto the soil. This keeps the leaves dry, which is the single best practice for preventing fungal diseases like leaf spot.
b. Signs of over- or under-watering
Your plant will tell you what it needs.
- Underwatering: Leaves will wilt or droop, feel thin, and growth will slow dramatically. Leaf edges may turn brown and crispy.
- Overwatering: Leaves may turn yellow and drop. The plant may wilt even though the soil is wet, which is a classic sign of root rot from lack of oxygen in the soil.
2. Fertilizing organically
a. Types of organic fertilizers to use
If you prepared your soil with plenty of compost, you may need minimal additional fertilizer. For an extra boost, especially for container-grown plants where nutrients leach out more quickly:
- Liquid Feeds: A diluted solution of fish emulsion or a balanced liquid seaweed fertilizer provides readily available nutrients.
- Top-Dressing: Side-dress the plants mid-season by scratching a layer of compost or worm castings into the soil surface around the base.
- Nitrogen Focus: Since you are growing this plant for its leaves, fertilizers slightly higher in nitrogen (the first number in an N-P-K ratio) are beneficial.
b. How often to fertilize
For in-ground plants in rich soil, one mid-season top-dressing with compost is often sufficient. For container-grown plants, apply a balanced, diluted liquid organic fertilizer every 2-3 weeks during the peak growing season to replenish nutrients washed out by frequent watering.
3. Common pests and diseases
a. Identifying problems
Malabar spinach is famously resilient, but a few issues can arise, usually related to environmental stress.
- Cercospora Leaf Spot: Small, circular tan or grey spots with a dark border on the leaves. This is a fungal issue favored by high humidity and wet foliage.
- Aphids or Japanese Beetles: Insects may occasionally feed on the leaves. Aphids are small, pear-shaped insects, while Japanese beetles are metallic green and copper.
- Root Rot: The entire plant wilts and fails to thrive despite wet soil. This is caused by poor drainage.
- Leggy Growth: Long, spindly stems with few leaves. This is not a disease but a symptom of insufficient sunlight.
b. Natural and organic remedies
Prevention is always the best cure.
- For Leaf Spot: Prune affected leaves immediately to stop the spread. Improve air circulation by thinning vines if they are too dense. Crucially, always water the soil, not the leaves.
- For Aphids: A strong jet of water from a hose will dislodge most of them. For persistent issues, use insecticidal soap.
- For Japanese Beetles: The most effective organic control is to hand-pick them in the early morning and drop them into a bucket of soapy water.
- For Root Rot: This is difficult to reverse. Prevention is key: ensure excellent drainage in your soil or container from the start.
V. Companion Planting for Malabar Spinach
1. Beneficial companion plants
a. Plants that enhance growth
Companion planting is about creating a small, cooperative ecosystem. Good partners for Malabar spinach include:
- Legumes (Bush Beans, Peas): These plants are “nitrogen-fixers.” They host bacteria on their roots that pull nitrogen from the air and convert it into a form plants can use, providing a free source of fertilizer for the heavy-feeding spinach.
- Alliums (Onions, Garlic, Chives): The strong scent of these plants can confuse and deter many common garden pests.
- Low-Growing Herbs: Plants like oregano, thyme, or marjoram can act as a living mulch, helping to suppress weeds and retain soil moisture around the base of the vine.
b. Plants that deter pests
These plants can act as a line of defense for your entire garden plot.
- *Marigolds (Tagetes sp.):* French marigolds release a chemical from their roots that can deter root-knot nematodes, a microscopic soil pest. Their scent also deters above-ground pests.
- Nasturtiums: These act as a “trap crop” for aphids. Aphids are often more attracted to nasturtiums and will gather on them, sparing your spinach. The leaves and flowers are also edible!
2. Plants to avoid
a. Incompatible neighbors
There are few true incompatibilities, but avoid planting situations that create problems.
- Tall, Shading Crops: Don’t plant Malabar spinach where it will be heavily shaded by taller crops like corn or sunflowers, as it needs full sun to thrive.
- Potatoes: While not a direct antagonist, potatoes are heavy feeders and can compete intensely for soil nutrients. If planted together, ensure the soil is exceptionally fertile.
- Fennel: Fennel is known to excrete substances that can inhibit the growth of many other plants, so it’s best to give it its own space.
VI. Harvesting Malabar Spinach
1. When and how to harvest leaves
a. Identifying ready-to-pick leaves
You can begin harvesting as soon as the vine is established and growing vigorously, typically 50-70 days from seed. The best parts to harvest are the tender, young leaves and the top 4-6 inches of the growing tips. These are the most succulent and have the best flavor.
b. Proper harvesting techniques
Use a “cut-and-come-again” method for a season-long harvest.
- With clean scissors or your fingertips, pinch off the growing tips of the vines.
- This practice is a form of pruning. By removing the main growing point (the apical meristem), you break the plant’s “apical dominance” and encourage it to send out new side shoots from the nodes below the cut.
- Harvesting regularly makes the plant bushier and more productive. A light harvest every few days is better than one large harvest once a month. Never remove more than one-third of the plant at a time.
2. Harvesting Malabar Spinach berries
a. When to harvest berries
Late in the season, the plant will produce inconspicuous white or pinkish flowers, which are followed by small, round berries. The berries are mature and ready for harvest when they turn a deep, inky purple-black. They will be plump and will stain your fingers when crushed.
b. How to harvest and use berries

Gently pick the ripe berries by hand. Their primary use is not for flavor, which is mild and unremarkable, but for their incredible pigment.
- Natural Dye: Crush the berries to release a powerful magenta-purple juice. It can be used as a natural food coloring for icings or as a fun, temporary paint for kids’ art projects.
- Saving Seeds: Each berry contains one seed. If you garden in a region where the plant has time to produce mature berries, you can save them for next year. Mash the berries, wash the pulp away from the hard seeds, let the seeds dry completely for several weeks, and store them in a cool, dark place.
Mentor’s Corner: The Texture Question
The mucilaginous quality of cooked Malabar spinach is a key feature. Some people love how it adds body to dishes, while others may find the texture surprising. My advice: try it first in a soup or a curry where that quality is an asset. If you prefer less of that texture, stir-fry it quickly at high heat, which minimizes its development.
### 3. Storing and Using Your Harvest
a. Short-term storage tips
Harvested leaves are best used fresh. If you need to store them, place unwashed leaves and stems in a plastic bag with a dry paper towel and store them in your refrigerator’s crisper drawer. They will keep for up to 3-5 days. Wash them just before use.
b. Freezing for long-term use
Malabar spinach freezes beautifully for use in cooked dishes like soups, stews, and smoothies.
- Blanch: Submerge the fresh leaves in a pot of boiling water for 1-2 minutes. This stops the enzymes that cause decay.
- Shock: Immediately transfer the leaves to a bowl of ice water for 1-2 minutes to stop the cooking process and lock in the color.
- Squeeze Dry: Drain the leaves and squeeze out as much water as possible. You can form them into small balls.
- Freeze: Place the squeezed portions on a baking sheet to freeze individually, then transfer them to a freezer bag. This prevents them from clumping together. They will keep for up to 8-10 months.
VII. Controlling Malabar Spinach’s Growth
1. Understanding its growth habits
a. Why it can become vigorous
Malabar spinach is not invasive in climates with freezing winters. However, its vigorous, rapid growth during ideal summer conditions means it can quickly cover a trellis. In frost-free climates, it can self-seed readily if berries are allowed to drop, leading to volunteer plants the following season. This vigor is an asset, not a threat, when managed properly.
b. Signs of overgrowth
“Overgrowth” is simply a sign of a happy plant. Look for vines extending beyond their intended support, beginning to shade out neighboring plants, or producing more leaves than you can use. This is your cue to harvest more, not a sign of a problem.
2. Preventive measures
a. Proper pruning techniques
Think of this as “directing growth” rather than controlling it. The best technique is also your harvesting method: regularly pinching off the growing tips. This accomplishes three things at once: it provides a continuous harvest, keeps the vine within its bounds, and encourages bushier, more productive side growth. If you do not wish for volunteer seedlings next year, simply pinch off the flower stalks as they appear.
b. Containment strategies
Growing on a trellis is the best containment strategy, as it directs all growth vertically. In frost-free zones, if you are concerned about self-seeding, you can take two simple steps:
- Apply a 2-3 inch layer of wood chip or straw mulch around the base of the plant. This will prevent most dropped seeds from germinating.
- Harvest the flowers or berries for dye before they can drop and sprout.
3. Managing volunteer plants
a. Identifying and removing seedlings
In warmer climates, you may find new seedlings with their distinctive heart-shaped leaves popping up in your garden. These volunteer plants are easy to identify and manage. They pull out easily from moist soil.
b. Utilizing excess growth
View volunteer seedlings not as weeds, but as a bonus.
- Transplant Them: Gently dig them up and move them to a new spot or pot them up to share with friends, family, and neighbors.
- Eat Them: The tiny seedlings are tender and can be harvested as delicious, nutrient-packed microgreens for salads.
- Compost Them: If you truly have too many, add them to your compost pile, where they will break down and enrich your future soil.
Comments (0)
No comments yet. Be the first to share your thoughts.