 Skip to content
Step-by-Step Guide to Planting and Caring for Ground Cherries
Ground cherries are a uniquely rewarding crop, offering a flavor that seems to capture the essence of summer—a bright, sweet-tart
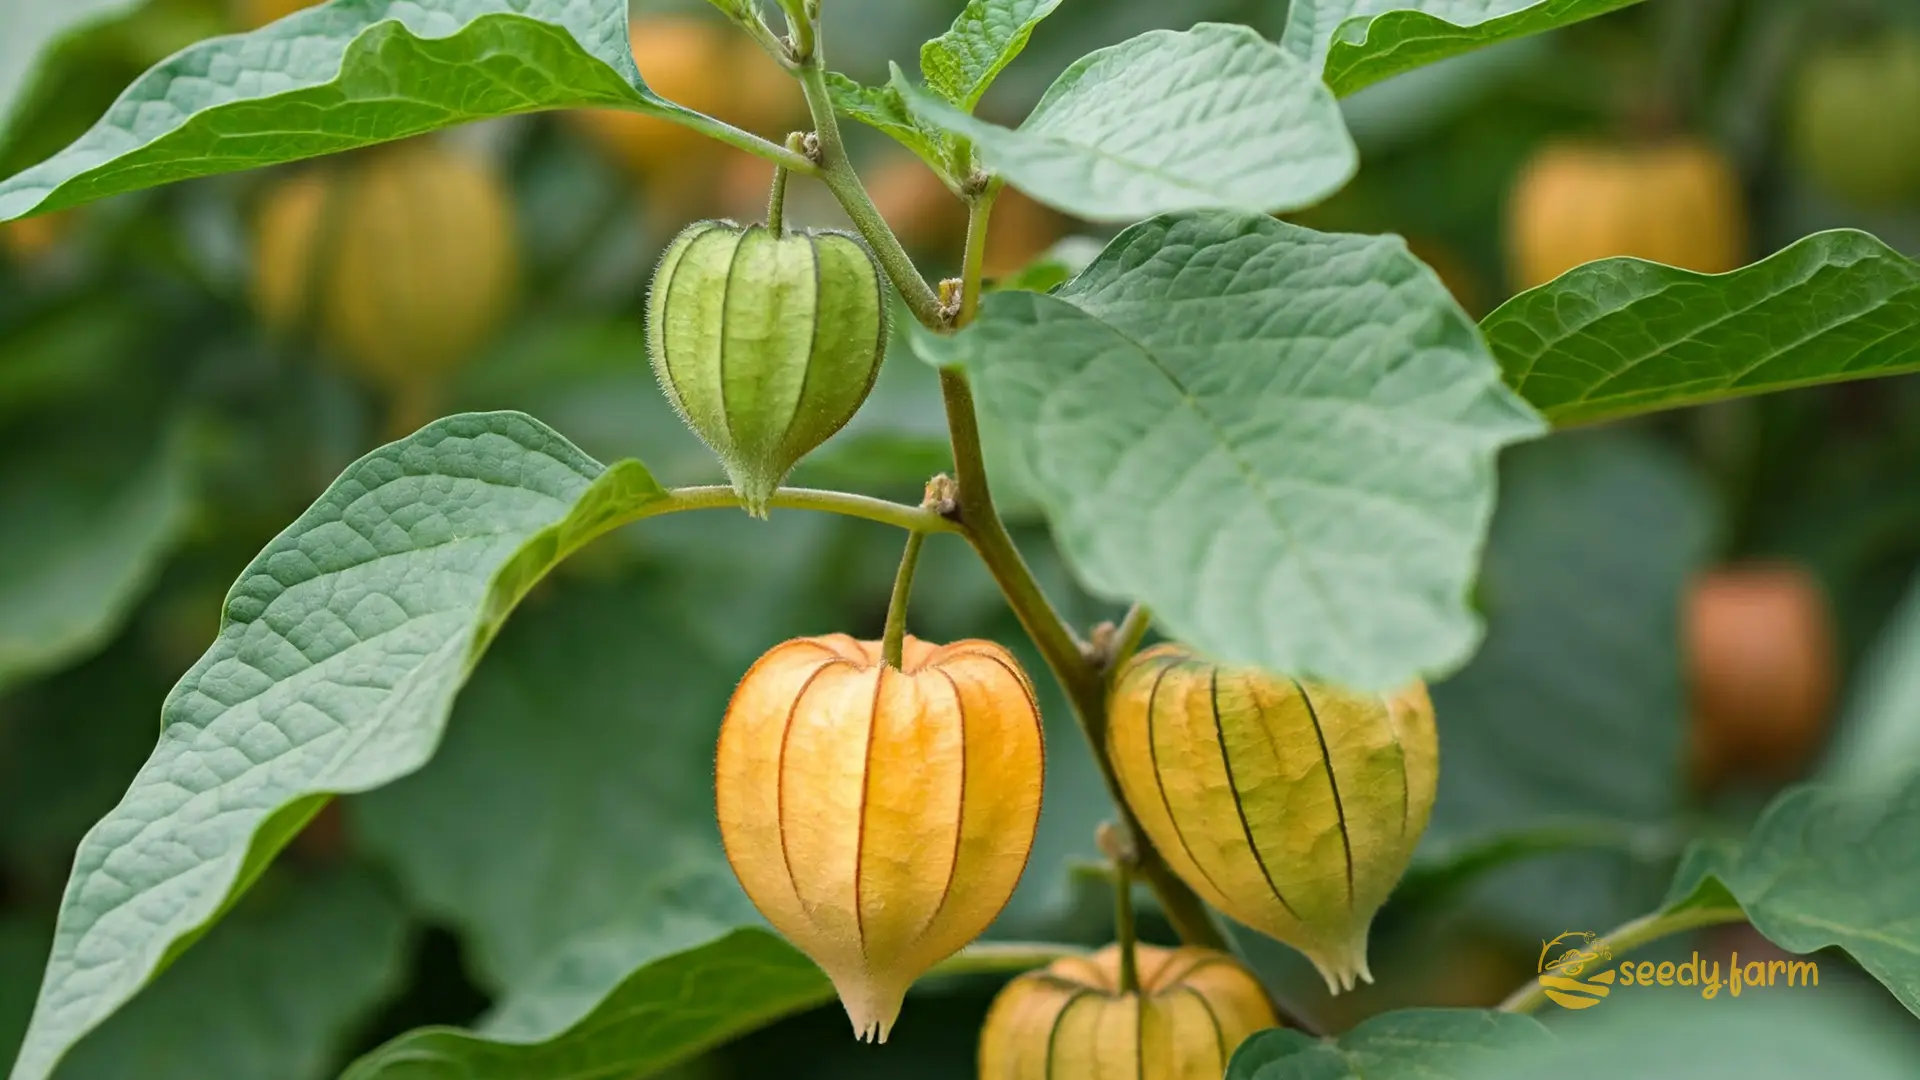
Ground cherries are a uniquely rewarding crop, offering a flavor that seems to capture the essence of summer—a bright, sweet-tart taste often compared to pineapple, strawberry, and vanilla. These low-growing, bushy plants are relatives of the tomato and tomatillo, sharing their vigorous nature but requiring far less fuss. For gardeners looking to add something productive, delicious, and a bit unusual to their plot, Physalis pruinosa is an outstanding choice. This guide provides clear, actionable steps based on sound horticultural principles to ensure a generous harvest.
I. Understanding Ground Cherries
1. What Are Ground Cherries?
a. Description and Appearance
Ground cherries (Physalis pruinosa) are members of the nightshade family (Solanaceae), closely related to tomatillos. The plant itself is a low, sprawling bush, typically reaching 1-3 feet in height with a wide spread. Its defining feature is the fruit: a small, golden-orange berry, about the size of a marble, completely encased in a papery, lantern-like husk called a calyx. As the fruit ripens, this husk dries and changes from green to a straw-like tan color, eventually dropping from the plant.
A Note on Naming: While sometimes called “Husk Cherry,” be aware they are distinct from their cousin, the Cape Gooseberry (Physalis peruviana). Cape Gooseberries are larger, take longer to mature, and are typically grown as perennials in tropical zones. This guide focuses specifically on the common ground cherry, P. pruinosa.
b. Taste and Culinary Uses
The flavor is complex and tropical. When perfectly ripe, it is intensely sweet with a tangy, citrusy finish. This makes them exceptionally versatile. They are superb eaten fresh as a snack, sliced into salads for a surprising burst of flavor, cooked down into pies and jams, or even muddled into cocktails.
| Specification | Details |
|---|---|
| Botanical Name | Physalis pruinosa |
| Common Names | Ground Cherry, Husk Cherry, Strawberry Tomato, Dwarf Cape Gooseberry |
| Plant Type | Tender annual in most climates (USDA Zones 4-10) |
| Height | 1 to 3 feet (30 to 90 cm) |
| Spread | 2 to 4 feet (60 to 120 cm); has a sprawling, bushy habit |
| Sun Exposure | Full Sun (minimum 6-8 hours of direct sunlight) |
| Soil Type | Well-draining loam; tolerates average soil but thrives with compost |
| Soil pH | Slightly acidic to neutral (6.0 to 7.0) |
| Water Needs | Consistent moisture; 1 to 1.5 inches per week is ideal |
| Hardiness Zones | Grown as an annual in USDA zones 4-10 |
| Days to Maturity | 65 to 85 days from transplanting |
| Flower Color | Small, bell-shaped, yellow with a dark purple or brown center |
| Fruit Size | 0.5 to 1 inch (1.25 to 2.5 cm) in diameter |
| Fruit Flavor | Sweet-tart, tropical notes of pineapple, vanilla, and strawberry |
| Harvest Time | Mid-summer until the first hard frost |
| Spacing | 2 to 3 feet (60 to 90 cm) between plants |
| Propagation | Primarily by seed, started indoors for best results |
| Pests | Flea beetles, aphids, three-lined potato beetles, tomato hornworms |
| Diseases | Generally resistant; can be susceptible to fungal leaf spots in wet conditions |
| Toxicity | Crucial: All green parts of the plant, including stems, leaves, and unripe fruit, contain solanine and are toxic. Only eat fully ripe, golden-orange berries from dried, tan husks. |
| Special Features | Drought-tolerant once established; highly productive; often self-seeds |
### 2. Benefits of Growing Ground Cherries
a. Easy for Beginners
Ground cherries are exceptionally forgiving. They are less demanding than tomatoes regarding soil fertility and are resilient to periods of moderate drought once established. Their robust nature makes them a confidence-boosting crop for new gardeners.
b. Abundant Harvest
A single, healthy plant can yield hundreds of fruits over its long season, from mid-summer until the first frost. Two to four plants are typically sufficient for a family to enjoy a steady supply for fresh eating and preserving.

### 3. Popular Varieties for Home Gardens
| Variety | Description | Days to Maturity | Flavor Profile | Best For |
|---|---|---|---|---|
| ‘Aunt Molly’s’ | A Polish heirloom prized for its rich, sweet flavor and reliable production. A well-regarded standard. | 70 days | Rich, sweet with citrus notes | Shorter seasons, preserving, all-purpose use. |
| ‘Pineapple’ | A common variety known for vigorous, sprawling growth and a distinct tropical taste. | 75 days | Pronounced pineapple-like flavor | Fresh eating, salsas, gardens with ample space. |
| ‘Cossack Pineapple’ | A Ukrainian heirloom similar to ‘Pineapple’ but often noted for slightly larger fruit and robust plants. | 75-80 days | Sweet with a strong pineapple note | Jams and pies due to its firm texture and high yield. |
| ‘Goldie’ | Produces slightly larger, bright golden fruits on more compact plants. | 75 days | Very sweet and citrusy | Container gardening and fresh eating. |
| ‘New Hanover’ | An early-maturing heirloom known for its productivity even in cooler climates. | 65 days | Well-balanced sweet and tangy | Regions with short growing seasons. |
### 4. Where to Buy Seeds or Seedlings
a. Local Nurseries and Garden Centers
Seedlings may be available at well-stocked local nurseries, especially those focused on edibles. This is a great option if you’re starting late or only want one or two plants.
b. Reputable Online Seed Suppliers
Starting from seed offers the widest selection of varieties. Choose trusted suppliers known for high germination rates and seed purity to ensure you are growing Physalis pruinosa.
II. Preparing for Cultivation
1. Soil Preparation
Success begins with the soil. While ground cherries tolerate average conditions, optimal preparation will significantly increase your harvest.
a. Soil Type and pH
- Preferred Soil: A well-draining loam is ideal. If you have heavy clay, amend with compost and coarse sand to improve drainage. If you have very sandy soil, amend with compost and peat moss to improve water retention. The goal is a soil that holds moisture but does not become waterlogged, as this can lead to root rot.
- Soil pH: Aim for a range between 6.0 and 7.0. Most garden soils naturally fall within this range. A simple soil test kit can provide a quick reading.
b. Enriching the Soil
- Before planting, work 2-4 inches of high-quality compost or well-rotted manure into the top 6-8 inches of soil. This provides slow-release nutrients, improves soil structure, and encourages beneficial microbial life.
- A critical note on nitrogen: Avoid high-nitrogen chemical fertilizers. Excessive nitrogen will cause the plant to produce lush, leafy growth at the expense of flowers and fruit. Compost provides a balanced diet.
2. Choosing the Right Location
a. Sunlight Requirements
- Select a site that receives a minimum of 6-8 hours of direct sunlight per day. Sunlight provides the energy for photosynthesis, which fuels flower production and the development of sugars in the fruit. Less sun results in fewer, less flavorful fruits.
b. Air Circulation
- Good air movement around the plants is essential. This helps leaves dry quickly after rain or morning dew, which is the single most effective way to prevent the establishment of fungal diseases like leaf spot or powdery mildew. Avoid planting them too close together or in a stagnant corner of the garden.
3. Companion Planting and Crop Rotation
a. Beneficial Companions
- Legumes (Bush Beans, Peas): Fix nitrogen in the soil, providing a gentle nutrient boost.
- Aromatic Herbs (Basil, Mint, Marjoram): The strong scent of these herbs can help confuse and repel common pests like aphids.
- Borage: Attracts pollinators and beneficial predatory insects.
b. Plants to Avoid
- Other Nightshades: Avoid planting ground cherries where tomatoes, potatoes, eggplants, or peppers were grown the previous year. This is a key crop rotation principle to prevent the buildup of soil-borne diseases like verticillium wilt, which affect the entire family.
- Fennel: It can inhibit the growth of many garden plants and is best grown separately.
c. Crop Rotation
- To break pest and disease cycles, rotate your ground cherries to a different garden bed each year. A simple 3-year rotation (e.g., Nightshades -> Legumes -> Brassicas) is a highly effective strategy for maintaining soil health.
III. Propagation and Planting
The success of your season is heavily influenced by how you start your plants. While direct sowing is possible, starting seeds indoors is the superior method for nearly all gardeners.
1. When to Plant
a. Starting Seeds Indoors
Sow seeds indoors 6-8 weeks before your last average frost date. This head start is crucial for giving the plants enough time to mature and produce a heavy crop before the season ends.
b. Transplanting Outdoors
Move seedlings into the garden only when all danger of frost has passed and the soil has warmed to at least 60°F (15°C). Wait 1-2 weeks after your last frost date for the soil to warm sufficiently.
2. Starting Seeds Indoors (Recommended Method)
This method provides reliable germination and gives you strong, healthy plants ready for the garden.
a. Preparing Containers
- Use clean 3-4 inch pots or cell trays with drainage holes. Sterilize old containers with a 1:9 bleach-to-water solution to kill any lingering pathogens.
- Fill with a sterile, high-quality seed-starting mix. This is lightweight and fine-textured, ideal for delicate seedlings.
b. Sowing Seeds
- Sow 2-3 seeds per pot, about 1/4 inch (6mm) deep. This shallow depth is critical for small seeds.
- Lightly cover with the mix and gently firm the surface. Mist thoroughly with water to ensure good seed-to-soil contact without dislodging the seeds.
c. Germination Conditions
- Place a heat mat under the trays to maintain a consistent soil temperature of 70-75°F (21-24°C). This dramatically speeds up and improves germination rates.
- Once seeds sprout (7-14 days), provide intense light. Place grow lights just 2-3 inches above the seedlings for 14-16 hours a day. A sunny windowsill is insufficient and will lead to weak, “leggy” plants.
- Keep the soil consistently moist but never soggy. Water from the bottom if possible to prevent damping-off disease.
3. Transplanting Seedlings
Careful transplanting minimizes shock and helps plants establish quickly.
a. Hardening Off
- This step is non-negotiable. About 7-10 days before planting out, begin acclimating your seedlings to outdoor conditions. Start with 1 hour of shade, then gradually increase the duration and sun exposure each day. This process thickens the leaf cuticle to prevent sunscald and windburn.
b. Planting Process
- Space plants 2 to 3 feet (60-90 cm) apart to allow for their bushy, sprawling habit. This spacing is vital for air circulation.
- Plant seedlings slightly deeper than they were in their pots, just like tomatoes. This encourages extra roots (adventitious roots) to form along the buried stem, creating a stronger plant.
- Water deeply at the base of each plant immediately after transplanting to settle the soil around the roots.
4. Direct Sowing (An Alternative for Long Seasons)
a. Mentor’s Guidance on Direct Sowing
While you may read about direct sowing ground cherry seeds, for most gardeners, this is not the recommended path to a reliable harvest. It should be considered an experiment rather than a primary strategy.
b. The Practical Drawbacks
- Ground cherry seeds require warm soil (consistently above 65°F / 18°C) to germinate. By the time the soil reaches this temperature in most temperate climates, you have lost valuable weeks of the growing season.
- Germination can be slow and spotty in the garden, leading to an uneven stand of plants that mature much later.
- Starting indoors gives you a critical 4-6 week head start, which translates directly into an earlier and more abundant harvest.
c. The Preferred Technique
- For a guaranteed, productive crop, always start with transplants, whether you grow them yourself from seed or purchase them from a nursery.
IV. Plant Care and Maintenance
Consistent care ensures your plants remain healthy and highly productive all season long.
1. Watering Guidelines
a. Watering Frequency
- Provide 1 to 1.5 inches of water per week, either from rainfall or irrigation.
- Water deeply once or twice a week. This encourages a deep, resilient root system, whereas shallow, daily watering promotes weak, shallow roots that are vulnerable to drought.
b. Best Practices
- Always water the soil, not the foliage. Use a soaker hose, drip irrigation, or a watering wand to deliver water directly to the base of the plant. Wet leaves are the primary vector for fungal diseases.
- Check for moisture by sticking your finger 2-3 inches into the soil. If it feels dry at that depth, it’s time to water.
2. Fertilizing
If you prepared your soil with compost, you may not need additional fertilizer.
a. When to Fertilize
- If plants show signs of slow growth or yellowing leaves (and you’ve ruled out watering issues), a supplemental feeding may be needed.
b. Fertilizer Application
- Side-dress with a layer of compost or apply a balanced liquid organic fertilizer (like fish emulsion or kelp meal) once, about a month after transplanting.
- Again, avoid high-nitrogen fertilizers. If you must use a synthetic granular fertilizer, choose one with a lower first number, such as a 5-10-10 formula.
3. Mulching and Support
These two steps make management easier and improve fruit quality.
a. Mulching
- Apply a 2 to 3-inch layer of organic mulch like straw, shredded leaves, or wood chips around the plants.
- Mulch conserves soil moisture, suppresses weeds, regulates soil temperature, and provides a clean surface for the ripe, fallen fruit to land on.
- Keep mulch a few inches away from the main stem to prevent moisture buildup, which can lead to stem rot.
b. Providing Support
- While not strictly required, using a small tomato cage or a simple stake-and-twine system is highly recommended.
- Support keeps the sprawling branches and fruit off the ground, which improves air circulation, reduces the risk of fruit rot, and makes harvesting significantly easier.
4. Pruning
Ground cherries require minimal pruning. Over-pruning can reduce your harvest.
- Remove any branches that are broken, damaged, or show signs of disease.
- If the plant is extremely dense, you can remove a few of the lower branches that are touching the soil to improve airflow.
- No other shaping or “suckering” is necessary. Let the plant assume its natural bushy form.
5. Weed Control
a. Mulching for Weed Suppression
- A thick layer of mulch is your best defense and will prevent most annual weeds from germinating.
b. Manual Weeding
- Hand-pull any weeds that emerge through the mulch. Be gentle, as ground cherry roots are relatively shallow. Avoid deep cultivation near the base of the plant.

### 6. Pest and Disease Management
Ground cherries are quite resilient, but proactive monitoring is key. Adopt an Integrated Pest Management (IPM) approach: observe first, and use the least toxic control method necessary.
a. Common Pests
- Flea Beetles: 1. Symptom: Numerous tiny, round “shotgun” holes in the leaves, especially on young transplants. 2. Solution: Protect young plants with floating row cover until they are large and established. Dusting leaves with diatomaceous earth can deter feeding. Healthy plants typically outgrow the damage.
- Aphids: 1. Symptom: Clusters of tiny insects on the undersides of leaves and on new growth; sticky “honeydew” residue. 2. Solution: A strong spray of water can dislodge them. For persistent issues, use an insecticidal soap spray. Attract beneficial insects like ladybugs by planting dill and yarrow nearby.
- Three-Lined Potato Beetles & Tomato Hornworms: 1. Symptom: Significant leaf damage or total defoliation; visible larvae (for the potato beetle) or large green caterpillars (for the hornworm). 2. Solution: Handpicking is the most effective control in a home garden. Drop the pests into a bucket of soapy water.
b. Common Diseases
- Fungal Leaf Spots: 1. Symptom: Small, dark spots on the leaves, sometimes with a yellow halo. 2. Cause: Fungal spores splashing from the soil or spreading in humid, wet conditions. 3. Solution: Prevention is key. Water at the base of the plant, ensure good air circulation through proper spacing, and use mulch. Remove and dispose of affected leaves.
- Verticillium Wilt: 1. Symptom: Yellowing and wilting of lower leaves, often on one side of the plant, progressing upwards. Plant may be stunted. 2. Cause: A soil-borne fungus that enters through the roots. 3. Solution: There is no cure. Remove and destroy infected plants to prevent spread. The most effective control is prevention through crop rotation: do not plant nightshades in the same spot for at least 3 years.
V. Harvest, Storage, and Seed Saving
This is the reward for your careful cultivation. Knowing exactly when and how to harvest will ensure you enjoy every fruit at its peak flavor.
1. When to Harvest
The plant tells you exactly when the fruit is ready.
a. Signs of Ripeness
- The Drop Test: This is the most reliable indicator. Ripe ground cherries will fall from the plant, husk and all. This is the origin of their name.
- Husk Color: The papery husk will have transitioned from green to a dry, straw-like tan or light brown.
- Fruit Color: The berry inside the husk will be a rich, golden-orange. A pale yellow or greenish fruit is not yet ripe and will be tart.
b. Harvesting Season
- Harvesting begins around 70-80 days from transplanting and continues relentlessly until the first hard frost of fall.
2. How to Harvest
a. Collecting Fallen Fruit
- The best method is to simply gather the fallen fruit from the ground every day or two. A layer of clean straw mulch makes this task easy and keeps the husks clean.
- Gently shake the plant to encourage any fully ripe fruits to drop. If they don’t fall easily, they are not ready.
Mentor’s Corner: The Self-Seeding Dilemma
Ground cherries are prolific self-seeders. Any fruit you miss during cleanup will likely rot, releasing its seeds. The following spring, you may find dozens of “volunteer” seedlings popping up.
- The Benefit: Free plants! You can carefully transplant the strongest volunteers to your desired location for a new crop.
- The Caution: They can become weedy if left unchecked. To manage this, be diligent about harvesting all fallen fruit. If you plan to till the area, most volunteers will be eliminated. In no-till beds, you will need to weed them out from areas where you don’t want them.
### 3. Post-Harvest Handling and Storage
Proper storage is simple and keeps the fruit in excellent condition.
a. In the Husk (Recommended for Storage)
- Leave the fruits inside their protective husks. Spread them in a single layer in a shallow basket or tray in a cool, dry, well-ventilated location (like a garage or cool pantry).
- Stored this way, they can last for 3-4 weeks, sometimes longer, as the husk protects them from damage and moisture loss.

#### b. Husked and Refrigerated
- Once you remove the husks, the fruit becomes more perishable. Store husked, rinsed berries in a breathable container in the refrigerator’s crisper drawer. Use within 5-7 days.
c. Freezing
- For long-term storage, freezing is an excellent option. Husk the fruits, rinse and dry them completely.
- Spread them in a single layer on a baking sheet and freeze until solid. Transfer the frozen berries to an airtight freezer bag or container.
- They will keep for up to a year and are perfect for smoothies, pies, or sauces.
4. Saving Seeds for Future Planting
Saving your own seeds is simple and ensures you have a supply for next year.
a. Selecting Fruits for Seeds
- Choose fruits from your healthiest, most productive, and best-tasting plants. This allows you to select for desirable traits over time. Ensure the fruit is fully ripe (it fell from the plant naturally).
b. Seed Extraction and Drying
- For small, non-gelatinous seeds like ground cherries, fermentation is unnecessary and can risk mold. A simpler method is better.
- Mash the ripe berries in a small bowl of water. The viable seeds will sink to the bottom while most of the pulp and skin floats.
- Carefully pour off the water and pulp. Rinse the seeds in a fine-mesh sieve until they are clean.
- Spread the clean seeds on a ceramic plate or piece of glass to dry (they can stick to paper). Let them air dry completely for 1-2 weeks in a well-ventilated spot away from direct sun. They should be hard and brittle when dry.
c. Storing Seeds
- Store the completely dry seeds in a labeled paper envelope or small glass jar in a cool, dark, and dry place. Properly stored seeds will remain viable for 3-5 years.
VI. Troubleshooting and Common Questions
1. Can ground cherries be grown in containers?
Absolutely. They do very well in containers. Choose a pot that is at least 5 gallons in volume (12-14 inches in diameter) with large drainage holes. Use a high-quality potting mix, not garden soil. Container-grown plants will require more frequent watering and may benefit from a monthly feeding with a liquid organic fertilizer.
2. Why are my plants big and leafy but have no fruit?
This is a classic sign of excessive nitrogen. The plant is directing all its energy into vegetative (leafy) growth instead of reproductive (flower and fruit) growth. Avoid high-nitrogen fertilizers. Ensure the plant is receiving at least 6-8 hours of direct sun, as insufficient light can also reduce flowering.
3. Are unripe ground cherries toxic?
Yes. This is extremely important. Like their tomato and potato relatives, the green parts of the ground cherry plant—including leaves, stems, and unripe green fruit—contain solanine, which is toxic if ingested. Only consume fully ripened, golden-orange berries that have been removed from their husks.
4. How do I stop my ground cherry plants from taking over my garden?
The “spreading” is caused by self-seeding from fruit that drops and is left in the garden. The best prevention is diligent harvesting. Using a thick layer of mulch makes spotting and collecting fallen fruit easier. If they do self-seed, simply treat the volunteers as weeds in areas where you don’t want them.
5. Are ground cherries related to tomatillos?
Yes, they are close cousins, both belonging to the genus Physalis. You can see the family resemblance in the papery husk (calyx) that surrounds the fruit. Tomatillos (Physalis ixocarpa or P. philadelphica) typically have a larger fruit that fills or even bursts the husk, while ground cherry fruit is smaller and sits loosely inside.
Comments (0)
No comments yet. Be the first to share your thoughts.