 Skip to content
Growing Okra: A Tasty and Nutritious Journey
Okra, botanically known as Abelmoschus esculentus and commonly called “lady’s fingers” in some regions due to its slender pods, is
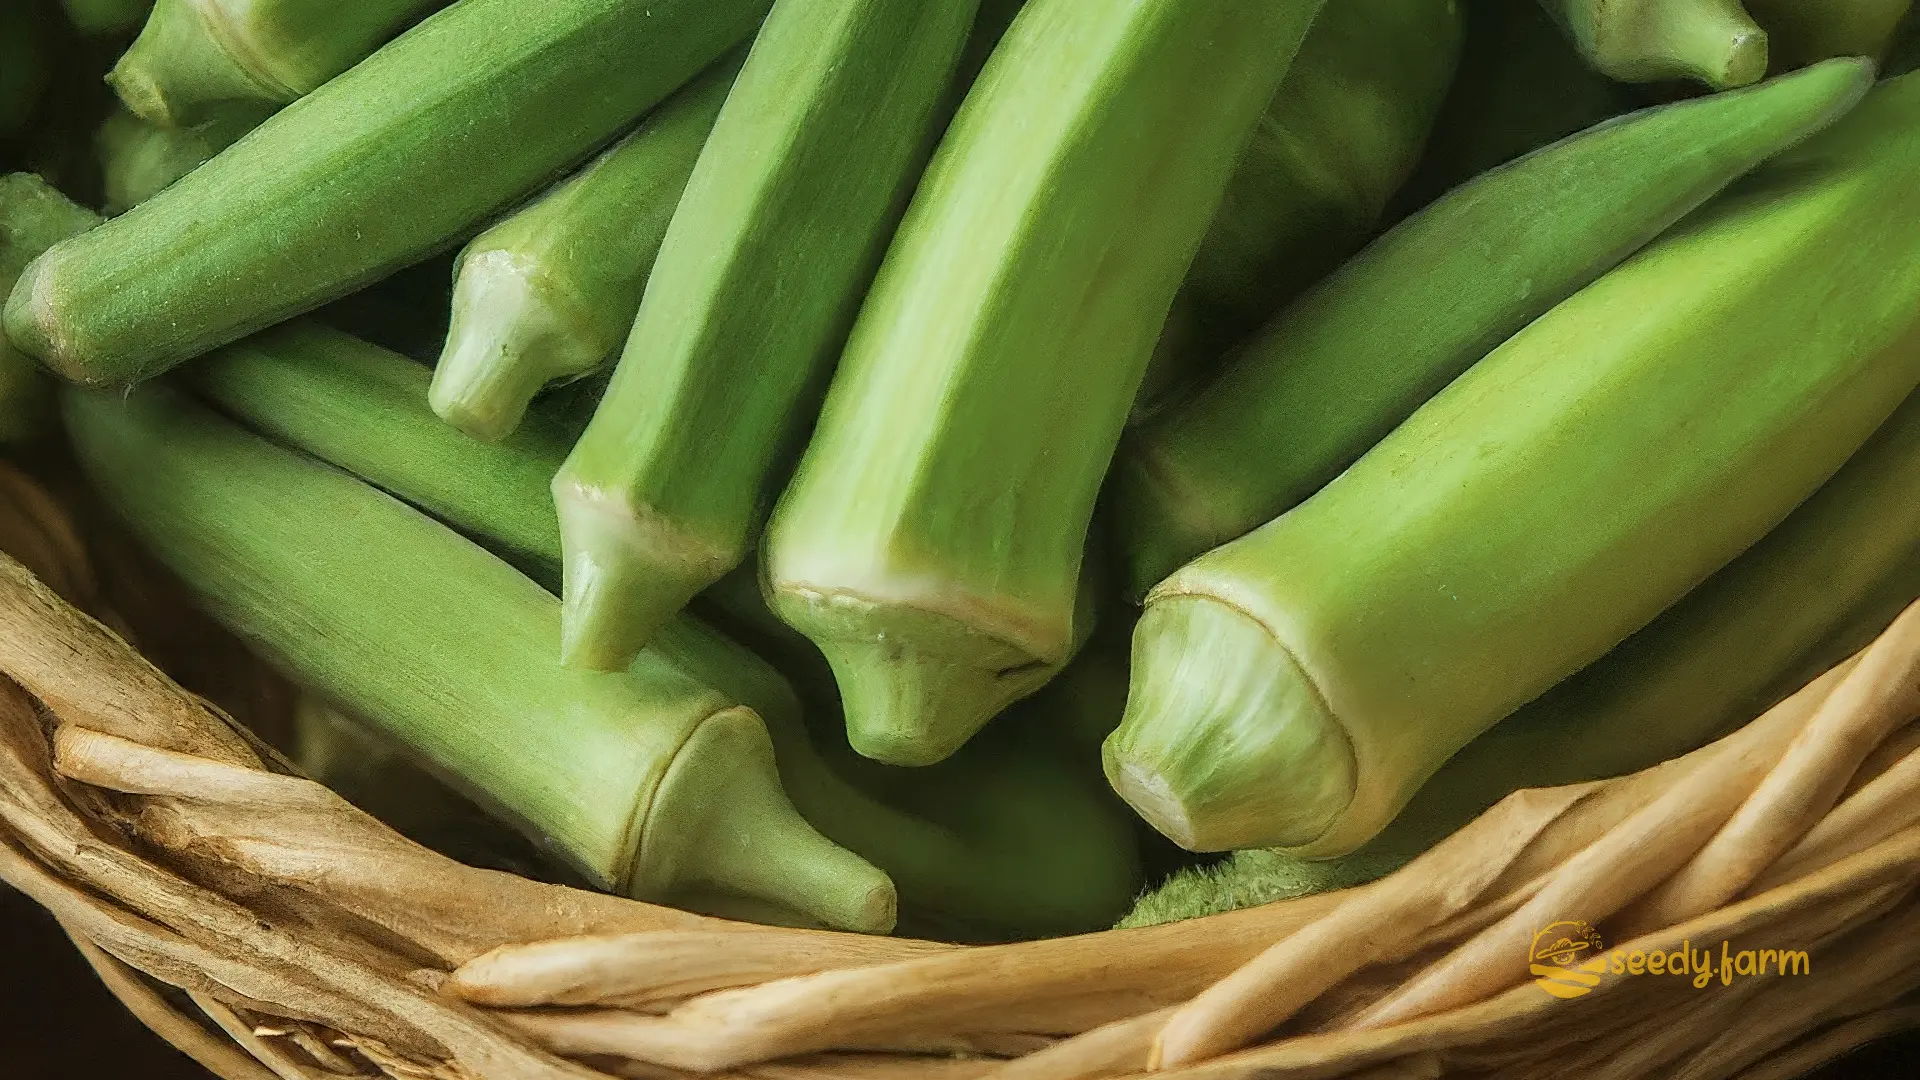
Okra, botanically known as Abelmoschus esculentus and commonly called “lady’s fingers” in some regions due to its slender pods, is a cherished vegetable worldwide. From the rich gumbos of the American South to flavorful curries in India and hearty African stews, okra’s unique texture and taste have secured its place in diverse culinary traditions. This guide offers a comprehensive look at cultivating this fascinating plant, helping you enjoy a successful harvest.
I. Discovering Okra: History, Uses, and Characteristics
Okra is more than just a versatile ingredient; it’s a plant with a deep history and distinct features. Its journey is believed to have started in ancient Ethiopia, spreading across continents and becoming integral to various food cultures. Notably, it traveled to the Americas with enslaved Africans, where it became a cornerstone of Southern U.S. cuisine.
| Specification | Details |
|---|---|
| Scientific Name | Abelmoschus esculentus |
| Family | Malvaceae (Mallow family; includes hibiscus, cotton, hollyhock) |
| Plant Type | Warm-season annual vegetable |
| Growth Habit | Upright, branching stalk |
| Plant Height | Typically 3-6 feet (0.9-1.8 meters), some varieties taller |
| Flower Characteristics | Showy, hibiscus-like; typically pale yellow with a reddish center |
| Pod Characteristics | Edible seed pod, typically green (some varieties red/burgundy), ridged or smooth, tapering |
| Optimal Pod Size for Harvest | 2-4 inches (5-10 cm) long for most varieties |
| Pod Color at Maturity | Harvested pods are green or other variety-specific colors; overmature pods turn brown and fibrous |
| Edible Parts | Immature pods (most common), young leaves (cooked like greens), seeds (roasted), flowers (garnish/salad) |
| Cultivation Needs | Full sun (6+ hours/day), warm temperatures, well-drained fertile soil |
| Nutritional Value | Good source of dietary fiber, Vitamin C, Vitamin K, folate, magnesium, and antioxidants |
| Origins | Likely Northeast Africa (Ethiopian highlands area) |
| Common Varieties | ‘Clemson Spineless’ (popular standard), ‘Dwarf Green Long Pod’ (compact), ‘Burgundy’ (red pods/stems), ‘Emerald’ (smooth, dark green pods) |
| Primary Uses | Thickener in soups/stews (gumbo), fried, roasted, grilled, pickled, stir-fried |
Nutritional Powerhouse Okra is a valuable addition to a healthy diet. It’s low in calories but rich in essential nutrients. Its high dietary fiber content aids digestion. Vitamins C and K contribute to immune function and bone health, respectively. Okra is also a source of antioxidants, like beta-carotene (a precursor to Vitamin A), lutein, and zeaxanthin, which support vision and skin health. Its significant folate levels are particularly beneficial during pregnancy for fetal development.
Culinary Creativity In the kitchen, okra shines. Its characteristic soluble fiber, known as mucilage, creates a smooth, thickening quality highly valued in dishes like gumbo. However, cooking methods like quick frying or roasting can minimize sliminess for those who prefer a firmer texture. From spicy Creole jambalayas and tangy Indian bhindi masala to simple fried okra or pickled pods, this vegetable offers endless possibilities for exploration.
II. Why Grow Okra? Benefits for Your Garden and Table
Beyond its culinary appeal, growing okra offers several advantages for the home gardener and the local ecosystem. Understanding these benefits can make cultivating okra even more rewarding.
1. Botanical Basics and Growing Appeal
- Family Ties: As a member of the Malvaceae family, okra shares kinship with ornamentals like hibiscus and economically important plants like cotton. This connection is evident in its beautiful, hibiscus-like flowers.
- Plant Form and Function: Okra grows as an annual, typically reaching heights of 3 to 6 feet, though some varieties vary. It produces large, palmate (hand-shaped) leaves and striking flowers that quickly develop into the edible pods. Pods grow rapidly and are best harvested when young and tender, usually 2-4 inches (5-10 cm) long, depending on the variety. Harvesting immature pods encourages the plant to produce more flowers and pods.
- Warm Weather Lover: Okra thrives in heat and sunlight. It requires at least 6-8 hours of direct sun daily and consistently warm temperatures – ideally above 70°F (21°C) – for vigorous growth and pod production. It is very sensitive to frost.

2. Garden and Environmental Advantages
- Culinary Convenience: Having fresh okra readily available allows you to harvest pods at their peak tenderness and flavor, far superior to store-bought options that may have toughened.
- Nutritional Access: Homegrown okra provides a direct source of its rich nutritional benefits, contributing to a healthy, garden-to-table lifestyle.
- Pollinator Haven: Okra’s large, nectar-rich flowers are highly attractive to bees, butterflies, and other beneficial insects. Planting okra can boost pollination throughout your garden, potentially increasing yields of other nearby crops like squash or cucumbers.
- Soil Health Contributor: Okra develops a strong central taproot that can penetrate deeply into the soil, helping to break up compacted layers and improve aeration and water infiltration. When the plant residues decompose, they add valuable organic matter back into the soil. This makes okra a beneficial component in crop rotation plans.
- Sustainable Practices: Growing your own okra reduces food miles and packaging waste associated with commercially sourced produce. Employing organic methods further minimizes environmental impact.
3. Landscape Value
- Ornamental Quality: With its stately height, interesting leaf shape, and beautiful flowers, okra can be an attractive addition to the edible landscape or even integrated into ornamental borders for visual interest. Varieties like ‘Burgundy’ offer striking red stems and pods.
- Biodiversity Support: By attracting pollinators and beneficial insects, okra contributes positively to local biodiversity, creating a healthier garden ecosystem.
III. Getting Started and Caring for Your Okra Garden
Successful okra cultivation begins with proper site preparation and continues with consistent care throughout the growing season. Follow these steps for a thriving okra patch.
1. Sowing Seeds and Transplanting Seedlings
- Optimal Timing: Okra demands warm soil for germination and growth. Direct sow seeds outdoors only after the soil temperature reliably reaches 65-70°F (18-21°C) and all danger of frost has passed. In regions with shorter growing seasons, start seeds indoors in biodegradable pots (like peat or coir pots) 3-4 weeks before the last expected frost date. This minimizes root disturbance when transplanting, as okra dislikes having its roots handled.
- Seed Preparation (Optional): To potentially speed up germination, you can soak the hard okra seeds in warm water for 12-24 hours immediately before planting.
- Planting Depth and Spacing: Sow seeds about 1/2 to 1 inch (1.3-2.5 cm) deep. Space seeds or thin seedlings to stand 12-18 inches (30-45 cm) apart within the row. Allow 2-3 feet (60-90 cm) between rows to ensure good air circulation and easy access for harvesting.
- Transplanting Seedlings: If starting indoors, carefully transplant the entire biodegradable pot into the garden once conditions are right. If using plastic pots, handle the root ball gently to avoid damage. Water thoroughly after transplanting.

2. Ideal Climate and Soil Conditions
- Sun and Heat: Choose the sunniest spot in your garden; full sun (6-8+ hours direct sunlight) is non-negotiable for good pod production. Okra loves heat and performs best in daytime temperatures between 75-90°F (24-32°C).
- Soil Preparation: Okra needs well-drained, fertile soil rich in organic matter. Before planting, amend the soil generously with several inches of mature compost or well-rotted manure. This improves soil structure, drainage, and nutrient availability. Okra prefers a soil pH between 6.0 and 7.0 (slightly acidic to neutral). Test your soil pH and amend as needed (e.g., lime to raise pH, sulfur to lower it).
3. Watering Wisely
- Consistent Moisture: Okra requires consistent moisture, especially during flowering and pod development. Aim for about 1 inch (2.5 cm) of water per week, either from rainfall or irrigation. Water deeply to encourage strong root growth.
- Watering Methods for Sustainability: Use drip irrigation or soaker hoses to deliver water directly to the soil surface at the base of the plants. This method is highly efficient, reduces water waste through evaporation, and helps keep foliage dry, minimizing the risk of fungal diseases like powdery mildew. Applying a 2-3 inch layer of organic mulch (straw, shredded leaves, wood chips) around plants helps conserve soil moisture, suppress weeds, and regulate soil temperature.
4. Feeding Your Okra Plants
- Nutrient Needs: Okra is a moderately heavy feeder. Incorporating compost at planting time provides a good foundation.
- Fertilization Strategy: You can apply a balanced, all-purpose organic fertilizer at planting time according to package directions. Once plants start flowering actively, an optional side-dressing (applying fertilizer alongside the row of growing plants) with a fertilizer slightly higher in phosphorus and potassium, or additional compost, can support pod production. Avoid excessive nitrogen, which can lead to lush leaf growth at the expense of pods.
- Observe Your Plants: Monitor plant growth and leaf color. Yellowing leaves (starting from the bottom) might indicate a need for nutrients, though other factors like water stress or disease should also be considered.

IV. Harvesting, Storing, and Enjoying Your Okra Bounty
The reward for your gardening efforts is a harvest of fresh, tender okra. Knowing when and how to pick, store, and use your okra ensures maximum enjoyment.
1. Harvest Timing and Technique
- The Perfect Size: Harvest okra pods when they are young and tender, typically 2-4 inches (5-10 cm) long for most varieties (check specific variety information). Pods grow incredibly fast in hot weather, sometimes doubling in size overnight. Test tenderness by snapping off the tip; if it snaps cleanly, it’s ready. If it bends or is difficult to snap, it’s likely becoming tough and fibrous (woody).
- Harvest Frequency is Key: Check plants and harvest every 1-2 days during peak production. Regular harvesting encourages the plant to produce more flowers and pods. Leaving mature pods on the plant signals it to slow down production and focus on seed development.
- Harvesting Method: Use sharp pruning shears or a knife to cut the pod stem just above the cap, leaving a small stub on the plant. Be gentle to avoid damaging the plant. Many okra varieties have small spines on the leaves and pods that can irritate skin, so wearing gloves and long sleeves is highly recommended during harvest.
2. Storing Your Harvest
- Short-Term Fresh Storage: Okra is best used fresh within a day or two of harvesting. If needed, store unwashed pods in a paper bag or a perforated plastic bag in the refrigerator’s crisper drawer. Washing before storing can promote mold growth. Use within 3-5 days for best quality.
- Long-Term Preservation: Freezing: For longer storage, freezing is effective. Wash pods and trim the stems. Leave small pods whole or slice larger pods crosswise into rounds. Blanch the okra by submerging it in boiling water for 3 minutes (whole pods) or 2 minutes (cut pods), then immediately plunge into ice water to stop the cooking process. Drain thoroughly, pat dry, and pack into airtight freezer bags or containers. Blanched frozen okra retains good texture for use in soups, stews, and gumbos.
- Other Preservation Methods: Okra can also be pickled, canned (following safe canning guidelines), or dehydrated.
3. Culinary Inspirations
- Managing Mucilage: To reduce sliminess, try quick, high-heat cooking methods like frying, roasting, or grilling. Adding acidic ingredients like tomatoes, vinegar, or lemon juice during cooking can also help cut down on the mucilage.
- Versatile Uses: Embrace okra’s versatility! Add it to stews (gumbo, African peanut stew), stir-fries (bhindi masala), roast it with spices, coat it in cornmeal and fry until crispy, grill it on skewers, or pickle it for a tangy snack. Young, tender leaves can even be cooked like spinach.

4. Utilizing Mature Pods and Saving Seeds
- Beyond Eating: Pods left on the plant that become too large and tough (mature and fibrous) are not suitable for eating but have other uses. They can be dried thoroughly and used in dried floral arrangements or crafts due to their interesting shape.
- Seed Saving for Future Gardens: To save seeds, allow some pods from healthy, vigorous plants (choose open-pollinated or heirloom varieties, not hybrids, if you want them to grow true-to-type) to fully mature and dry on the plant until they become brittle and brown. Remove the dried pods, crack them open, and harvest the round, dark seeds. Ensure seeds are completely dry before storing them in an airtight container in a cool, dark, dry place for planting next season. This promotes self-sufficiency and helps preserve genetic diversity.
V. Troubleshooting Common Okra Problems: Pests, Diseases, and More
While generally robust, okra plants can encounter pests, diseases, or environmental challenges. Early identification and intervention are key to maintaining healthy plants. Prioritize sustainable and organic methods whenever possible.
1. Integrated Pest Management (IPM) for Okra
a. Common Okra Pests
- Aphids: Tiny, pear-shaped insects (often green, yellow, or black) that cluster on new growth and undersides of leaves, sucking sap. They cause yellowing, distorted leaves, and excrete sticky “honeydew,” leading to sooty mold.
- Flea Beetles: Small, dark beetles that jump like fleas when disturbed. They chew numerous small “shot holes” in leaves, which can severely damage young seedlings.
- Stink Bugs and Leaf-Footed Bugs: Larger insects that pierce pods and stems to feed, causing spotting, distortion, and poor development of pods.
- Corn Earworms / Pod Borers: Caterpillars that may bore into developing pods, damaging them from the inside.
b. Sustainable Control Strategies
- Cultural Controls: Maintain good garden sanitation; remove weeds and debris where pests hide. Rotate crops annually.
- Physical Barriers: Use floating row covers over young plants, especially early in the season, to prevent flea beetles and some other flying insects from reaching them. Remove covers when plants begin to flower to allow pollination.
- Biological Controls: Encourage natural predators like ladybugs, lacewings, parasitic wasps, and predatory mites by planting diverse flowers (e.g., dill, fennel, alyssum) nearby and avoiding broad-spectrum pesticides.
- Manual Removal: Handpick larger pests like stink bugs and drop them into soapy water. A strong spray of water from a hose can dislodge aphid populations.
- Organic Sprays (Use Judiciously): If infestations are severe, use targeted organic options like insecticidal soap (effective against aphids and other soft-bodied insects) or neem oil (broad-spectrum, disrupts insect feeding and growth). Apply late in the day to minimize harm to pollinators. Always follow label instructions carefully.
2. Preventing and Managing Common Okra Diseases
a. Common Diseases
- Powdery Mildew: A common fungal disease appearing as white, powdery patches on leaves and stems, especially during humid weather or when plants are crowded. Severe infections hinder photosynthesis.
- Verticillium Wilt and Fusarium Wilt: Soil-borne fungal diseases that infect the plant’s vascular system, causing sudden wilting (often starting on one side), yellowing, and eventual death. The fungi persist in the soil for years.
- Leaf Spot Diseases: Various fungal or bacterial pathogens can cause spots on leaves, which may enlarge and merge, potentially leading to defoliation in severe cases.
b. Prevention and Treatment Strategies
- Resistant Varieties: Choose varieties known to have resistance to common diseases like Verticillium Wilt if available and suitable for your region.
- Crop Rotation: This is crucial for managing soil-borne diseases like wilt. Do not plant okra or related Malvaceae family members (like cotton or hibiscus) in the same spot more than once every 3-4 years.
- Proper Spacing and Air Circulation: Ensure adequate spacing between plants (as recommended in Section III) to promote good airflow, which helps leaves dry quickly and reduces conditions favorable for fungal growth (like powdery mildew and leaf spots).
- Watering Practices: Water at the base of the plant (using drip irrigation or soaker hoses) to keep foliage dry. Water early in the day so any moisture on leaves evaporates quickly.
- Sanitation: Remove and destroy infected plant debris promptly. Do not compost diseased plant material. Clean tools between uses, especially if working with potentially diseased plants.
- Organic Fungicides: For powdery mildew, preventative applications of organic fungicides based on sulfur, potassium bicarbonate, or neem oil can be effective if started early. Ensure thorough coverage. Wilt diseases are very difficult to control once established; prevention is the best approach.
3. Addressing Other Common Okra Issues
a. Flower Drop (Blossom Drop)
- Possible Causes: Extreme temperature fluctuations (too hot or too cool), inconsistent watering (drought stress), nutrient imbalances (especially excessive nitrogen), or poor pollination can cause flowers to drop before setting pods.
- Solutions: Ensure consistent watering, especially during heat waves. Mulch to moderate soil temperature and moisture. Avoid over-fertilizing with high-nitrogen fertilizers. Ensure pollinators have access if row covers were used.
b. Poor Pod Development or Low Yield
- Possible Causes: Insufficient sunlight (less than 6 hours/day), inadequate water or nutrients, poor pollination, or pest/disease pressure. Overcrowding can also limit resources for each plant.
- Solutions: Confirm the site receives full sun. Maintain consistent watering and appropriate fertilization. Check for and manage pests/diseases. Ensure proper plant spacing. Encourage pollinators. Remember to harvest regularly to stimulate ongoing production.
VI. FAQ: Expert Answers for Growing Okra Successfully
Here are answers to some common questions gardeners have about growing okra, designed to help you achieve a successful and abundant harvest.
How often should I water my okra plants?
Okra needs consistent moisture, particularly during pod development. Provide about 1 inch (2.5 cm) of water per week, applied deeply. Water more frequently during very hot, dry spells, checking the soil moisture 2-3 inches below the surface. Avoid letting the soil become completely dry or constantly waterlogged. Using mulch helps maintain consistent soil moisture.
When is the absolute best time to harvest okra pods?
Harvest pods when they are young, tender, and typically 2-4 inches (5-10 cm) long (check variety specifics). They should snap easily. Pods mature very quickly in warm weather, so check plants every 1-2 days during peak season. Harvesting frequently encourages more production.
What’s the proper way to store fresh okra to keep it from getting slimy before cooking?
Store fresh okra dry. Do not wash it until just before you plan to cook it. Place unwashed pods in a breathable container like a paper bag or a loosely closed plastic bag with ventilation holes in the refrigerator’s crisper drawer. Use within a few days for optimal freshness.
Can I successfully grow okra in containers?
Yes, okra can be grown in containers, but choose a large one. Select a pot at least 5 gallons in size, preferably larger (10-15 gallons), and at least 12-15 inches (30-38 cm) deep to accommodate its taproot. Ensure the container has excellent drainage holes. Use a quality potting mix, and be aware that container plants dry out faster and may need more frequent watering and fertilization than garden plants. Choose dwarf varieties for easier container management.
What type of fertilizer works best for okra?
Start with soil rich in organic matter (compost). At planting, you can incorporate a balanced organic fertilizer (e.g., formulation like 5-5-5 or 10-10-10). Once flowering begins, you might side-dress lightly with compost or a fertilizer slightly richer in phosphorus and potassium to support pod production. Avoid excessive nitrogen, which promotes leaves over pods. Follow soil test recommendations if available.
How can I organically prevent pests on my okra?
Employ Integrated Pest Management (IPM): encourage beneficial insects, use row covers on young plants, practice crop rotation, maintain good sanitation, and monitor plants regularly. Handpick larger pests. Use water sprays for aphids. If needed, resort to targeted organic options like insecticidal soap or neem oil, applying carefully and sparingly.
Why are my okra plants flowering but not producing many pods?
This can result from several factors: Insufficient Pollination (ensure pollinators can access flowers), Extreme Heat (temperatures consistently above 95°F/35°C can interfere with pollination/pod set), Water Stress (inconsistent watering), Nutrient Imbalance (especially too much nitrogen), or Not Harvesting Enough (leaving mature pods on the plant slows production). Address these potential issues by ensuring consistent water, appropriate nutrients, pollinator access, and frequent harvesting of tender pods.
How do I save okra seeds for next year?
Select pods from your healthiest, most productive plants of an open-pollinated or heirloom variety (hybrid seeds won’t grow true-to-type). Let these selected pods mature fully and dry completely on the plant until they are brown and brittle. Remove the pods, break them open, and collect the dark, round seeds. Ensure the seeds are thoroughly dry (spread them out in a single layer indoors for a week or two) before storing them in a labeled envelope or airtight jar in a cool, dark, dry place. Properly stored seeds can remain viable for several years.
Comments (0)
No comments yet. Be the first to share your thoughts.