 Skip to content
How to Grow Bitter Gourd: Your Comprehensive Home Garden Guide
Bitter gourd, known by many names including bitter melon, karela, and its scientific name Momordica charantia, is a fascinating and
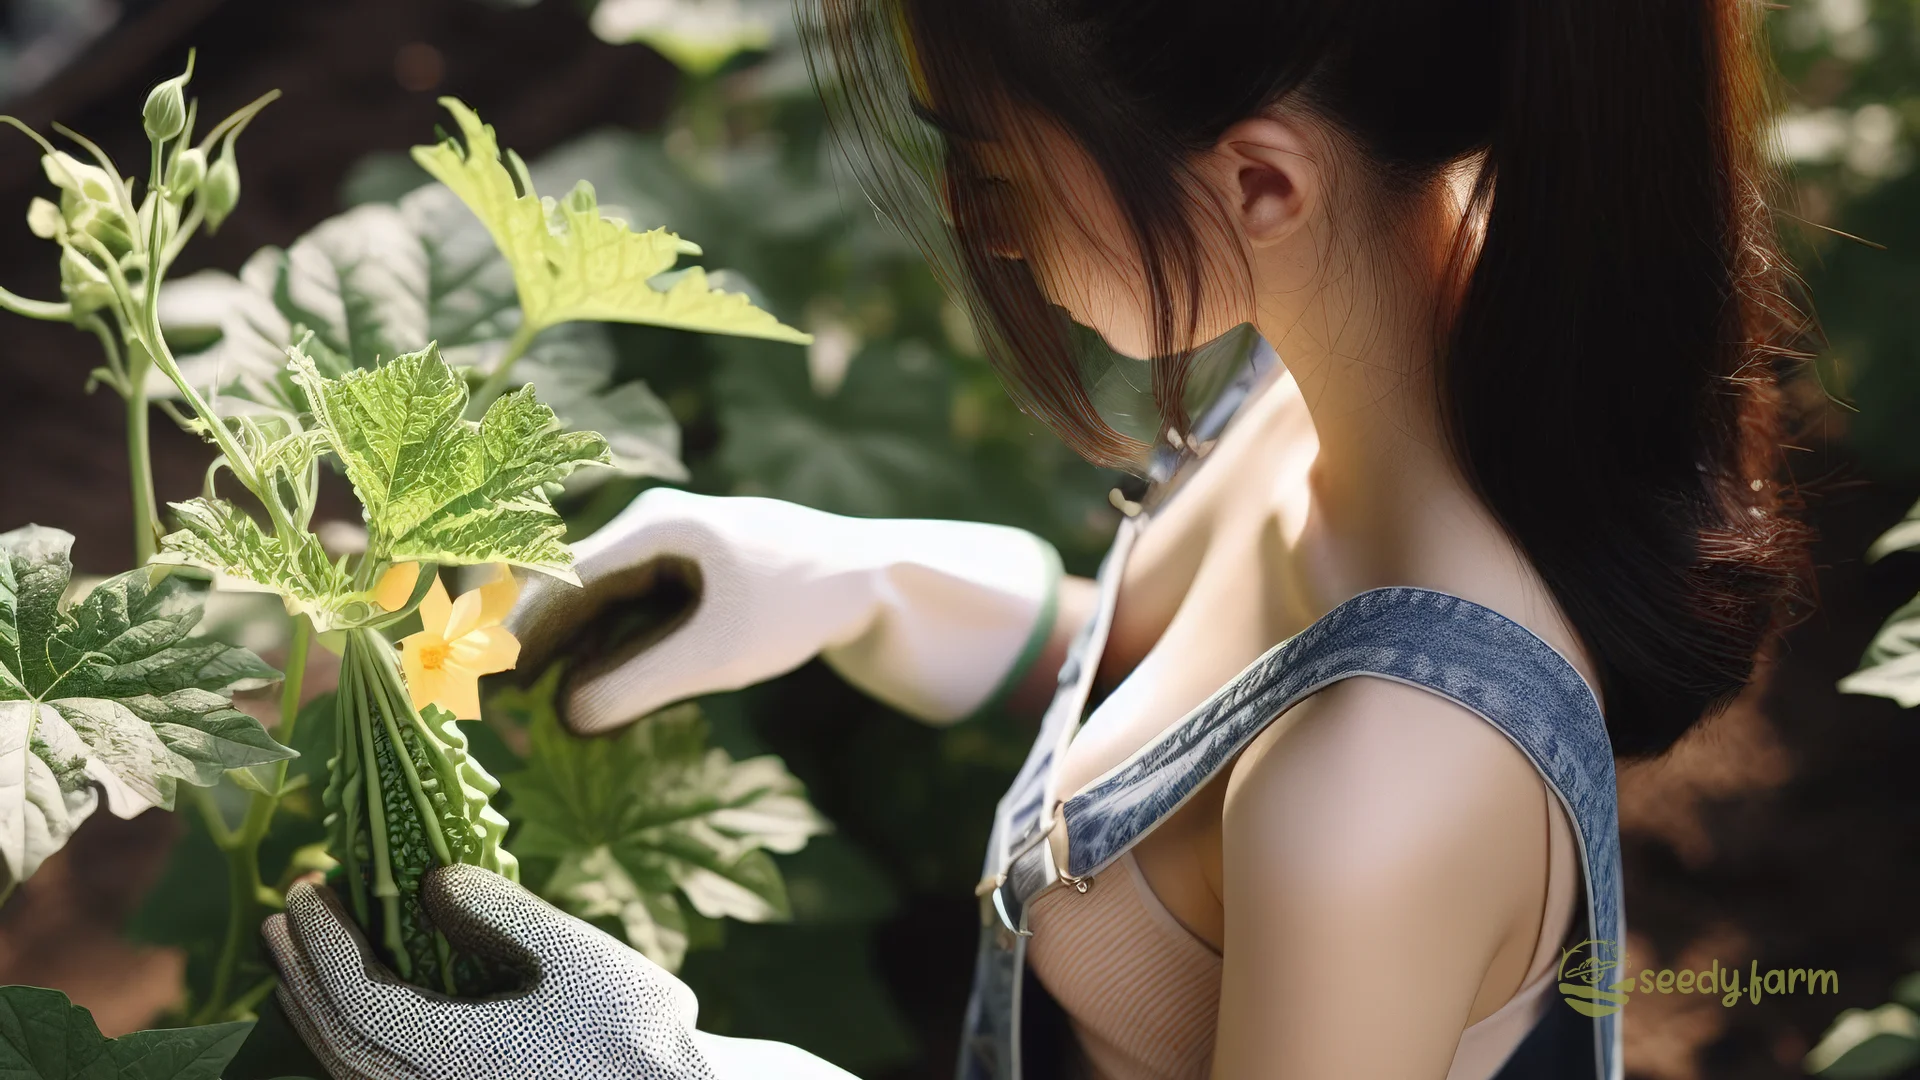
Bitter gourd, known by many names including bitter melon, karela, and its scientific name Momordica charantia, is a fascinating and productive vine prized in many cuisines worldwide. While its characteristic bitterness can be an acquired taste, this tropical and subtropical native offers unique flavours and textures, along with notable nutritional benefits. Growing this vigorous summer vegetable in your home garden is a rewarding experience, bringing a taste of the tropics and healthy produce right to your table. This guide will walk you through everything you need to know for a successful harvest.
| Characteristic | Description |
|---|---|
| Plant Type | Herbaceous, tendril-climbing vine |
| Scientific Name | Momordica charantia |
| Origin | Tropical and subtropical regions, likely originating in the Old World Tropics (Asia/Africa) |
| Growth Habit | Vigorous vining plant; requires sturdy trellising or support to climb |
| Leaves | Palmately lobed (hand-shaped), typically 5-7 deep lobes, somewhat hairy |
| Flowers | Distinct male and female yellow flowers borne separately on the same plant (monoecious) |
| Fruit | Variable shape (oblong to cucumber-like), typically warty or ridged, green when immature, ripening to yellowish-orange and splitting open to reveal seeds with red arils |
| Fruit Taste | Distinctly bitter; intensity varies by variety and ripeness |
| Sunlight Needs | Full sun (minimum 6-8 hours of direct sunlight daily is ideal) |
| Soil Preference | Fertile, well-draining loam or sandy loam; rich in organic matter; pH 6.0-6.8 |
| Temperature Range | Warm-season crop; thrives in temperatures between 75°F – 85°F (24°C – 29°C); sensitive to frost |
| Water Needs | Consistent moisture essential, especially during flowering and fruiting; avoid waterlogged soil |
| Growth Period | Annual (completes its life cycle within a single growing season) |
| Pollination | Primarily insect-pollinated (bees); hand-pollination can improve fruit set, especially in low-pollinator environments |
| Spacing Requirements | Plants: 12-18 inches (30-45 cm) apart; Rows: 5-6 feet (1.5-1.8 meters) apart to allow for vining |
| Days to Maturity | Approximately 50-70 days from sowing to first harvest, depending on variety and conditions |
## I. Planting Basics: Setting the Stage for Success
Before you plant a single seed, understanding the fundamentals will significantly increase your chances of growing healthy, productive bitter gourd vines.
1. Choosing the Right Variety
Selecting a bitter gourd variety suited to your climate, space, and culinary preferences is the first step. Varieties differ in size, shape, colour, bitterness intensity, and maturity time. Consider these popular types:
- Chinese Varieties: Often longer (up to 12 inches or 30 cm), smoother-skinned with more rounded ridges, light green, and generally considered milder in bitterness. Good for stir-fries and soups.
- Indian Varieties: Typically shorter, broader, with rougher, pointier warts or ridges, often dark green, and known for a more pronounced bitterness. Excellent in curries and stuffed preparations.
- White or Pale Green Varieties: These tend to have lower bitterness levels compared to their greener counterparts, making them appealing for salads or pickling.
 Here’s a closer look at some specific cultivars:
| Variety Name (Example) | General Description | Potential Uses & Notes |
|---|---|---|
| Baby / Small Fruited Types (e.g., ‘Small Warty Green’) | Compact fruits (2-4 inches / 5-10 cm), often light green. | Good for containers, quick maturing, suitable for single servings or pickling. |
| Chinese Long Types (e.g., ‘Hong Kong Green’) | Long, slender fruits (10-15 inches / 25-38 cm), light green, smoother ridges. | Productive, classic stir-fry type, relatively milder bitterness. |
| Indian Types (e.g., ‘Priya’, ‘Preethi’) | Shorter, thicker fruits (4-8 inches / 10-20 cm), dark green, prominent warts. | Intense flavour preferred in many Indian dishes, robust growth. |
| White Types (e.g., ‘Taiwan White’) | Medium-sized fruits (8-10 inches / 20-25 cm), creamy white to pale green. | Lower bitterness, visually interesting, suitable for various cooking methods. |
| Japanese Types (e.g., ‘Okinawa Long’) | Very long, slender fruits (up to 16 inches / 40 cm), often dark green. | Similar uses to Chinese types, can be very productive. |
Note: Always check seed packets for specific variety characteristics and regional suitability. Sourcing seeds from reputable suppliers ensures better germination and varietal accuracy.
2. Seeds or Seedlings: Which Start is Best for You?
You can begin your bitter gourd journey either by sowing seeds directly or by purchasing young plants (seedlings). Each method has its advantages:
a. Starting with Seeds
Advantages
- Lower Cost: Seed packets are typically inexpensive, allowing you to grow many plants affordably.
- Wider Variety Selection: You’ll find a much broader range of cultivars available as seeds compared to seedlings at nurseries.
- Full Growth Experience: Witnessing the entire life cycle from a tiny seed to a fruiting vine offers immense gardening satisfaction.
- Reduced Transplant Shock Risk: Direct-sown seeds establish roots directly in their final location.
Challenges
- Longer Time to Harvest: Requires patience as germination and early growth take time (add several weeks compared to starting with seedlings).
- Germination Hurdles: Bitter gourd seeds have a tough coat; achieving good germination requires specific conditions (warmth, moisture) and sometimes pre-treatment (see Section II).
- Space & Setup for Indoor Starting: If starting indoors early, you need space, containers, suitable lighting, and careful management.
b. Opting for Seedlings
Advantages
- Head Start: Seedlings bypass the germination phase, saving you several weeks and getting you closer to harvest sooner.
- Higher Initial Success Rate: Especially beneficial for beginners, as the tricky germination stage is already complete. You start with an established young plant.
- Convenience: Simply purchase and plant; no need for seed starting equipment or processes.
Challenges
- Higher Cost Per Plant: Seedlings are significantly more expensive than seeds.
- Limited Variety Availability: Nurseries typically offer only the most common varieties.
- Potential for Transplant Shock: Seedlings must adjust to new soil and environmental conditions, requiring careful handling and acclimatisation (‘hardening off’) before planting outdoors to minimize stress.
For a deeper dive into this decision, consider resources like this article on Seed vs. Seedling pros and cons.
3. Ideal Planting Time: Catching the Warmth
Warmth is Key Bitter gourd is unequivocally a warm-season crop. It demands warm temperatures, ideally between 75°F and 85°F (24°C – 29°C), for optimal growth and fruit production. High humidity is also beneficial. Think tropical or subtropical conditions!
Avoid Frost at All Costs These plants are extremely sensitive to cold and will be damaged or killed by frost. Planting must occur only after all danger of frost has passed in the spring and when the soil has warmed sufficiently.
 Timing Guidelines:
- Direct Sowing Outdoors: Wait until late spring or early summer when soil temperatures consistently reach at least 70°F (21°C).
- Starting Seeds Indoors: In regions with shorter growing seasons, start seeds indoors about 3-4 weeks before your average last frost date. This gives plants a valuable head start.
- Transplanting Seedlings: Whether purchased or homegrown, transplant seedlings outdoors only when weather and soil conditions are reliably warm (as above for direct sowing). Be sure to harden them off first by gradually exposing them to outdoor conditions over 7-10 days.
Growing Season Length Bitter gourd needs a relatively long growing season – typically 90 to 150 frost-free days – to reach full productivity. Gardeners in cooler climates may need to use season extension techniques like greenhouses, polytunnels, or row covers to provide the necessary warmth, especially early and late in the season.
4. Spacing and Support: Giving Vines Room to Thrive
Bitter gourd plants are energetic climbers that need both adequate space and a sturdy structure to support their growth. Providing these is essential for plant health, productivity, and ease of management.
a. Spacing Requirements
Give your plants room to breathe and spread:
- Between Plants: Space individual plants about 12 to 18 inches (30 to 45 cm) apart within the row.
- Between Rows: Allow approximately 5 to 6 feet (1.5 to 1.8 meters) between rows.
This spacing ensures good air circulation (reducing disease risk), sufficient sunlight exposure for all parts of the plant, and access for tending and harvesting.
b. Providing Essential Support
Their natural vining habit means bitter gourds must have support. Supporting vines keeps fruit off the ground (preventing rot and pest damage), improves air circulation, maximizes sun exposure, and makes harvesting much easier. Choose a support system before or at the time of planting:
- Trellises: Sturdy A-frame, vertical, or arched trellises made from wood, bamboo, metal conduit, or cattle panels work well. Ensure they are tall enough (at least 5-6 feet / 1.5-1.8 m) and securely anchored.
- Netting: Strong nylon or plastic garden netting stretched between posts provides many attachment points for tendrils.
- Stakes or Cages: While less ideal for the sprawling nature of bitter gourd, very sturdy, tall tomato cages or individual stakes can work for single plants if managed carefully.
- Fences or Arbors: Existing structures can be used if they are strong enough to bear the weight of mature vines laden with fruit.

Crucial Installation Tip
Install your chosen support structure at the time of planting or very shortly after. Driving stakes or digging trellis posts later risks damaging the developing root system. Position supports near, but not directly on top of, the planting spot. Gently guide young vines towards the support as they grow, using soft ties (cloth strips, garden twine) if needed, being careful not to constrict the stem.
#### c. Benefits of Proper Support and Spacing
- Enhanced air circulation, significantly lowering the risk of fungal diseases like powdery mildew.
- Better sunlight penetration to leaves and developing fruits, boosting photosynthesis and yield.
- Cleaner fruit, kept away from soil-borne pests and diseases.
- Simplified garden tasks like weeding, fertilizing, pest monitoring, and harvesting.
5. Soil Preparation and Container Choice: The Foundation for Growth
The quality of your soil is paramount for growing healthy bitter gourd. These plants are relatively heavy feeders and require fertile, well-draining soil with good structure.
a. Preparing Garden Soil
- Test Your Soil: Start with a soil test (available through local extension offices or kits) to determine pH and nutrient levels. Aim for a pH between 6.0 and 6.8. Amend according to test recommendations – add lime to raise pH (make less acidic) or sulfur to lower pH (make less alkaline).
- Improve Drainage and Structure: Bitter gourd hates ‘wet feet’. If you have heavy clay soil, improve drainage and aeration by incorporating generous amounts of organic matter like well-rotted compost, aged manure, coconut coir, or shredded leaves. If your soil is very sandy, these same amendments will improve its ability to retain moisture and nutrients. Aim for a rich, loamy texture.
- Boost Fertility: Before planting, work in several inches of high-quality compost or well-aged manure into the top 6-12 inches (15-30 cm) of soil. You can also mix in a balanced, slow-release organic fertilizer according to package directions to provide sustained nutrition. Sustainable practice: Using homemade compost recycles kitchen and yard waste while enriching your soil naturally.
b. Selecting Soil and Containers for Potting
Bitter gourd can be grown successfully in containers, provided they are large enough:
- Container Size: Choose pots that are at least 5 gallons (approx. 18-20 litres) in volume, ideally larger (10+ gallons / 35-40+ litres). Ensure they are at least 12-15 inches (30-38 cm) deep and wide. Adequate drainage holes are non-negotiable to prevent waterlogging.
- Potting Mix: Use a high-quality, well-draining potting mix formulated for vegetables or containers. Avoid using garden soil, which compacts too easily in pots. Look for mixes containing compost, peat moss or coir, perlite, and vermiculite for good aeration, drainage, and moisture retention. You can enhance commercial mixes by adding extra compost.
Soil Management Tips
- Mulching is Key: Apply a 2-3 inch (5-8 cm) layer of organic mulch (straw, shredded bark, wood chips, leaf mold) around the base of plants (but not touching the stem). Mulch conserves soil moisture, regulates soil temperature, suppresses weeds, and slowly adds organic matter as it decomposes – a fantastic sustainable practice.
- Monitor and Adjust: Keep an eye on soil moisture throughout the season, especially in containers which dry out faster. Check nutrient levels based on plant growth and supplement if needed (see Fertilization section).
## II. Planting Bitter Gourd: A Step-by-Step Guide
With your site prepared and supplies ready, it’s time to plant! Follow these steps for success whether starting from seed or transplanting seedlings.
1. Seed Preparation (If Starting from Seed)
Bitter gourd seeds have a notoriously tough seed coat that can hinder germination. Pre-treatment significantly improves success rates:
- Scarification (Optional but Recommended): Gently nick or file the edge of the seed coat opposite the small indentation (the ‘eye’). Be very careful not to damage the inner seed (embryo). This allows water to penetrate more easily.
- Soaking is Essential: Soak the scarified (or unscarified) seeds in lukewarm water for 12-24 hours. You should notice the seeds swell slightly. Discard any seeds that float after soaking, as they are likely not viable. The state change is from a hard, dry seed to a slightly softened, hydrated one, ready to germinate.
2. Choosing the Planting Spot
- Sunlight Champion: Reconfirm your chosen spot receives at least 6-8 hours of direct sun daily.
- Soil Ready: Ensure the soil is prepared as described in Section I.5 – loose, fertile, and well-draining.
- Support Nearby: Have your trellis or support structure installed or ready to install immediately after planting.
3. Sowing Seeds or Transplanting Seedlings
- Direct Sowing: Plant pre-soaked seeds about ½ to 1 inch (1.5 – 2.5 cm) deep. Plant 2-3 seeds per spot (near the base of your support) spaced 12-18 inches (30-45 cm) apart. Planting multiple seeds ensures at least one germinates per location; you will thin later. Water gently but thoroughly after sowing to settle the soil. The soil should be consistently moist but not saturated.
- Starting Indoors (for later transplanting): Sow 1-2 prepared seeds per peat pot or biodegradable container about 3-4 weeks before the last frost. Use a quality seed-starting mix and keep warm (75-85°F / 24-29°C) and moist. Provide bright light once seedlings emerge.
- Transplanting Seedlings: If using store-bought or homegrown seedlings, handle them carefully by the root ball to minimize disturbance. Plant them at the same depth they were in their original container. Space as per direct sowing recommendations (12-18 inches apart). Water well after transplanting. Remember to harden off indoor-grown seedlings first!

4. Germination and Early Growth
- Patience and Warmth: Keep the soil consistently moist (like a wrung-out sponge) and warm. Germination typically takes 7-14 days but can be longer if conditions are cool. You’ll see the first seed leaves (cotyledons) emerge from the soil.
- Moisture Management: Avoid letting the soil dry out completely, but also prevent sogginess.
5. Thinning Seedlings
Once seedlings have developed their first set of ‘true leaves’ (these appear after the initial seed leaves and look like miniature versions of the adult plant leaves), it’s time to thin. Select the strongest, healthiest-looking seedling in each group/pot and remove the others by snipping them off at the soil line with scissors. This prevents competition for light, water, and nutrients, allowing the chosen seedling to thrive. Do not pull the extras, as this can disturb the roots of the remaining seedling.

6. Guiding onto Support
As soon as the young vines develop tendrils and start to elongate (usually when they are about 6-12 inches / 15-30 cm tall), gently guide them towards the base of your support structure. They will usually begin to climb on their own, but loose ties may help initially.
7. Mulching
Once seedlings are established (a few inches tall), apply a layer of organic mulch around the base of the plants, keeping it an inch or two away from the stem itself. This conserves moisture, suppresses weeds, and keeps the soil cooler.
III. Care and Maintenance: Nurturing Your Vines
Consistent care throughout the growing season ensures healthy vines and a bountiful harvest.

1. Watering Needs and Techniques: The Moisture Balance
- Consistency is Crucial: Bitter gourd requires consistently moist soil, especially during the critical periods of flowering and fruit development. Aim for about 1-2 inches (2.5-5 cm) of water per week, either from rainfall or irrigation. Irregular watering can lead to stress, flower drop, and poorly formed or excessively bitter fruit.
- Avoid Waterlogging: While consistent moisture is needed, saturated soil deprives roots of oxygen and promotes root rot. Ensure your soil or container drains well.
- Watering Method: Water deeply at the base of the plant, preferably in the morning. This allows foliage to dry during the day, reducing the risk of fungal diseases. Avoid overhead sprinklers. Sustainable Practice: Drip irrigation or soaker hoses are highly efficient, delivering water directly to the root zone with minimal evaporation or runoff.
- Mulch Matters: A good layer of organic mulch is your best friend for maintaining soil moisture, moderating soil temperature, and reducing watering frequency.
- Check Before Watering: Don’t water on a fixed schedule. Check the soil moisture first. Insert your finger 1-2 inches deep; if the soil feels dry at that depth, it’s time to water. Adjust frequency based on weather – more water may be needed during hot, dry spells.
- Container Considerations: Plants in containers dry out much faster than those in the ground, especially during hot weather. Check container moisture daily and water thoroughly whenever the top inch or two of soil feels dry. Ensure water drains freely from the bottom holes.
2. Fertilization Requirements: Feeding for Fruit
Bitter gourd vines are relatively heavy feeders, requiring adequate nutrients throughout their growth cycle.
- Initial Soil Enrichment: As mentioned in soil preparation, incorporating compost or aged manure before planting provides a strong foundation of slow-release nutrients.
- Early Growth Stage: A few weeks after germination or transplanting, once plants are established, you can apply a balanced organic fertilizer (e.g., granular 5-5-5 NPK or similar). Nitrogen (N) supports leafy growth initially.
- Flowering and Fruiting Stage: As the vines begin to flower and set fruit, switch to a fertilizer slightly higher in phosphorus (P) and potassium (K). Phosphorus encourages flower and fruit development, while potassium supports overall plant health and fruit quality. Examples include fertilizers derived from bone meal (P) and kelp meal or greensand (K), or a commercial “bloom booster” formula. Avoid excessive nitrogen at this stage, as it can promote excessive leaf growth at the expense of fruit production.
- Application Frequency: Side-dress with granular fertilizer or apply liquid feeds every 4-6 weeks during the active growing season, following package instructions. Adjust based on plant appearance – lush, dark green leaves usually indicate sufficient nitrogen; pale leaves might signal a deficiency.
- Organic Feeding Options: Compost tea, diluted fish emulsion, or worm castings are excellent organic liquid feeds that provide readily available nutrients and beneficial microbes. Apply according to directions, usually every 2-4 weeks. Sustainable Practice: Relying on compost and organic amendments builds long-term soil health, reducing the need for frequent synthetic fertilizer applications.
- Container Feeding: Nutrients leach out of containers more quickly. Fertilize container-grown plants more frequently, perhaps every 2-3 weeks, using a diluted liquid fertilizer or incorporating slow-release granules into the potting mix at planting.
- Observe Your Plants: The best guide is the plant itself. Watch for signs of deficiency (yellowing leaves, stunted growth, poor flowering/fruiting) or excess (burnt leaf tips, overly lush foliage with few flowers) and adjust your feeding strategy accordingly.
3. Pruning and Training Vines: Managing Growth
While not strictly essential, some pruning and consistent training can improve yield, manage plant size, and enhance air circulation.
- Why Prune & Train?: Training guides the vines onto their support, maximizing light exposure and keeping fruit clean. Pruning can remove non-productive growth, improve airflow (reducing disease risk), and potentially encourage more lateral (fruiting) branches.
- When to Start Training: Begin guiding main stems onto the trellis as soon as they are long enough to reach it (see Section II.6).
- Pruning Basics: - Consider removing the first 4-6 lower lateral (side) shoots that emerge from the main stem. This encourages the plant to focus energy on upward growth initially. - Once the main vine reaches the top of the trellis, you can pinch off its growing tip to encourage the development of more lateral branches, where most fruit is produced. - Remove any yellow, damaged, or diseased leaves and stems promptly throughout the season. - If growth becomes overly dense, selectively prune some non-fruiting laterals or leaves from the center of the plant to improve air circulation.
- Ongoing Training: Continue to gently tuck or tie growing vines onto the support structure as needed throughout the season. Use soft, flexible ties that won’t cut into the stems.
- Container Pruning: Pruning might be more necessary for container plants to keep them manageable within their space and support structure.
- Don’t Overdo It: Avoid excessive pruning, especially once the plant is actively flowering and fruiting, as leaves are needed for photosynthesis to support fruit development.
4. Companion Plants for Bitter Gourd: Creating a Beneficial Community
Planting certain companions near bitter gourd can help deter pests, improve soil fertility, or attract beneficial insects. Consider these options as part of an integrated garden system:
a. Nitrogen Fixers (Beans & Peas)
Legumes like bush beans, pole beans, or peas host nitrogen-fixing bacteria on their roots. These bacteria convert atmospheric nitrogen into a form usable by plants, naturally enriching the soil and benefiting nearby heavy feeders like bitter gourd. Pole beans can even share the same trellis if space allows, but ensure adequate spacing.
b. Pest Deterrents (Radishes & Marigolds)
- Radishes: Some gardeners believe radishes help deter cucumber beetles, a common pest of gourds. Their quick growth cycle means they are harvested before competing significantly with the main crop.
- *Marigolds (Tagetes species):* Certain types of marigolds release compounds (e.g., alpha-terthienyl) from their roots that can suppress populations of root-knot nematodes in the soil. They also attract beneficial insects. Choose strongly scented varieties. Nasturtiums can act as a trap crop for aphids.
c. Beneficial Attractors (Herbs & Flowers)
Planting aromatic herbs like dill, oregano, or flowering plants like alyssum nearby can attract beneficial insects such as ladybugs, lacewings, and parasitic wasps, which prey on common garden pests like aphids.
d. Ground Cover / Living Mulch (Spinach)
Low-growing, cool-season crops like spinach can be planted early around the base of the bitter gourd support. They act as a living mulch, suppressing weeds and conserving moisture, and can be harvested before the gourd vines become too large and shade them out.
Note: Companion planting effects can be subtle and vary based on specific conditions and pest pressures. It’s best used as one component of a broader healthy garden strategy, including crop rotation and organic pest management.
IV. Harvesting Bitter Gourd: Reaping Your Reward

1. Signs of Optimal Maturity for Eating
Harvesting at the right stage is key to managing bitterness and getting the best texture. Look for these signs:
- Color: Fruits should be a consistent green colour (light to dark, depending on variety). Any yellowing indicates over-ripeness for culinary use (though needed for seed saving). The fruit should look vibrant, not dull.
- Size: Harvest according to the expected mature size for your specific variety (check the seed packet). Generally, this is between 4 to 12 inches (10 to 30 cm) long. Harvesting slightly younger often results in less bitterness. Don’t wait for them to reach maximum possible size, as they can become fibrous and overly bitter.
- Firmness and Texture: Gently squeeze the fruit. It should feel firm and solid. The ridges or warts characteristic of the variety should be well-defined. If it feels soft or spongy, it’s likely overripe.
- Skin Sheen: Young, perfectly ripe gourds often have a slight gloss or sheen to their skin.
- Seeds (Internal Check – Occasional): If unsure, harvest one fruit and cut it open. For eating, the seeds inside should be small, soft, and white or pale. Hard, dark seeds indicate the fruit is past its prime culinary stage.

2. Proper Harvesting Techniques
- Use Clean, Sharp Tools: Always use sharp pruning shears, scissors, or a knife to harvest. This makes a clean cut and prevents tearing the vine, which can invite disease.
- Cut the Stem: Cut the fruit from the vine, leaving about ½ to 1 inch (1-2 cm) of stem attached to the fruit. This can help prolong its storage life slightly.
- Avoid Pulling: Never pull or twist the fruit off the vine. This can damage the vine itself and potentially dislodge other developing flowers or fruits.
- Harvest Timing: The best time to harvest is typically in the cool morning hours after the dew has dried. Plants are most turgid then, and the harvested fruits will store better.
- Harvest Regularly: Check your vines every 1-3 days during peak season. Bitter gourds can grow quickly! Regular harvesting encourages the plant to produce more flowers and fruits. Leaving overripe fruits on the vine signals the plant to slow down production.
- Handle Gently: Bitter gourds can bruise easily. Handle them with care after harvesting.
3. Storing and Preserving Your Harvest
Fresh bitter gourd is best used soon after harvesting, but you can store or preserve it using these methods:
- Short-Term Refrigeration: Place unwashed, dry bitter gourds in a perforated plastic bag or wrap loosely in paper towels and store in the vegetable crisper drawer of your refrigerator. They should keep well for 5-7 days.
- Freezing for Longer Storage: 1. Wash, slice, or chop the gourds as desired. Optional: Blanching can help preserve texture and colour. To blanch, boil the pieces for 2-3 minutes, then immediately plunge them into ice water to stop the cooking process. 2. Drain thoroughly (pat dry if blanched). 3. Spread pieces in a single layer on a baking sheet and freeze until solid. 4. Transfer the frozen pieces to airtight freezer bags or containers, removing as much air as possible. Frozen bitter gourd can last for several months and is best used in cooked dishes like soups or stir-fries.
- Drying: Slice bitter gourd thinly (about ⅛ inch / 3 mm). Dry the slices in a food dehydrator, a low oven (around 135°F / 57°C with the door slightly ajar), or in the sun (in hot, dry climates with good air circulation) until completely brittle. Store the dried pieces in an airtight container in a cool, dark place. Rehydrate before using or add directly to soups.
- Pickling: Bitter gourd makes excellent pickles. Typically, slices are salted for a few hours or overnight (and rinsed) to reduce bitterness before being pickled in a brine of vinegar, sugar, salt, and spices. Store pickled bitter gourd in the refrigerator.
- Saving Seeds for Next Season: To save seeds, you must let fruits fully ripen *on the vine*. They will turn yellow or orange and often split open, revealing seeds coated in a bright red, fleshy aril. 1. Harvest these overripe fruits. 2. Scoop out the seeds and wash off the red aril thoroughly. 3. Spread the cleaned seeds on paper towels or a screen to dry completely in a well-ventilated area away from direct sunlight for 1-2 weeks. They should be hard and snap easily when dry. 4. Store dried seeds in a labelled envelope or airtight container in a cool, dark, dry place. Note: Seeds saved from hybrid (F1) varieties may not grow true to the parent plant. Choose open-pollinated varieties for reliable seed saving.

V. Troubleshooting Common Issues & FAQ
Even with careful planning, challenges can arise. Here’s how to address common bitter gourd problems using primarily organic and sustainable approaches, followed by frequently asked questions.
1. Common Issues and Organic Solutions
- Poor Seed Germination: Cause: Old/non-viable seeds, soil too cold, inconsistent moisture (too wet or too dry), tough seed coat. Solution: Use fresh seeds from a reputable source. Ensure soil temperature is consistently above 70°F (21°C). Scarify and soak seeds before planting (see Section II.1). Maintain even moisture.
- Yellowing Leaves (Lower Leaves First): Cause: Often nitrogen deficiency. Could also be overwatering, underwatering, or other nutrient imbalances. Solution: Apply a balanced organic fertilizer or nitrogen-rich supplement like compost tea or diluted fish emulsion. Check soil moisture and adjust watering practices. Ensure good drainage.
- Flower Drop (Flowers fall off before setting fruit): Cause: Temperature stress (too hot or too cold), inconsistent watering, excessive nitrogen fertilization, poor pollination, natural shedding of male flowers (which don’t produce fruit). Solution: Provide consistent water. Avoid high-nitrogen fertilizers once flowering begins. If heat is extreme, provide afternoon shade. Ensure pollinators are present or try hand-pollination (see below). Remember male flowers naturally drop after releasing pollen.
- Poor Fruit Set (Female flowers present but don’t develop into fruit): Cause: Lack of pollination is the most common reason. Nutrient deficiency (especially potassium or phosphorus), extreme temperatures, or water stress can also contribute. Solution: Encourage pollinators (bees) by planting attractive flowers nearby. Hand-pollinate: In the morning, identify male flowers (on a plain stalk) and female flowers (with a tiny immature fruit at the base). Gently transfer pollen from the male stamen to the female stigma using a small brush, cotton swab, or by carefully touching the male flower’s center to the female flower’s center. Ensure balanced fertilization and consistent watering.
- Pests (Aphids, Spider Mites, Cucumber Beetles, Fruit Flies): Cause: Various insects are attracted to gourds. Solution (Organic IPM): – Aphids/Mites: Strong spray of water, insecticidal soap, or neem oil. Encourage beneficial insects (ladybugs, lacewings). – Cucumber Beetles: Handpick early in the morning. Use floating row covers early in the season (remove when flowering starts for pollination). Yellow sticky traps can help monitor. Some organic pesticides based on pyrethrin can be used cautiously if infestations are severe. Crop rotation helps reduce overwintering pests. – Fruit Flies: Bagging young, developing fruits with paper or mesh bags after pollination can prevent egg-laying. Sanitation (removing fallen/overripe fruit) is crucial.
- Diseases (Powdery Mildew, Downy Mildew, Anthracnose): Cause: Fungal or bacterial pathogens, often thriving in humid conditions with poor air circulation. Solution (Prevention is Key): Ensure proper spacing and trellising for good air circulation. Water at the base of plants, avoid wetting foliage. Prune dense growth. Remove and destroy infected leaves/plants immediately. Choose disease-resistant varieties if available. Apply organic fungicides (copper, sulfur, potassium bicarbonate-based, or neem oil) as a preventative or at first sign of disease, following label directions carefully. Practice crop rotation (don’t plant gourds in the same spot for 3-4 years).
- Fruits are Excessively Bitter or Malformed: Cause: Often due to plant stress – inconsistent watering, extreme heat, nutrient imbalances, or poor pollination can affect fruit shape and flavour intensity. Harvesting too late also increases bitterness. Solution: Maintain consistent soil moisture. Provide afternoon shade during intense heat. Ensure balanced nutrition. Practice hand-pollination if needed. Harvest fruits when they are young and tender at the correct size for the variety.
- Blossom End Rot (Dark, sunken spot on the blossom end of the fruit): Cause: Usually a calcium uptake issue, often triggered by inconsistent watering rather than a lack of calcium in the soil. Solution: Maintain consistent soil moisture through regular watering and mulching. Ensure soil pH is appropriate for nutrient uptake. Avoid high-nitrogen fertilizers, which can interfere with calcium uptake. In rare cases of true soil deficiency, calcium amendments might be needed (based on soil test).
2. FAQ: Your Bitter Gourd Questions Answered
Can bitter gourd be grown successfully in containers?
Absolutely! Choose a large container (minimum 5-gallon, ideally 10+ gallon) with excellent drainage. Use a quality potting mix, provide sturdy support, and be diligent with watering and fertilizing, as containers dry out and lose nutrients faster.
How long does it take for bitter gourd plants to produce fruit?
Typically, you can expect the first harvest about 50 to 70 days after sowing seeds, though this varies depending on the specific variety and growing conditions (temperature, sunlight, care).
How do I know exactly when my bitter gourd is ready to pick?
Harvest based on the variety’s expected size, when the fruit is firm, has reached its characteristic green colour (before any yellowing), and ideally feels heavy for its size. Taste preference also plays a role; younger fruits are generally less bitter.

How often should I water my bitter gourd plants?
Aim to keep the soil consistently moist but not waterlogged. Check the soil moisture every 1-2 days (more often for containers or in hot weather) and water deeply when the top 1-2 inches feel dry. Aim for 1-2 inches of water per week total.
What plants make good companions for bitter gourd?
Legumes (beans, peas) for nitrogen fixation, aromatic herbs (dill, oregano) and flowers (marigolds, alyssum) to attract beneficial insects and deter some pests, and radishes are often cited. Avoid planting very close competition like potatoes.
Why are my bitter gourd fruits small, misshapen, or curling?
This often points to incomplete pollination. Other causes include nutrient deficiencies (especially potassium or boron), inconsistent watering, or damage from pests (like thrips) during early fruit development. Address pollination, water, and nutrient issues first.
Is it possible to save seeds from the bitter gourd I grow?
Yes, especially from open-pollinated (non-hybrid) varieties. Let selected fruits fully ripen on the vine until yellow/orange, then harvest, clean the seeds by removing the red aril, dry them thoroughly, and store in a cool, dark, dry place.
My bitter gourd is too bitter! How can I reduce the bitterness?
Bitterness is characteristic, but you can reduce it: 1) Choose milder varieties. 2) Harvest fruits when young and tender. 3) Before cooking, slice the gourd, lightly salt the pieces, let them sit for 30 minutes, then rinse and squeeze out excess liquid. Blanching briefly can also help.
Is pruning bitter gourd vines necessary?
It’s not strictly required, but selective pruning (removing lower laterals, pinching the main vine tip, removing dense/unproductive growth) can improve air circulation, potentially increase yield, and make management easier, especially on trellises.
How long does it take for bitter gourd seeds to germinate?
Under ideal conditions (warm soil 75-85°F / 24-29°C, consistent moisture), germination typically occurs within 7 to 14 days. Cooler temperatures will slow germination significantly.
How often should I fertilize bitter gourd plants?
Fertilize every 4-6 weeks during the growing season, adjusting based on plant growth and soil type. Start with balanced fertilizer, then switch to one slightly higher in P and K during flowering/fruiting. Container plants need more frequent feeding (e.g., every 2-3 weeks with diluted liquid fertilizer).
How can I encourage more female flowers (the ones that produce fruit)?
Ensure adequate sunlight (6-8+ hours), consistent water, and balanced fertilization (avoid excess nitrogen). Sometimes, pinching the main vine tip after it reaches a certain length (e.g., top of trellis) can encourage lateral branches, which often bear more female flowers. Hand pollination ensures fruit set from existing female flowers. Stress can reduce female flower production.
Comments (0)
No comments yet. Be the first to share your thoughts.