 Skip to content
How to Grow Watercress Indoors and Outdoors
Watercress holds a special place for salad lovers and culinary adventurers, celebrated for its distinctive peppery bite and impressive nutritional
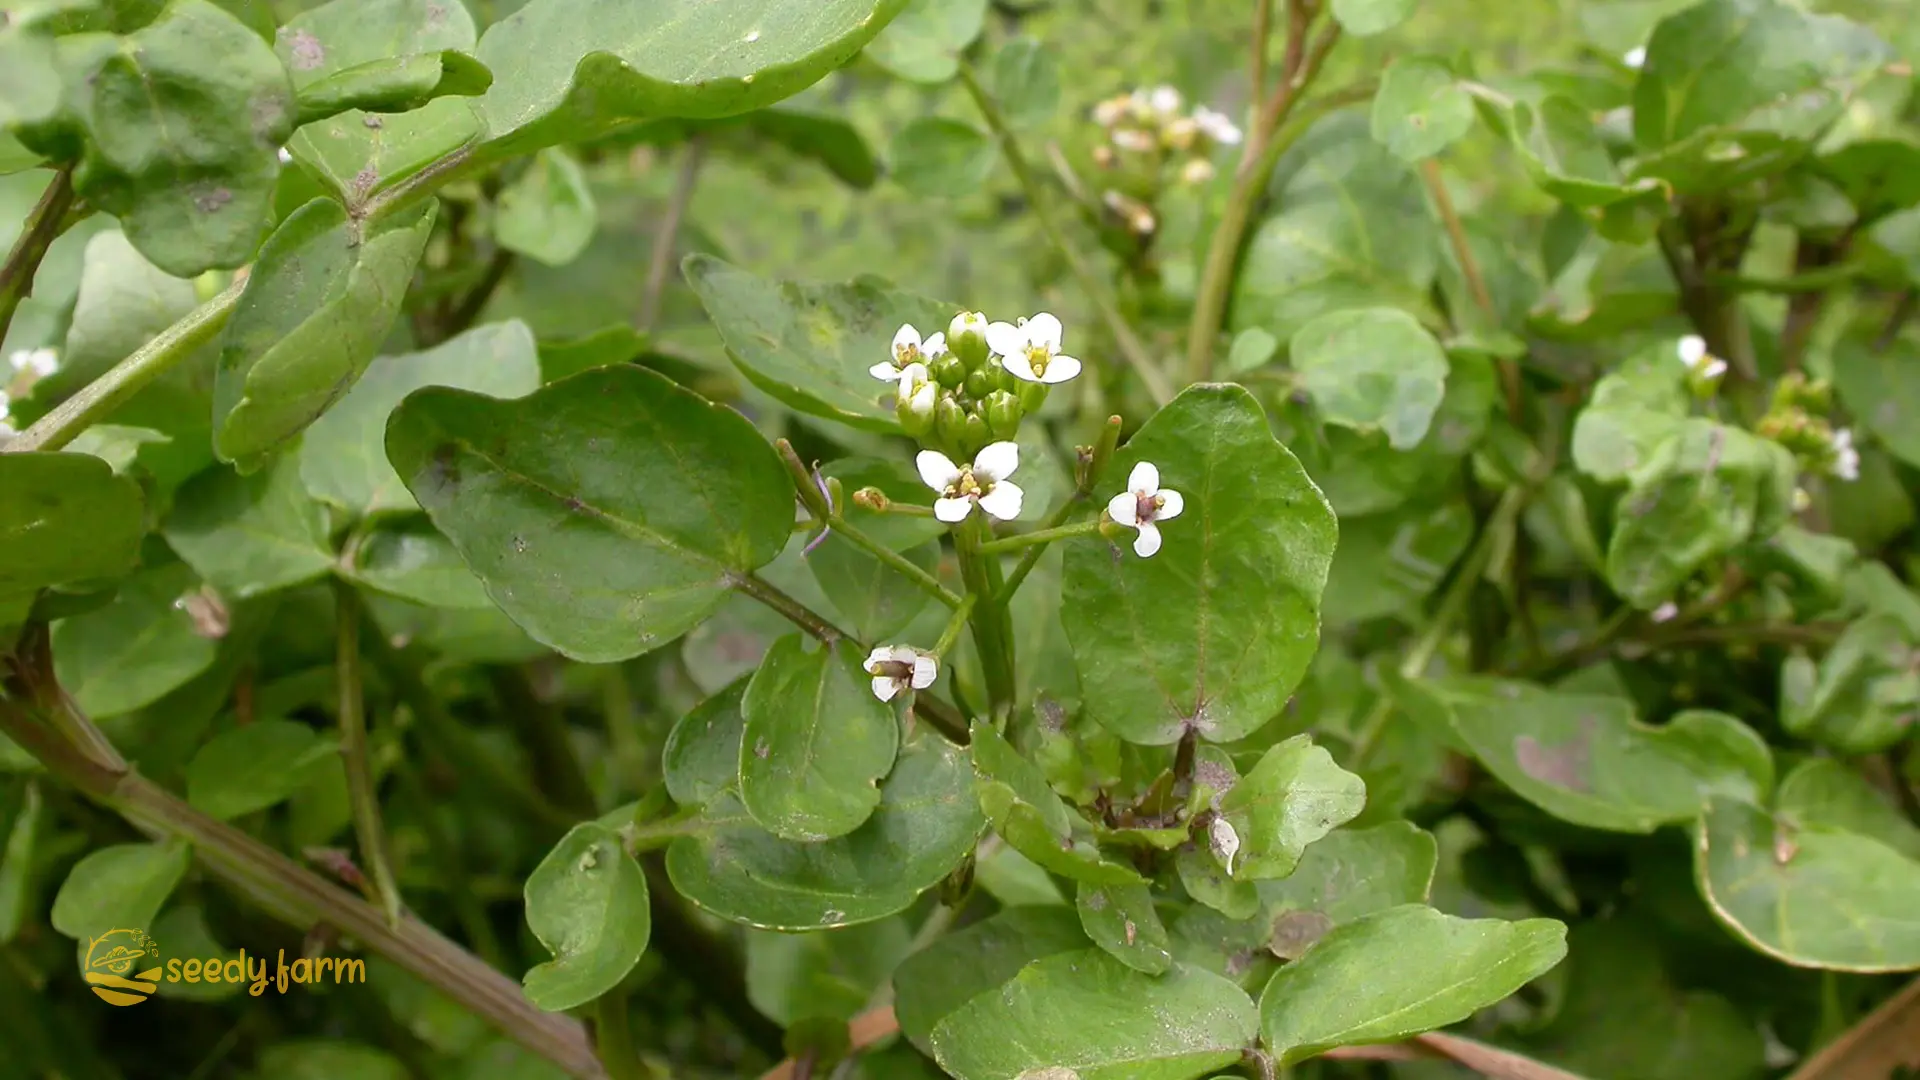
Watercress holds a special place for salad lovers and culinary adventurers, celebrated for its distinctive peppery bite and impressive nutritional profile. While often pictured thriving in pristine, slow-moving streams, watercress (Nasturtium officinale) is surprisingly adaptable, making it an excellent candidate for home cultivation. Whether you have a garden bed, a container on your balcony, or even just a sunny windowsill, growing your own supply of this vibrant green is achievable. This guide will walk you through the essential steps to successfully cultivate watercress at home, ensuring you have a fresh, nutritious harvest readily available.
| Specification | Value |
|---|---|
| Scientific Name | Nasturtium officinale |
| Common Names | Watercress, Garden Cress, Cresson |
| Plant Family | Brassicaceae (Mustard Family) |
| Plant Type | Perennial Aquatic/Semi-aquatic Herb |
| Growth Habit | Spreading, often forming floating mats in water or creeping in moist soil |
| Mature Height | Typically 6-10 inches (15-25 cm) in cultivation, can trail longer |
| Mature Spread | 12-24 inches (30-60 cm) or more, depending on conditions |
| Leaf Shape | Compound, pinnate (feather-like arrangement of leaflets) |
| Leaf Color | Rich Green |
| Flower Color | White, small, 4-petaled, typical of Brassicaceae |
| Culinary Uses | Salads, soups, sandwiches, sauces, garnishes |
| Flavor Profile | Distinctively peppery, slightly tangy, refreshing |
| Ideal Growing Conditions | Cool temperatures, consistently moist soil or shallow, clean water |
| Native Region | Europe and Asia |
## I. Understanding Watercress and Its Needs
1. What is Watercress?
Watercress (Nasturtium officinale) is a fast-growing, perennial herb belonging to the Brassicaceae family, which also includes mustard, cabbage, and kale. It’s renowned for its pungent, peppery-tasting leaves and tender stems, which add a zesty kick to various dishes. In its natural habitat, it flourishes along the edges of clear, cool, slow-moving streams and springs. Beyond its culinary appeal, watercress is a nutritional powerhouse, densely packed with essential vitamins and minerals.
Nutritional Highlights (Approximate values per 100g, raw):
| Nutrient | Amount (per 100g) | Primary Benefit |
|---|---|---|
| Calories | ~11 kcal | Extremely low-calorie food |
| Protein | ~2.3 g | Contributes plant-based protein |
| Fiber | ~0.5 g | Supports digestive health |
| Vitamin K | ~250 mcg (over 100% DV) | Crucial for blood clotting and bone metabolism |
| Vitamin C | ~43 mg (~72% DV) | Potent antioxidant, supports immune function |
| Vitamin A | ~3191 IU (~64% DV) | Supports vision, immune function, and skin health |
| Folate | ~9 mcg (~2% DV) | Important for cell division and DNA synthesis |
| Calcium | ~120 mg (~12% DV) | Essential for bone health |
| Manganese | ~0.24 mg (~12% DV) | Involved in metabolism and antioxidant defence |
| Antioxidants | High Levels | Contains phenylethyl isothiocyanate (PEITC), glucosinolates, carotenoids (lutein, beta-carotene), flavonoids, beneficial for cellular health. |
Note: Nutrient values can vary based on growing conditions and variety. DV = Daily Value.
2. Ideal Growing Conditions
Successfully growing watercress hinges on replicating its preferred cool, moist environment. Key factors include:
| Aspect | Ideal Conditions | Notes |
|---|---|---|
| Light | Full sun to partial shade | Prefers at least 4-6 hours of direct sunlight daily. In hot climates (zones 8+), afternoon shade is beneficial to prevent bolting (premature flowering) and stress. |
| Temperature | Cool: 50-65°F (10-18°C) optimal | Tolerates slightly warmer temperatures but thrives in cool weather. Growth slows significantly in heat. Frost tolerant but may die back in hard freezes. |
| Water | Consistently moist soil or shallow, flowing water | Crucial requirement. Soil should never dry out. Stagnant water should be avoided or refreshed regularly. |
| Soil pH | Slightly alkaline: 6.5-7.5 | Adaptable but prefers this range for optimal nutrient uptake. |
| Soil Type | Rich, fertile loam or compost-based mix | Needs good water retention combined with some drainage to prevent root rot in static setups. High organic matter content is ideal. |
| Humidity | Moderate to High | Prefers humid conditions, mimicking its natural streamside habitat. |
### 3. Creating a Suitable Growing Environment at Home
You don’t need a natural stream! Here are effective ways to create the right conditions:
- Natural Water Features: If you are fortunate enough to have a clean, slow-moving stream or pond edge on your property (ensure water is unpolluted), watercress can be established directly in the shallow edges, anchoring roots in the substrate.
- DIY Water Bog/Furrow: Mimic a streamside environment in your garden. Dig a shallow trench or furrow, about 6-8 inches (15-20 cm) deep. Line it carefully with food-grade pond liner or heavy-duty (6 mil) polyethylene plastic, ensuring no leaks. Fill the bottom 2-3 inches (5-7.5 cm) with a rich mix of compost and garden soil. Keep this area consistently saturated with fresh water.
- Container Growing (The “Double Pot” Method): This is highly effective and adaptable. Use a solid outer container (without drainage holes) and an inner pot (with drainage holes) that fits inside. Plant watercress in the inner pot using a rich, moisture-retentive potting mix (e.g., compost-based mix with perlite for aeration). Place the inner pot into the outer container and keep the outer container filled with 1-2 inches (2.5-5 cm) of fresh water at all times. This ensures the soil stays constantly moist from the bottom up. Refresh the water in the outer container every 2-3 days to prevent stagnation.
- Simple Container Method: Use a large pot or trough *with* drainage holes, but place it inside a deep saucer or tray. Fill the pot with a rich, moisture-retentive potting mix. Keep the saucer constantly filled with 1-2 inches (2.5-5 cm) of water. Ensure the potting mix wicks moisture effectively.

4. Soil Requirements and Preparation
Watercress thrives in fertile conditions. Prepare your chosen growing area thoughtfully:
- Garden Beds/Furrows: Amend the soil generously before planting. Incorporate 3-4 inches (7.5-10 cm) of fully decomposed compost or well-rotted manure into the top 6-8 inches (15-20 cm) of soil. This improves fertility, structure, and, crucially, water retention. Ensure the final soil mix is fine and free of large clumps.
- Containers: Use a high-quality, peat-free potting mix rich in organic matter. A blend of good compost, coir (coconut fiber), and a small amount of perlite or vermiculite works well. Avoid standard garden soil in containers as it compacts too easily. Pre-moisten the mix thoroughly before planting until it is damp but not sodden.
- Soil State: Before planting seeds or transplants, the soil surface should be level, fine-textured, and consistently moist throughout.
- Sustainable Soil Amendments: Consider using homemade compost, worm castings (vermicompost), or leaf mold as sustainable sources of organic matter and nutrients. These improve soil health naturally.
II. Planting Watercress: Seeds, Transplants, or Cuttings
Watercress can be propagated in several ways. Choose the method that best suits your situation and timeline.
1. Starting from Seeds
Growing from seed is economical and satisfying. Watercress seeds are tiny and require light for germination.
a. Indoor Seed Starting (Recommended for earlier start)
- Timing: Start seeds indoors 4-6 weeks before your last expected spring frost. This gives you established seedlings ready to plant out when conditions are favourable.
- Containers & Mix: Use clean seed trays or small pots with drainage holes. Fill with a fine, sterile seed-starting mix or the rich potting mix described earlier. Moisten the mix thoroughly until damp but not waterlogged.
- Sowing: Sprinkle the tiny seeds thinly over the surface of the prepared mix. Gently press them down to ensure good contact with the moist soil. Do not cover the seeds with soil, as they need light to germinate.
- Germination Conditions: Cover the tray or pots with a clear plastic dome or plastic wrap to maintain high humidity. Place in a bright location with indirect light (direct sun can overheat the covered tray) or under grow lights. Aim for temperatures between 50-65°F (10-18°C). Keep the mix consistently moist, watering gently from the bottom or using a fine mist sprayer to avoid dislodging seeds. Germination typically occurs within 7-14 days.
- Seedling Care & Transplanting: Once seeds germinate, remove the cover. Continue to provide bright light and keep the mix moist. When seedlings have developed their first set of true leaves (the second set of leaves that appear after the initial seed leaves, or cotyledons) and are large enough to handle carefully, thin them or transplant them into individual small pots if overcrowded. Harden them off gradually to outdoor conditions over a week before planting into their final garden spot or larger container after the danger of frost has passed. Space plants about 6-8 inches (15-20 cm) apart.
b. Direct Sowing Outdoors
- Timing: Sow seeds directly into your prepared garden bed, furrow, or outdoor container after the last frost date, once soil temperatures are consistently above 50°F (10°C). Cool spring or autumn conditions are ideal.
- Site Preparation: Ensure your chosen spot is prepared as described in Section I-4, with rich, consistently moist soil and appropriate light exposure. The soil surface should be smooth and level.
- Sowing: Scatter seeds thinly over the moist soil surface. Gently press them down for good soil contact. Remember, do not cover them.
- Moisture & Germination: Keep the seedbed consistently moist using a fine mist or gentle watering can setting. Avoid washing the tiny seeds away. Protect from heavy rain if necessary. Germination should occur in 7-14 days in optimal cool, moist conditions.
- Thinning: Once seedlings have their true leaves and are about 1-2 inches (2.5-5 cm) tall, thin them carefully to stand about 6-8 inches (15-20 cm) apart. This spacing allows for good air circulation and prevents overcrowding, reducing disease risk. Thinned seedlings can often be gently transplanted elsewhere or eaten as microgreens.
2. Starting from Transplants or Cuttings
Using established plants or cuttings gives you a head start.
a. Using Transplants (Nursery-bought or Homegrown)
- Acquiring Transplants: Purchase healthy, vigorous-looking watercress plants from a reputable nursery, or use the seedlings you started indoors. Look for plants with bright green leaves and a well-developed root system (check drainage holes if possible). Ensure they are free from pests or disease signs.
- Site Preparation: Prepare the garden bed, furrow, or container as detailed previously (Section I-4). Ensure the soil is thoroughly moist before planting.
- Planting: Gently remove the transplant from its pot, disturbing the roots as little as possible. Dig a hole slightly larger than the root ball. Place the transplant in the hole so the top of the root ball is level with the surrounding soil surface. Backfill gently, firming the soil around the roots to eliminate air pockets. Space plants 6-8 inches (15-20 cm) apart.
- Watering In: Water thoroughly immediately after planting to settle the soil and hydrate the roots. Maintain consistent moisture as the plants establish.
b. Propagating from Cuttings (Easy & Fast!)
Watercress roots very readily from stem cuttings, even from bunches bought at the grocery store (choose fresh, unwilted bunches).
- Obtaining Cuttings: Select healthy, robust stems, ideally 4-6 inches (10-15 cm) long. Use sharp, clean scissors or pruners to take the cuttings.
- Preparing Cuttings: Gently remove the leaves from the lower 1-2 inches (2.5-5 cm) of each stem. These cleared areas contain nodes (points where leaves were attached), which is where roots will primarily develop.
- Rooting Cuttings in Water: Place the prepared cuttings in a jar or glass of clean, fresh water, ensuring the lower, leafless portion (including the nodes) is submerged. Change the water every 1-2 days to keep it fresh and oxygenated. Place the jar in a bright spot out of direct sunlight. Roots should start appearing from the nodes within a few days to a week.
- Rooting Cuttings in Soil: Alternatively, insert the prepared cuttings directly into a pot filled with consistently moist potting mix or into your prepared garden bed. Make small holes with a pencil or dibber, insert the cuttings so the lower nodes are below the soil surface, and gently firm the mix around them. Keep the soil very moist and provide high humidity (e.g., cover with a plastic bag or dome initially) until roots form.
- Transplanting Rooted Cuttings: Once cuttings rooted in water have developed a healthy network of roots (about 1 inch / 2.5 cm long), carefully transplant them into your prepared soil or containers, spacing them 6-8 inches (15-20 cm) apart. Water well after planting.
3. Key Planting Considerations
- Spacing: Consistent spacing of 6-8 inches (15-20 cm) apart is recommended for mature plants, whether started from seed, transplants, or cuttings. This allows ample room for spreading and promotes good air circulation, which helps prevent fungal diseases.
- Depth: Plant transplants and rooted cuttings at the same depth they were previously growing. Sow seeds on the surface.
- Initial Care: Regardless of the method, keep newly planted watercress consistently moist and protect young plants from harsh sun or wind until established.
4. Comparing Indoor vs. Outdoor Growing
| Aspect | Indoor Growing | Outdoor Growing |
|---|---|---|
| Environmental Control | High: Easier to manage temperature, light (with grow lights), and moisture precisely. | Lower: Subject to weather fluctuations, seasons, and ambient conditions. |
| Space | Flexible: Suitable for small spaces like windowsills, balconies (using containers). | Variable: Requires garden space, potentially near water or requiring prepared beds/furrows. |
| Pest & Disease Pressure | Generally Lower: Controlled environment reduces exposure, but issues like spider mites or fungus gnats can occur. | Potentially Higher: Exposed to a wider range of garden pests (snails, aphids, flea beetles) and soil-borne diseases. |
| Water Management | Contained: Easier to maintain consistent moisture using double pots or trays. Water conservation possible. | More Demanding: Requires vigilant watering or specific setups (furrows, streamside) to maintain constant moisture. Risk of runoff. |
| Seasonality | Year-Round Possible: With adequate light and cool conditions, can be grown through winter indoors. | Typically Seasonal: Best growth in cool spring and autumn. May struggle or bolt in summer heat, go dormant or die back in winter freezes (depending on zone). |
| Yield | Potentially Lower per Plant: Limited root run in containers might restrict size compared to ideal outdoor conditions. | Potentially Higher per Plant: Can spread more vigorously in suitable garden conditions. |
| Setup | May require pots, trays, potting mix, potentially grow lights. | May require soil amendment, liners, or proximity to existing water features. |
## III. Caring for Your Watercress: Watering and Maintenance
Ongoing care focuses primarily on maintaining moisture and providing adequate nutrition.
1. Maintaining Consistent Moisture Levels: The Golden Rule
This is the most critical aspect of watercress care. The soil or growing medium must *never* be allowed to dry out completely.
- Garden/Furrow Growth: Water daily, or even twice daily during hot, dry weather, to keep the soil saturated. The goal is constantly damp, cool soil. If using a lined furrow, ensure the water level remains consistent. Consider drip irrigation or a soaker hose laid in the bed for efficient, consistent watering.
- Container Growth (Double Pot/Saucer): Regularly check the water level in the outer pot or saucer and refill as needed, typically daily. Aim to keep 1-2 inches (2.5-5 cm) of fresh water available for the inner pot to wick up. Crucially, change the water in the reservoir completely every 2-3 days. This prevents water from becoming stagnant, depleted of oxygen, and potentially harboring algae or bacteria. Use fresh, clean water.
- Indoor Growth: Similar to container growth, maintain the water reservoir. Mist plants occasionally if the indoor air is very dry, especially during winter heating season, to boost local humidity.
- Water Quality: Use clean water. Avoid heavily chlorinated tap water if possible (letting it sit out overnight can help dissipate some chlorine) or use filtered/rainwater.
- Monitoring: Visually check the soil surface daily. Feel the soil – it should always feel damp to the touch. Wilting is a clear sign of insufficient moisture.
- Sustainability Note: While watercress needs lots of water, using contained systems like the double pot method or targeted irrigation like drip lines minimizes waste compared to broad spraying. Collecting rainwater for irrigation is an excellent sustainable practice.
2. Nutrient Requirements and Feeding
Watercress grows rapidly and benefits from a steady supply of nutrients, especially nitrogen for leafy growth.
- Soil Fertility: Starting with rich, compost-amended soil provides a good foundation.
- Fertilization Needs: In soil beds, top-dressing with compost mid-season can replenish nutrients. For container-grown watercress or if growth seems slow, supplemental feeding is beneficial.
- Choosing Fertilizers: - Balanced Liquid Fertilizer: Use a balanced, water-soluble fertilizer (e.g., 10-10-10 or similar) diluted to half-strength, applied every 2-3 weeks during active growth. - Organic Options (Recommended for Sustainability): Use diluted fish emulsion, seaweed extract, or compost tea every 2-3 weeks. These provide nutrients and support soil microbial life. Follow product instructions for dilution rates. Worm castings incorporated into the potting mix or used as a top dressing also provide slow-release nutrients.
- Application: Apply liquid fertilizers to the soil/water reservoir, not directly on the leaves, to avoid potential burn (unless using a specific foliar feed product according to instructions).
- Nutrient Deficiency Signs: - Yellowing Lower Leaves: Often indicates nitrogen deficiency. Increase feeding frequency slightly or use a slightly higher nitrogen organic source like fish emulsion. - Stunted Growth/Purplish Tinge: Can indicate phosphorus deficiency, though less common if using compost. Bone meal (use cautiously and sustainably) or rock phosphate can help if a soil test confirms deficiency. - Leaf Edge Browning/Scorching: May suggest potassium deficiency. Kelp meal or greensand are organic sources. - Yellowing Between Veins (Young Leaves): Classic sign of iron deficiency (chlorosis), more likely in overly alkaline conditions. Chelated iron or seaweed extract can help. Ensure pH is within the optimal range (6.5-7.5).
- Avoid Over-Fertilization: Too much fertilizer, especially synthetic types, can harm plants and potentially contaminate water. Follow dilution rates carefully. If using synthetic fertilizers in containers, occasionally flush the pot with clean water to prevent salt buildup.
3. Weed Control and Mulching
Keeping the growing area free of weeds reduces competition for water, nutrients, and light.
- Weed Management: Gently remove any weeds by hand as soon as they appear. Be careful not to disturb the shallow roots of the watercress. Weeds can quickly overwhelm young plants.
- Mulching: While traditional mulch might be difficult in very wet or container setups, a thin layer of fine, washed gravel or sand on the soil surface in containers can help suppress algae growth and deter some soil-dwelling pests like fungus gnats. In garden beds where the soil is consistently moist but not submerged, a light layer of organic mulch like straw or shredded leaves applied *around* the plants (not touching the stems) can help retain moisture and deter weeds. Ensure mulch doesn’t impede water flow or saturation at the root zone.
IV. Harvesting and Storing Your Watercress
 Harvesting regularly encourages bushier growth and provides a continuous supply.
1. When and How to Harvest
- Timing: Watercress is typically ready for its first harvest about 3-4 weeks after germination or planting transplants/cuttings, once stems are 4-6 inches (10-15 cm) tall. Harvest frequently – every 1-2 weeks during peak growth.
- Best Flavor: Flavor is generally best during cooler weather (spring and autumn). Hot weather can make the leaves more intensely peppery or slightly bitter, especially if the plant starts to flower.
- Method: Use clean, sharp scissors or snips. Cut the stems about 2-4 inches (5-10 cm) above the soil line or water level. Aim to leave the lower portion of the stem and leaves intact, as this is where regrowth will occur. Harvest outer stems first, allowing inner stems to continue developing. This is known as a “cut-and-come-again” harvest.
- Harvesting Microgreens: If grown densely as microgreens, harvest with scissors just above the soil line when seedlings are 2-3 inches (5-7.5 cm) tall and have developed their first true leaves.

2. Encouraging Regrowth
Watercress is very responsive to harvesting.
- Regular Cutting: Frequent harvesting is the best way to encourage continuous, bushy growth. It prevents the plant from becoming leggy and encourages the production of tender new shoots.
- Preventing Flowering: Regular harvesting also helps prevent the plant from flowering (bolting). Once watercress flowers, the leaves often become tougher and more bitter. Snip off any developing flower stalks immediately if you see them.
- Post-Harvest Care: Ensure the remaining plant continues to receive consistent moisture and adequate nutrients to support vigorous regrowth.
3. Storing Freshly Harvested Watercress
Watercress is best used fresh but can be stored for a short period. Its delicate leaves wilt quickly.
- Immediate Use: For best flavor and texture, use harvested watercress within hours.
- Refrigeration (Short-Term): 1. Gently rinse the harvested stems under cool running water to remove any soil or debris. 2. Shake off excess water gently or pat *very lightly* with paper towels. Avoid bruising. 3. Place the stems upright in a jar or glass with about an inch (2.5 cm) of fresh, cool water, like a bouquet of flowers. Cover loosely with a plastic bag (ensure some air circulation). Store in the refrigerator. Change the water daily. This can keep it crisp for 3-5 days. 4. Alternatively, wrap the rinsed, slightly damp watercress loosely in a damp paper towel, place it inside a perforated plastic bag or airtight container, and store it in the crisper drawer of your refrigerator. Use within 2-4 days.
- Freezing (For Cooked Use): Watercress doesn’t freeze well for salads due to its high water content, but it can be frozen for use in soups, stews, or sauces. 1. Wash the watercress thoroughly. 2. Blanch it quickly: Submerge in boiling water for just 15-30 seconds, then immediately plunge into ice water to stop the cooking process and preserve color. 3. Drain thoroughly and gently squeeze out excess moisture. 4. Chop if desired. Pack into small freezer bags or ice cube trays (top with a little water or oil before freezing). Freeze promptly. Use within 3-6 months.
V. Troubleshooting Common Issues and FAQs
Even with care, you might encounter occasional problems. Here’s how to address them:
1. Common Pests and Sustainable Management
Watercress grown in moist conditions can attract certain pests. Integrated Pest Management (IPM) focuses on prevention and using the least toxic methods first.
- Snails and Slugs: Love the moist environment. Handpick them, especially at dawn or dusk. Use barriers like copper tape around containers, crushed eggshells, or diatomaceous earth (reapply after rain/watering). Beer traps can be effective. Encourage natural predators like frogs and ground beetles.
- Aphids: Small, pear-shaped insects clustering on new growth. Dislodge with a strong spray of water. Encourage beneficial insects like ladybugs and lacewings. Use insecticidal soap or neem oil sprays as a last resort, following label directions carefully.
- Whiteflies: Tiny, white, moth-like insects that fly up when disturbed. Found on leaf undersides. Use yellow sticky traps to monitor and trap adults. Encourage predators. Insecticidal soap or neem oil can help control heavy infestations.
- Spider Mites: Tiny pests causing stippling (tiny yellow dots) on leaves and fine webbing in severe cases. Thrive in dry, hot conditions (less common in ideal watercress setups but possible indoors). Increase humidity. Spray forcefully with water. Insecticidal soap or horticultural oil sprays are options.
- Flea Beetles: Small, dark beetles that jump when disturbed, chewing characteristic “shotholes” in leaves. Use floating row covers over young plants, especially outdoors. Diatomaceous earth can deter them. Keep the area weed-free.
- Fungus Gnats: Small, dark flies around the soil surface, especially indoors or in containers with constantly wet soil. Larvae feed on fungi and sometimes roots. Allow the very top surface of the soil to dry slightly between waterings (if possible without stressing the watercress), use yellow sticky traps for adults, and consider applying beneficial nematodes (Steinernema feltiae) to the soil to control larvae. Ensure good drainage and avoid overwatering the reservoir.
- Sustainable Pest Control Emphasis: Prioritize cultural controls (healthy plants, good air circulation, sanitation), physical controls (barriers, traps, handpicking), and biological controls (encouraging beneficial insects) before considering even organic pesticides.
2. Common Diseases and Prevention
High moisture levels can sometimes lead to fungal or bacterial issues. Prevention is key.
- Damping Off: Affects seedlings, causing stems to rot at the soil line. Use sterile seed-starting mix, ensure good air circulation, avoid overwatering, and don’t sow seeds too densely.
- Leaf Spot Diseases (Fungal or Bacterial): Appear as spots on leaves, sometimes with yellow halos. Remove affected leaves promptly. Ensure good spacing for air circulation. Avoid splashing water onto leaves; water the soil/reservoir. Rotate crops if planting in the same garden spot yearly (less relevant for container/hydroponic setups). Copper-based fungicides can be used preventively in severe cases, but focus on cultural controls first.
- Root Rot: Caused by overly saturated, stagnant conditions with poor aeration. Ensure containers have drainage, the soil mix isn’t overly compacted, and refresh water reservoirs regularly (e.g., in double pot method). If roots look brown and mushy, the plant may not be salvageable. Improve drainage for future plantings.
- Powdery Mildew: White, powdery patches on leaves, usually in humid conditions with poor airflow. Less common on watercress than some other plants but possible. Improve air circulation, prune dense growth if necessary. Fungicides are available but often unnecessary if cultural practices are improved.
3. Promoting Natural Pest Control
Creating a healthy garden ecosystem helps manage pests naturally.
- Attract Beneficial Insects: Plant flowers like alyssum, dill, fennel, or cilantro nearby to attract ladybugs, lacewings, hoverflies, and parasitic wasps, which prey on common pests like aphids and whiteflies.
- Provide Habitat: Maintain some diversity in your garden with different plant types and structures to provide shelter and food sources for beneficials.
- Avoid Broad-Spectrum Pesticides: These kill beneficial insects along with pests, disrupting the natural balance. Use targeted, least-toxic options only when necessary.
- Healthy Soil, Healthy Plants: Using compost and organic practices builds healthy soil, which supports robust plants that are naturally more resilient to pests and diseases.
4. Frequently Asked Questions (FAQ)
How much water does watercress really need?
It needs consistently moist to wet conditions. The soil should never dry out. Think damp stream bank or shallow pool. Using methods like the double pot or a lined furrow helps achieve this reliably. Stagnant water should be avoided; keep it fresh.
Can I grow watercress indoors year-round?
Yes, successfully! Provide bright indirect light (a south-facing window is good, but supplement with grow lights for 10-12 hours daily if needed, especially in winter). Maintain cool room temperatures (ideally below 70°F / 21°C) and ensure constant moisture using a tray or double pot method with regularly refreshed water.
What’s the ideal soil mix again?
A rich, moisture-retentive but reasonably well-aerated mix. Good options include a quality compost-based potting mix, potentially amended with coir and a little perlite. Avoid heavy garden soil in pots. For beds, amend heavily with compost. pH should be 6.5-7.5.
My watercress is tasting bitter. Why?
Bitterness usually increases when the plant is stressed, often by heat or insufficient water. It can also occur if the plant begins to flower (bolt). Harvest regularly, provide afternoon shade in hot weather, ensure consistent moisture, and remove flower stalks immediately.
Can I grow watercress from a bunch I bought at the supermarket?
Yes, often! Look for fresh bunches with some stem bases intact. Trim the ends, remove lower leaves, and place the stems in a glass of water (as described in the Cuttings section). Once roots develop, plant them in soil or your chosen setup. Ensure the store-bought cress wasn’t treated to prevent sprouting.
Is watercress difficult to grow?
Not necessarily difficult, but it has specific needs, primarily consistent moisture and cool temperatures. If you can provide those, it’s relatively easy and fast-growing. Container methods often make meeting these needs easier for home gardeners.
Does watercress need fertilizer?
It benefits from it, especially in containers where nutrients leach out. Use a balanced liquid fertilizer (organic options like fish emulsion or compost tea are great) every 2-3 weeks during active growth, following dilution instructions. Starting with rich composty soil provides a good base.
Comments (0)
No comments yet. Be the first to share your thoughts.