 Skip to content
How to Grow Your Own Tea Plant (Camellia Sinensis) at Home
Ever dreamed of brewing tea plucked straight from your own garden? It’s entirely possible! The plant behind your daily cuppa
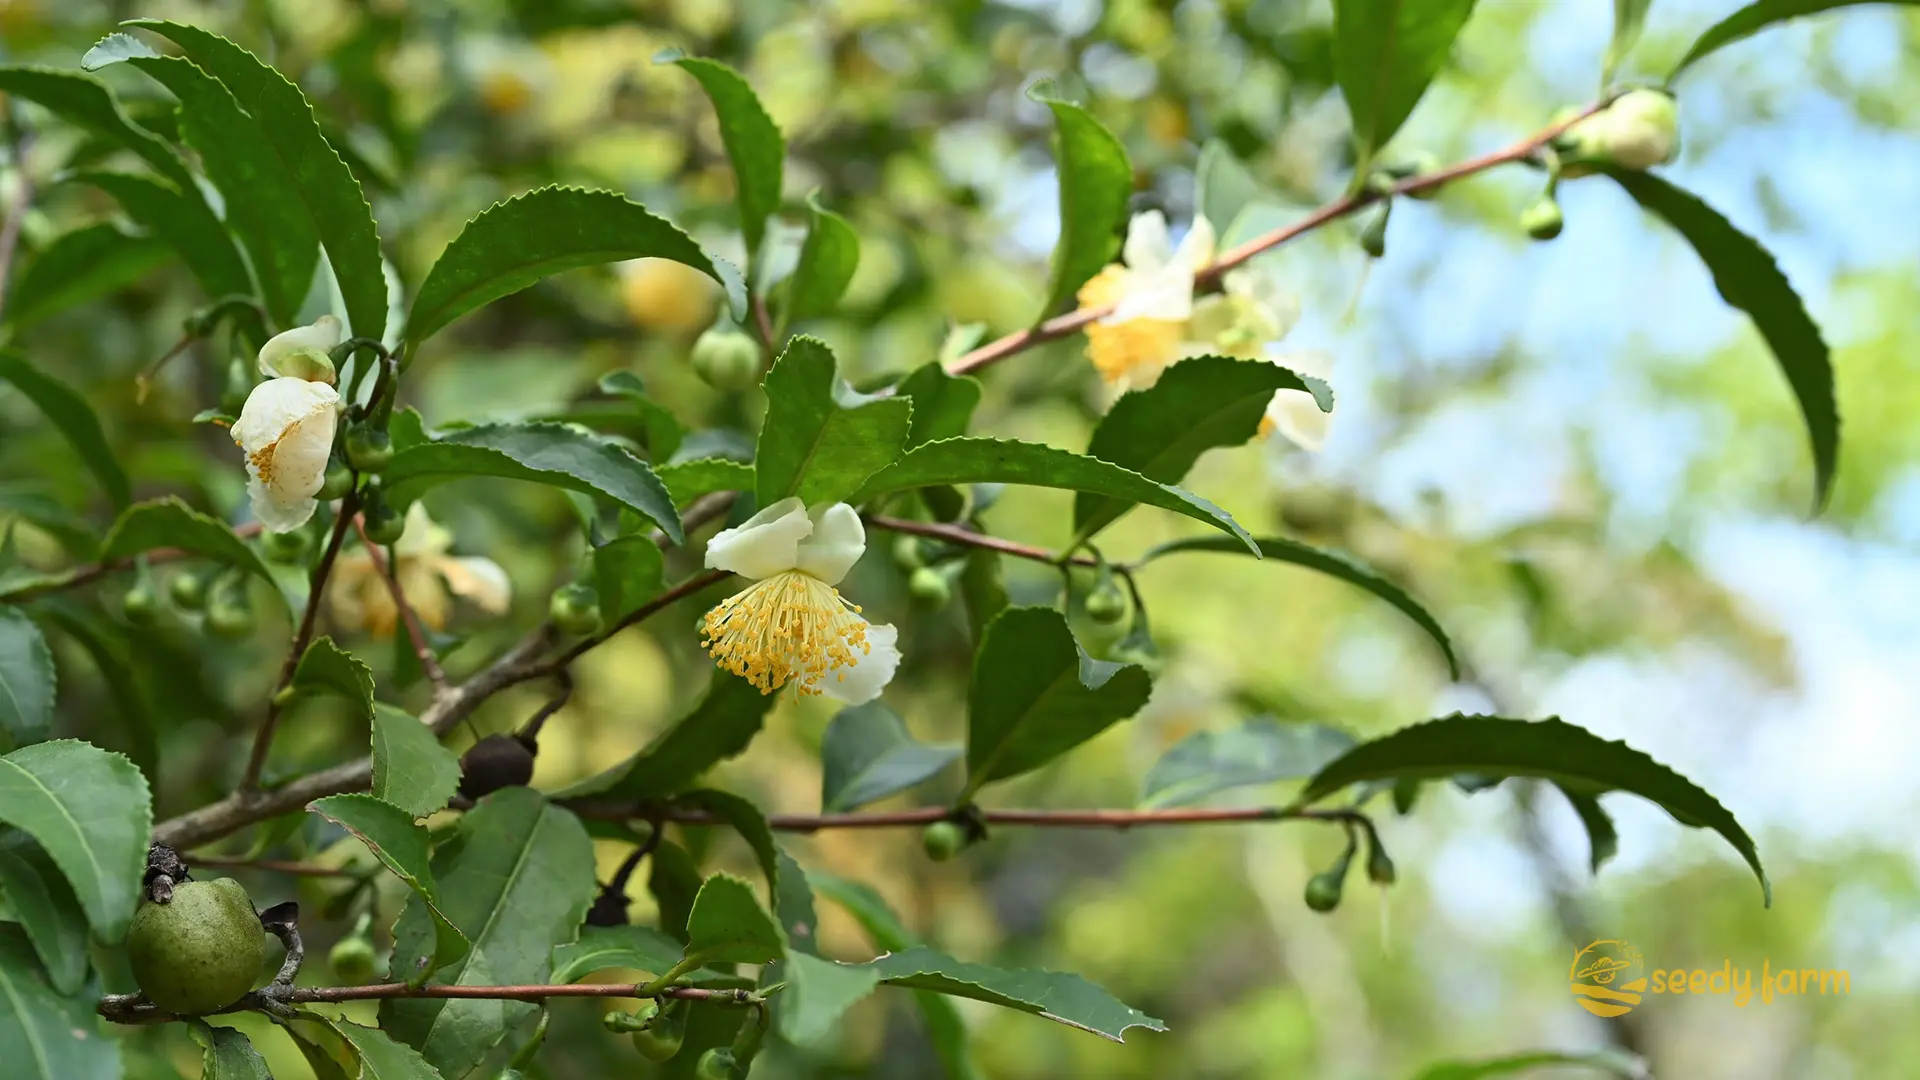
Ever dreamed of brewing tea plucked straight from your own garden? It’s entirely possible! The plant behind your daily cuppa is Camellia sinensis, a surprisingly resilient evergreen shrub or small tree. It’s prized not only for its leaves, which give us everything from green tea to black tea, but also for its attractive appearance. With glossy, deep green, pointed leaves and charming, fragrant white flowers that grace the plant in autumn, it makes a wonderful addition to gardens and even indoor spaces.
Camellia sinensis is adaptable, capable of growing outdoors in suitable climates or indoors as a houseplant. Success hinges on understanding its preferences: the right climate, specific soil type, appropriate light levels, and consistent watering. With a bit of know-how, you can cultivate your very own tea source at home.
This plant prefers a bright spot shielded from harsh winds, ideally with some partial shade, especially during hot afternoons. Crucially, it needs ericaceous soil – that means soil that is acidic (low pH) and drains exceptionally well. While tea plants can handle warm temperatures, most varieties benefit from a cooler winter period to enter dormancy, a natural rest phase vital for healthy growth in the following season. This pattern mimics the conditions in traditional tea-growing regions like parts of China and Vietnam.
 Thinking of growing indoors? It’s definitely feasible! Just ensure your plant gets cooler temperatures (especially at night) and high humidity during the winter months. A bright, cool sunroom or conservatory often provides the perfect environment. Left unpruned, tea plants can eventually reach heights of up to 2 meters (around 6.5 feet) or even taller depending on the variety, forming a lush, attractive hedge if planted with adequate spacing.
Even if you’re short on space, don’t despair! Urban gardeners can successfully grow tea in large containers on patios or balconies. Regular pruning is key in any setting, as it encourages the plant to develop a dense, bushy form – perfect for maximising your leaf harvest.
| Specification | Details |
|---|---|
| Plant Type | Evergreen shrub or small tree |
| Family | Theaceae (Tea Family) |
| Scientific Name | Camellia sinensis |
| Common Varieties | C. sinensis var. sinensis (China type), C. sinensis var. assamica (Assam type) |
| Growth Habit | Upright, multi-stemmed, can be trained as a hedge or small tree |
| Mature Height | Typically 3-7 feet (0.9-2.1 meters) when pruned for harvest; up to 30 feet (9 meters) or more if left unpruned (especially var. assamica) |
| Sunlight Requirements | Full sun to partial shade (afternoon shade is beneficial in hot climates) |
| Soil Requirements | Well-draining, acidic soil (pH 4.5-6.0 is ideal, up to 6.5 tolerated) rich in organic matter |
| Water Needs | Consistent moisture; prefers evenly moist soil but intolerant of waterlogging |
| Optimal Temperature Range | Prefers temperatures between 60°F-85°F (15°C-30°C) during the growing season |
| Hardiness Zones | Typically USDA Zones 7-9 (var. sinensis is generally hardier than var. assamica) |
| Planting Time | Spring or fall, avoiding extreme heat or cold |
| Spacing | 3-5 feet (0.9-1.5 meters) apart for hedge or harvest purposes |
| Propagation | Seeds (requires patience), cuttings (most common), or layering |
| Harvest Time | Primarily spring and early summer (‘first flush’), potentially smaller flushes later. Leaves can technically be harvested year-round in mild climates, but quality varies. |
| Processing | Harvested leaves are processed (withered, rolled/shaped, oxidized/fixed, dried) to create different tea types (green, black, white, oolong, etc.). The processing method determines the final tea type. |
## I. Understanding Growing Conditions
1. Climate Requirements
Camellia sinensis is adaptable but truly flourishes under specific climate conditions. It generally prefers a moderate climate with noticeable seasons, including a distinct rainy and dry period. Regions where tea is commercially grown often have this balance. While established plants can tolerate high temperatures, consistent moisture is essential to prevent stress. Critically, many tea varieties require a cooler winter period to induce dormancy. This resting phase allows the plant to conserve energy and prepare for vigorous spring growth, which produces the best quality leaves. Without sufficient winter chill, growth can be less robust, and flowering may be affected.
In cooler zones (e.g., USDA Zone 7 or borderline 6), protecting your tea plant from harsh winter freezes is key. Planting in a sheltered location, away from freezing winds, and using mulch can help. Frost damage primarily affects young, tender growth. Conversely, in consistently warm or tropical climates, ensuring adequate water and potentially providing afternoon shade becomes the priority to prevent heat stress. The assamica variety generally handles heat better but is less cold tolerant than the sinensis variety.
2. Light and Soil Preferences
Finding the right balance of light is important for healthy tea plants. They thrive in a bright location but benefit from some protection from intense, direct afternoon sun, especially in warmer climates. Dappled sunlight filtering through taller trees or morning sun followed by afternoon shade is often ideal. Too much direct sun can lead to leaf scorch (brown, crispy patches), while deep shade will result in sparse growth and fewer leaves suitable for harvesting.
Soil is perhaps the most critical factor. Tea plants demand ericaceous (acidic) soil that is rich in organic matter and, crucially, well-draining. The ideal soil pH is between 4.5 and 6.0. If your soil is alkaline (high pH), the plant will struggle to absorb nutrients, leading to yellowing leaves (chlorosis) and poor growth. Excellent drainage is non-negotiable; tea plants hate ‘wet feet’ and are susceptible to root rot in waterlogged conditions. Improve drainage and acidity by incorporating generous amounts of organic matter like composted pine bark, well-rotted manure, or specific ericaceous compost. For a sustainable option, consider using peat-free ericaceous mixes often based on composted bark and coir.
3. Container Size and Drainage Needs
Growing tea in containers is a great option, especially if your garden soil isn’t acidic or you need to move the plant for winter protection. Choose a container that gives the roots ample room to grow – start with one at least 12-15 inches (30-38 cm) in diameter and depth. As the plant matures, you’ll need to pot it up into progressively larger containers every few years.
Excellent drainage is paramount for container-grown tea. Ensure the pot has multiple large drainage holes. Avoid using pots with attached saucers that can hold water. While adding a layer of gravel at the bottom was once common advice, it doesn’t significantly improve drainage and can actually hinder it by creating a perched water table. Instead, focus on using a high-quality, well-draining potting mix. An ericaceous potting mix, possibly amended with extra perlite or coarse sand for better aeration, is ideal. Container plants dry out faster than those in the ground, so monitor moisture levels closely.
II. Preparing to Plant
1. Choosing the Right Variety
Before you plant, consider which type of Camellia sinensis best suits your situation. The two primary varieties offer different strengths:
a. Camellia sinensis var. sinensis (China Tea)
Native to China, this variety is generally more compact and better suited to cooler climates (down to USDA Zone 7, potentially colder with protection). It’s known for its smaller, narrower leaves and typically produces teas with more delicate, nuanced flavours – often favoured for green, white, and high-quality oolong teas. Its greater cold hardiness makes it a popular choice for home growers in temperate regions.
b. Camellia sinensis var. assamica (Assam or Indian Tea)
Originating from the warmer, wetter Assam region of India, this variety features larger leaves and grows into a more robust, potentially taller plant (can become a substantial tree if unpruned). It thrives in tropical and subtropical climates (USDA Zones 8-9 and warmer) and is less tolerant of frost. Teas made from var. assamica, like robust black teas (including Assam and breakfast blends), usually have a stronger, bolder, more malty flavour profile.
Your Choice Depends On:
- Your Climate: Prioritise cold hardiness (var. sinensis) if you experience frosts, or heat tolerance (var. assamica) if you live in a hot climate.
- Your Space: Var. sinensis tends to be more manageable in size, especially in containers.
- Your Preferred Tea: While processing determines the final tea type, the variety influences the inherent flavour potential (delicate vs. bold).
Many nurseries offer specific cultivars selected for vigour, leaf quality, or ornamental appeal. Researching cultivars within these varieties can help you find the perfect plant.
| Specification | Camellia sinensis var. sinensis | Camellia sinensis var. assamica |
|---|---|---|
| Common Name | Chinese Tea Plant | Assam (or Indian) Tea Plant |
| Native Range | Southern China | Northeast India, Southeast Asia |
| Leaf Size | Smaller (typically 4-7 cm long) | Larger (typically 8-20 cm long) |
| Leaf Shape | Lanceolate to elliptic, often serrated | Broadly lanceolate to ovate, sometimes less distinctly serrated |
| Leaf Texture | Generally thinner, more delicate | Thicker, often glossier, coarser texture |
| Plant Height (Pruned) | Typically managed at 3-5 feet (0.9-1.5 m) | Typically managed at 4-6 feet (1.2-1.8 m), but naturally more vigorous |
| Plant Height (Unpruned) | Can reach 10-15 feet (3-4.5 m) | Can reach 30-60 feet (9-18 m) or more |
| Growth Habit | More compact, multi-stemmed shrub | Taller, more tree-like, potentially single trunk if trained |
| Cold Tolerance | More cold-tolerant (Zones 7-9) | Less cold-tolerant (Zones 8/9+) |
| Preferred Climate | Subtropical to temperate, distinct cool season beneficial | Tropical to subtropical, prefers consistent warmth and humidity |
| Flavor Potential | Generally lighter, sweeter, more floral/vegetal notes | Generally stronger, bolder, malty, sometimes astringent notes |
| Common Tea Types | Green, white, oolong, some black teas (e.g., Keemun) | Primarily black teas (e.g., Assam, Ceylon), some oolong and specialty teas |
### 2. Selecting the Right Location
a. Outdoor Planting
Choosing the perfect spot outdoors involves balancing several factors:
- Light: Aim for morning sun and afternoon shade, or dappled sunlight all day. In cooler climates, more sun may be tolerated or even beneficial, but avoid reflected heat from walls.
- Shelter: Protect the plant from strong, drying winds and severe frost pockets. Planting on the leeward side of a building, fence, or hedge can provide necessary protection.
- Soil: Test your soil pH. If it’s not acidic (below 6.5, ideally below 6.0), you’ll need to amend it significantly or consider raised beds filled with ericaceous soil mix. Ensure the area drains well; avoid low spots where water collects. Amend heavy clay soil generously with organic matter (like composted bark or ericaceous compost) to improve structure and drainage.
Protecting Young Plants from Frost
Young tea plants are especially vulnerable to frost damage. During unexpected cold snaps:
- Cover plants overnight with frost cloth, burlap, or even an old sheet (remove during the day).
- Apply a thick layer (3-4 inches) of organic mulch (like pine straw or shredded bark) around the base to insulate the roots, keeping it away from the immediate stem.
- Ensure plants are well-watered before a freeze, as moist soil retains heat better than dry soil.
- For potted plants, move them to a sheltered porch, garage, or indoors temporarily.
#### b. Indoor Cultivation
If growing indoors, select a location that mimics the plant’s preferred outdoor conditions as closely as possible:
- Light: A bright spot near a window receiving several hours of indirect sunlight is ideal. South or east-facing windows often work well. Avoid direct, scorching midday sun through glass.
- Temperature & Humidity: Average room temperatures are usually fine during the growing season, but provide cooler conditions (ideally 50-60°F / 10-15°C) and higher humidity during winter dormancy. Avoid placing plants near heat vents or radiators which cause dry air. Use a humidifier or place the pot on a pebble tray filled with water (ensure the pot bottom is above the water level).
c. Soil and Drainage (Reiteration for Emphasis)
This cannot be stressed enough: whether indoors or out, excellent drainage and acidic soil are essential. For outdoor planting, amending the native soil or using raised beds is key if conditions aren’t naturally suitable. For containers, always use a high-quality ericaceous potting mix and pots with ample drainage holes.
d. Spacing
If planting multiple tea bushes (e.g., for a hedge or small plantation), allow adequate space for growth and air circulation. A spacing of 3-5 feet (0.9-1.5 meters) between plants is generally recommended. Good air circulation helps prevent fungal diseases.
3. Starting from Seeds
Growing tea from seed is a rewarding but lengthy process, requiring patience.
a. Sourcing and Preparing Seeds
Obtain fresh tea seeds from a reputable supplier, as viability decreases over time. Tea seeds have a hard coat and benefit from preparation:
- Soaking: Soak the dry, hard seeds in warm water for 24-48 hours. This softens the seed coat and encourages hydration.
- Viability Check: Viable seeds will typically sink after soaking, while non-viable or empty seeds often float. Discard the floaters.
- Optional Scarification: Some growers gently nick or scratch the hard seed coat (avoiding the embryo area) after soaking to further aid water absorption, but this requires care.

b. Germination Process
- Prepare Medium: Use a well-draining, acidic seed-starting mix. A blend of ericaceous compost and perlite or coarse sand (e.g., 50:50) works well. Fill seed trays or small pots (3-4 inches deep) with this mix.
- Sowing: Plant the soaked, viable seeds about 1 inch (2.5 cm) deep. Cover lightly with the mix and gently firm it down.
- Watering: Water thoroughly but gently after sowing, ensuring the mix is moist but not saturated. Maintain consistent moisture throughout germination. Using a spray bottle can help prevent dislodging the seeds.
- Environment: Place the pots/trays in a warm location (ideally 70-75°F / 21-24°C) with bright, indirect light. Covering the pots with a plastic dome or bag can help maintain humidity, but ensure some ventilation to prevent mould.
- Patience: Germination is often slow and erratic, taking anywhere from 1 to 3 months, sometimes longer.
- Transplanting Seedlings: Once seedlings develop 3-4 true leaves and are large enough to handle carefully, they can be transplanted into larger individual pots (approx. 6 inches) using ericaceous potting mix. Handle them gently by the leaves, not the stem, to avoid damage. Continue to grow them in a warm, partially shaded spot.
4. Starting from Cuttings
Propagating from cuttings is generally faster and ensures the new plant is genetically identical to the parent.
a. Cutting Preparation
- Timing: Take cuttings during periods of active growth, typically late spring to mid-summer.
- Selection: Choose healthy, vigorous stems from the current season’s growth that are ‘semi-hardwood’ – meaning the base is starting to firm up, but the tip is still flexible. Avoid very soft, new tips or old, woody stems.
- Cutting: Using clean, sharp secateurs or a knife, take cuttings 4-6 inches (10-15 cm) long. Make the cut just below a node (the point where a leaf attaches). Each cutting should ideally have 2-4 nodes.
- Preparation: Remove the lower leaves, leaving just the top 2-3 leaves intact. If the remaining leaves are large, you can cut them in half horizontally to reduce water loss (transpiration).
b. Rooting Process
- Rooting Hormone (Recommended): Dip the cut base of the prepared cutting into a rooting hormone powder or gel. Tap off any excess. This encourages faster and more reliable root development.
- Planting Medium: Prepare small pots or trays with a very well-draining rooting medium. Options include a mix of perlite and peat/coir (50:50), coarse sand, or a specialized rooting mix. Ensure it’s moist.
- Insertion: Make a hole in the medium with a pencil or dibber. Insert the hormone-treated base of the cutting, ensuring at least one or two nodes are below the surface. Gently firm the medium around the cutting.
- Humidity: High humidity is crucial for rooting success. Cover the pot(s) with a clear plastic bag (use stakes to keep it off the leaves), place them in a propagator, or mist frequently.
- Location: Place the cuttings in a warm spot (around 70-75°F / 21-24°C) with bright, indirect light. Avoid direct sun.
- Monitoring: Keep the rooting medium consistently moist but not wet. Check for rooting after 6-10 weeks by gently tugging on the cutting; resistance indicates root formation. You may also see new leaf growth.
- Acclimatization: Once well-rooted, gradually acclimate the new plants to lower humidity over a week or two before potting them into larger containers with standard ericaceous potting mix.
III. Planting and Early Care
1. Transplanting Seedlings or Rooted Cuttings
a. When to Transplant
Transplant your young tea plants (whether grown from seed or cuttings) into their final position (garden bed or larger container) once they have a well-developed root system and are actively growing. Typically, this is when they have several sets of true leaves and the roots have started to fill their current pot (but are not severely root-bound). Choose a mild day in spring or fall for transplanting, avoiding the stress of extreme heat or cold.
b. Preparing the Transplant Site
- In Ground: Prepare the planting hole by digging it twice as wide as the plant’s root ball but roughly the same depth. Amend the backfill soil generously with ericaceous compost or well-rotted organic matter, especially if your soil is heavy or not naturally acidic. Ensure the area drains well.
- In Containers: Choose a container that is the next size up (about 2-4 inches larger in diameter) from the current pot. Ensure it has excellent drainage holes. Use a fresh batch of high-quality ericaceous potting mix.
c. Transplanting Process
- Water Well: Water the young plant thoroughly in its current pot an hour or two before transplanting. This helps the root ball hold together and reduces transplant shock.
- Prepare Hole/Container: Dig the hole or prepare the new container as described above. You might add a small amount of ericaceous slow-release fertilizer to the backfill soil or potting mix, following package instructions.
- Remove Plant Carefully: Gently slide the plant out of its current pot. Avoid pulling it by the stem. If the roots are circling (root-bound), gently tease them apart or make a few vertical cuts down the sides of the root ball to encourage outward growth.
- Position Plant: Place the plant in the center of the hole or new container. The top of the root ball should be level with the surrounding soil surface. Planting too deep can lead to stem rot.
- Backfill and Firm: Fill the hole or container with the prepared soil mix, gently firming it around the root ball to eliminate large air pockets. Do not compact the soil heavily.
d. Initial Care After Transplanting
Immediately after transplanting, water the plant thoroughly to settle the soil around the roots. Keep the soil consistently moist but not waterlogged for the first few weeks as the plant establishes. Applying a 2-3 inch layer of organic mulch (pine straw, shredded bark) around the base (but not touching the stem) helps retain moisture, suppress weeds, and regulate soil temperature. If planted in a sunny spot, providing temporary partial shade (e.g., with shade cloth) for the first week or two can help reduce stress. Monitor the plant closely for signs of wilting or stress.
Companion Planting Ideas for Tea
Consider planting your Camellia sinensis alongside other plants that appreciate similar acidic, well-draining conditions. Good companions include:
- Other Ericaceous Plants: Blueberries, Rhododendrons, Azaleas, Heathers, Pieris. They share soil preferences, simplifying care.
- Groundcovers: Low-growing acid-lovers like Gaultheria procumbens (Wintergreen) can act as a living mulch.
- Beneficial Attractors: Planting herbs like mint (in containers to control spread!), lemon balm, or flowers like alyssum nearby can attract beneficial insects that may help manage pests.
Avoid planting tea near plants that prefer alkaline soil, as their needs conflict.
### 2. Initial Watering and Fertilization
a. Watering Schedule
Young, newly transplanted tea plants need careful watering to establish strong roots.
- Consistency is Key: Aim to keep the soil consistently evenly moist, like a wrung-out sponge. Check the soil moisture regularly by inserting your finger about an inch deep. Water when the top inch feels slightly dry.
- Amount: Water deeply enough to moisten the entire root zone, allowing excess water to drain away freely. Avoid frequent shallow watering, which encourages shallow roots.
- Adjust to Conditions: Watering needs vary significantly based on weather (hot, windy conditions increase needs), soil type (sandy soils dry faster), and container vs. in-ground planting (containers dry out quicker). Monitor your specific plant and adjust accordingly. Be especially vigilant during dry spells.
- Avoid Waterlogging: Overwatering is a common killer of tea plants. Ensure drainage is excellent. Signs of overwatering include yellowing leaves (starting with lower ones), wilting despite moist soil, and potential root rot (mushy, brown roots). Underwatering signs include wilting, dry/crispy leaf edges, and leaf drop.
b. Fertilization Needs
Tea plants are relatively heavy feeders, especially when actively growing and being harvested. However, be cautious with young plants.
- Wait Initially: Wait about 4-6 weeks after transplanting before starting a regular fertilization routine to allow the roots to settle. If you added slow-release fertilizer at planting, wait longer according to its duration.
- Choose the Right Fertilizer: Use a balanced fertilizer specifically formulated for acid-loving plants (often labelled for Rhododendrons, Azaleas, or Camellias). These provide nutrients in forms readily available at low pH and help maintain soil acidity. Organic options like well-rotted manure (applied as a top dressing), compost, fish emulsion, or cottonseed meal are also excellent choices and improve soil health.
- Application Timing & Rate: Apply fertilizer during the active growing season (spring through summer). Follow the product instructions carefully regarding rates and frequency (e.g., typically every 4-8 weeks for liquid feeds, less often for slow-release granules). Reduce or stop feeding during the fall and winter dormancy period.
- Avoid Over-fertilizing: Too much fertilizer can burn the roots and leaves. It’s always better to err on the side of caution and apply slightly less than recommended if unsure. Water plants well before applying liquid fertilizer to avoid root burn.
IV. Growth Management
1. Pruning Techniques
Pruning is vital for managing the size and shape of your tea plant, encouraging the production of tender new leaves (the ‘flush’) for harvest, and maintaining plant health.
a. Timing and Methods
- Major Pruning (Structural): The best time for significant shaping or rejuvenation pruning is during the plant’s dormant period, usually late winter or very early spring, just before new growth starts.
- Harvest Pruning (‘Plucking’ or ‘Tipping’): This is the light, frequent pruning done during the growing season as you harvest the desirable young leaves and buds. It naturally shapes the plant and encourages more flushes.
- Maintenance Pruning: Throughout the year, remove any dead, diseased, damaged, or crossing branches as soon as you notice them. Use clean, sharp secateurs or pruning shears to make cuts just above an outward-facing bud or leaf node, angling the cut slightly away from the bud.
- Thinning: Occasionally, thin out some of the older, less productive branches from the center of the bush to improve air circulation and light penetration, which helps prevent disease and encourages new growth from the base.
b. Encouraging Bushier Growth and the ‘Plucking Table’
Commercial tea growers aim for a flat-topped, wide bush called a ‘plucking table’ for easy harvesting. You can encourage a similar dense, bushy habit at home:
- Formative Pruning: When the plant is young (1-2 years old), prune the main stem(s) back to encourage side branching lower down.
- Regular Tipping/Plucking: Consistently harvesting the top ‘two leaves and a bud’ during the growing season naturally encourages the plant to branch out below the cut, leading to a denser canopy over time.
- Height Management: Don’t let the plant get too tall and leggy. Periodically prune back taller shoots to maintain a manageable height for harvesting (typically 3-5 feet).
Regular Pruning = More Tea!
Don’t be afraid to prune your tea plant! Pruning, especially the light ‘tipping’ involved in harvesting, stimulates the plant to produce more lateral shoots. This results in a bushier plant with more growing points, ultimately yielding more tender leaves for your tea cup. It keeps the plant vigorous and productive.
### 2. Mulching
Applying mulch around your tea plant offers significant benefits and is a highly recommended practice.
a. Types of Mulch
- Organic Mulches (Ideal): Options like pine straw, shredded bark (pine or fir), composted wood chips, or chopped leaves work wonderfully. These acidic or neutral organic materials break down over time, enriching the soil with organic matter, improving its structure, and supporting beneficial soil life. Choose materials that don’t compact easily.
- Avoid Alkaline Mulches: Steer clear of mulches like mushroom compost which can raise soil pH.
- Inorganic Mulches: Gravel or pebbles can be used, especially in containers, but they don’t offer soil improvement benefits. Landscape fabric can suppress weeds but may hinder water penetration and soil aeration over time.
b. Benefits of Mulching
- Moisture Conservation: A 2-4 inch layer of mulch significantly reduces water evaporation from the soil surface, meaning less frequent watering is needed.
- Temperature Regulation: Mulch acts like a blanket, insulating the soil from extreme heat in summer and cold in winter, protecting the sensitive root system.
- Weed Suppression: Mulch blocks sunlight, preventing many weed seeds from germinating and making any that do appear easier to remove.
- Soil Health Improvement (Organic Mulches): As organic mulches decompose, they steadily add valuable humus to the soil, improving its fertility, drainage, and aeration.
- Prevents Soil Compaction & Erosion: Mulch cushions the impact of rain and foot traffic, reducing soil compaction and erosion.
Application Tip: Apply mulch around the plant’s base, extending out to the drip line (the edge of the canopy), but keep it pulled back an inch or two from the main stem to prevent moisture buildup and potential rot. Replenish organic mulch annually as it decomposes.
3. Pest and Disease Management
Healthy, well-cared-for tea plants are less susceptible to problems, but it’s good to be aware of potential issues. Integrated Pest Management (IPM), focusing on prevention and least-toxic solutions first, is the most sustainable approach.
a. Common Pests
- Aphids: Small, pear-shaped insects (often green, black, or brown) that cluster on new growth, sucking sap. Cause distorted leaves, yellowing, and produce sticky ‘honeydew’ which can lead to sooty mold. Control: Strong water spray, insecticidal soap, neem oil, encouraging beneficial insects (ladybugs, lacewings).
- Spider Mites: Tiny arachnids, hard to see without magnification. Thrive in hot, dry conditions. Cause stippling (tiny yellow dots) on leaves, fine webbing. Control: Increase humidity (mist plants), insecticidal soap, neem oil, horticultural oil.
- Scale Insects: Small, immobile bumps on stems and leaves, often resembling shells. Suck sap, causing yellowing and reduced vigour. Can also produce honeydew. Control: Difficult to control once established. Prune out heavily infested branches. Use horticultural oil during the dormant season or target crawlers (mobile young stage) with insecticidal soap or neem oil.
- Tea Mosquito Bug (Helopeltis): More common in commercial plantations but can occur. Sucks sap from young shoots, causing them to blacken, wither (‘mosquito blight’). Control: Monitor frequently, handpick if numbers are low. Encourage natural predators. Neem oil may help deter feeding.
- Caterpillars/Leaf Rollers: Various species may feed on leaves or roll them up. Control: Handpick. Use Bacillus thuringiensis (Bt), a biological insecticide specific to caterpillars.
b. Common Diseases
Most tea diseases are fungal and thrive in damp, humid conditions with poor air circulation.
- Blister Blight (Exobasidium vexans): Causes characteristic pale yellow spots on young leaves that develop into convex blisters on the upper surface and concave white fungal growth underneath. Favoured by cool, wet weather. Control: Improve air circulation (pruning, spacing). Remove and destroy infected leaves immediately. Copper-based fungicides can be preventative if disease pressure is high.
- Root Rot (e.g., Phytophthora, Pythium): Caused by soil-borne fungi, usually due to overwatering or poor drainage. Symptoms include wilting (even when soil is moist), yellowing leaves, stunted growth, and rotting roots. Control: Prevention is key! Ensure excellent drainage. Avoid overwatering. Remove affected plants if severe. Fungicide drenches may help in early stages but improving drainage is critical.
- Anthracnose (Colletotrichum): Causes dark, sunken spots or lesions on leaves, stems, or flowers, often with concentric rings. Can lead to leaf drop and dieback. Control: Prune out infected parts, destroying them (do not compost). Improve air circulation. Copper-based fungicides can help manage spread.
- Algal Leaf Spot (Cephaleuros virescens): Appears as velvety, greenish-grey to reddish-brown raised spots on leaves. More common in high humidity. Usually cosmetic but can stress the plant if severe. Control: Improve air circulation and light penetration. Avoid overhead watering. Fungicides are usually not necessary.
c. Preventive and Sustainable Measures (IPM)
- Start Strong: Use healthy, disease-free plants from reputable sources.
- Right Plant, Right Place: Ensure proper siting (light, shelter) and soil conditions (acidic, well-draining). A happy plant is a resilient plant.
- Monitor Regularly: Inspect plants frequently (including undersides of leaves) for early signs of trouble. Catching problems early makes them much easier to manage.
- Good Sanitation: Keep the area around plants clean. Remove fallen leaves and weeds, which can harbour pests and diseases. Clean pruning tools between cuts, especially if dealing with diseased material (use rubbing alcohol or a bleach solution).
- Proper Watering: Water at the base of the plant (avoid wetting foliage unnecessarily) and water early in the day so leaves dry quickly. Avoid overwatering.
- Promote Air Circulation: Prune appropriately to open up the canopy and ensure good airflow. Space plants adequately.
- Boost Soil Health: Healthy soil supports healthy plants. Use compost and organic mulch.
- Encourage Beneficial Insects: Attract ladybugs, lacewings, parasitic wasps, etc., by planting diverse flowers and avoiding broad-spectrum pesticides.
- Use Least-Toxic Controls First: Try physical removal (handpicking, water sprays), barriers, or biological controls before resorting to chemical pesticides. If chemicals are needed, choose targeted, less persistent options like insecticidal soap, horticultural oil, or neem oil, and follow label instructions precisely.
V. Harvesting and Storing Tea
1. Harvesting Tea Leaves: The Art of Plucking
Harvesting, often called ‘plucking’ in the tea world, requires timing and technique to capture the best flavour.
a. When to Pick Leaves
The finest tea is typically made from the ‘flush’ – the burst of new, tender growth in spring. Subsequent flushes occur during the growing season but may yield slightly less complex flavours.
- Focus on New Growth: Harvest the terminal bud (the unopened leaf at the tip of the shoot) and the top one or two youngest, brightest green leaves immediately below it. This ‘two leaves and a bud’ standard is prized for quality. Older, larger, darker green leaves further down the stem are tougher and produce coarser tasting tea.
- Timing of Day: The traditional time to harvest is early morning, after the dew has evaporated but before the sun becomes too intense. This helps preserve the volatile aromatic compounds in the freshly plucked leaves.
- Frequency: During peak growing periods (spring/early summer), you might be able to harvest new flushes every 7-14 days, depending on growth rate. Harvest lightly from young plants (under 3 years old) to allow them to establish.

b. Harvesting Methods
- Hand-Plucking: The traditional and preferred method for high-quality tea. Use your thumb and forefinger to gently but firmly pinch the stem just below the desired leaves. A clean snap is ideal. Handle the plucked leaves gently to avoid bruising, which can prematurely start oxidation. Collect leaves in a clean basket or bag, avoiding compaction.
- Using Shears: For larger quantities or quicker harvesting, clean, sharp scissors or small shears can be used. Cut the stem cleanly. While efficient, this can sometimes cause more bruising than careful hand-plucking.
2. Post-Harvest Care: The Crucial First Steps
What you do immediately after harvesting significantly impacts the final quality of your tea.
a. Post-Harvest Handling
The goal is to prepare the leaves for the specific type of tea you intend to make. The first step for most teas (except some green teas) is withering.
- Withering (Reducing Moisture): Spread the freshly harvested leaves thinly on a clean tray, cloth, or bamboo mat. Place them in a cool, airy, shaded location (indoors or outdoors out of direct sun) for several hours (typically 8-18 hours, depending on humidity and desired tea type). The goal is to reduce the moisture content, making the leaves limp and pliable (like soft leather) and initiating enzymatic changes. Gently toss or turn the leaves occasionally for even withering. The state of the leaves should transform from stiff and crisp to soft and flexible.
- Preventing Contamination: Ensure all surfaces, tools, and hands are clean to avoid introducing unwanted odours or microbes to the leaves.
b. Immediate Steps to Maintain Leaf Quality
- Avoid Heat and Sun: Keep the withering leaves out of direct sunlight and away from heat sources, which can damage delicate compounds and halt desirable enzymatic activity unevenly.
- Gentle Handling: Continue to handle the leaves gently during and after withering to prevent excessive bruising or tearing until you reach the rolling/shaping stage.
- Timely Processing: Proceed to the next processing step (e.g., rolling, firing, oxidation) promptly after the desired level of wither is achieved. Leaving leaves partially processed for too long can negatively affect flavour.
3. Basic Storing Techniques for Finished Tea
Once you have processed and thoroughly dried your homemade tea, proper storage is essential to preserve its flavour and aroma for as long as possible.
a. Ideal Storage Conditions
Finished, dried tea leaves are sensitive to their environment. Protect them from:
- Air: Exposure to oxygen degrades tea quality over time.
- Moisture: Humidity will cause tea to go stale and can even lead to mould.
- Light: Light, especially sunlight, breaks down flavour compounds.
- Heat: Warm temperatures accelerate the degradation process.
- Odours: Tea readily absorbs surrounding smells (like spices, coffee, or cleaning supplies).
Therefore, the ideal storage location is cool, dry, dark, and away from strong odours (a pantry cupboard away from the stove is often better than a kitchen counter).
b. Containers and Packaging
- Airtight is Essential: Use containers with excellent seals. Options include: - Metal tins with tight-fitting lids (especially double lids). - Ceramic jars with good seals. - Opaque glass jars stored in darkness. - Multi-layer, resealable foil pouches (often used commercially).
Avoid clear glass if stored in the light, and avoid porous materials like paper or cardboard bags for long-term storage unless they have an airtight inner lining.
- Correct Size: Choose a container size appropriate for the amount of tea. Too much empty space (headspace) in the container means more air exposure each time you open it.
- Labeling: Clearly label your containers with the type of tea and the date it was processed/stored. Most homemade teas are best enjoyed within 6-12 months for optimal freshness.

VI. Troubleshooting and FAQs
1. Common Problems and Solutions
Even with good care, you might encounter occasional issues. Here’s how to address some common ones:
a. Yellowing Leaves (Chlorosis)
Yellow leaves, especially when the veins remain green, often point to nutrient issues or improper watering.
- Check Soil pH: This is the most common cause for tea plants. If the soil pH is too high (alkaline), the plant can’t absorb iron and other micronutrients. Test the pH. If high, acidify the soil gradually using sulphur, iron sulphate, or regular applications of ericaceous compost/fertilizer. Avoid lime or mushroom compost.
- Nutrient Deficiency: If pH is correct, yellowing might indicate a lack of nitrogen (overall yellowing, starting with older leaves) or magnesium (yellowing between green veins). Use a balanced ericaceous fertilizer. A foliar spray of Epsom salts (magnesium sulphate) can sometimes provide a quick magnesium boost.
- Overwatering/Poor Drainage: Saturated soil suffocates roots, preventing nutrient uptake and causing yellowing (often starting with lower leaves) and wilting. Ensure excellent drainage. Allow the top inch or two of soil to dry slightly between waterings. Check for root rot (dark, mushy roots).
- Underwatering: Severe lack of water can also cause leaves to yellow and drop, usually accompanied by wilting and dry tips. Ensure consistent, adequate moisture.
b. Slow or Stunted Growth
If your tea plant isn’t growing as expected, consider these factors:
- Insufficient Light: While tea dislikes scorching sun, it needs bright light to thrive. Too much shade results in weak, leggy growth. Ensure it receives several hours of bright, indirect light or morning sun.
- Inadequate Nutrition: Tea plants are feeders. Ensure you are fertilizing regularly during the growing season with an appropriate ericaceous fertilizer.
- Incorrect Soil pH: As above, if the pH is wrong, nutrient uptake is blocked, hindering growth.
- Root-Bound (Containers): If a container plant stops growing, it might be root-bound. Check the roots; if they are densely circling the pot, transplant into a slightly larger container, gently loosening the roots.
- Temperature Stress: Extreme cold or heat can slow or stop growth. Protect from frost and provide shade during intense heatwaves. Ensure winter dormancy requirements are met if applicable to your variety.
- Water Stress: Both chronic overwatering and underwatering can stunt growth. Aim for consistent moisture.
c. Pest Infestations (See Section IV.3.a for details)
Quick reference: Aphids, spider mites, scale. Act promptly using least-toxic methods first (water spray, insecticidal soap, neem oil). Encourage beneficial insects.
d. Fungal Diseases (See Section IV.3.b for details)
Quick reference: Blister blight, root rot, anthracnose. Prevention is key: ensure good air circulation (pruning, spacing), proper watering (avoid wet foliage, ensure drainage), and good sanitation. Remove infected parts promptly. Use fungicides only if necessary and choose appropriate ones.
e. Leaf Scorch
Brown, crispy patches or edges on leaves, especially on the sun-exposed side.
- Too Much Direct Sun: The most likely cause, especially intense afternoon sun. Provide partial shade or relocate the plant.
- Underwatering During Heat: Lack of water combined with heat/sun stress can cause scorching. Ensure adequate water during hot periods.
- Fertilizer Burn: Applying too much fertilizer or applying it to dry soil can ‘burn’ roots and cause leaf scorching. Follow fertilizer instructions carefully and water before applying.
- Windburn: Strong, dry winds can also cause leaf desiccation and scorching. Provide shelter if needed.
2. Frequently Asked Questions
a. How long before the first harvest?
Patience is key! While you might get a tiny picking in the second year, it’s best to wait until the plant is well-established, typically around three years old, before beginning regular harvesting. Early, heavy harvesting can weaken a young plant and hinder its long-term development. Focus on encouraging strong root and branch structure in the first couple of years.
b. Can tea plants really grow well indoors?
Yes, Camellia sinensis var. sinensis, in particular, can adapt to indoor life, provided its core needs are met. Success hinges on providing bright, indirect light (e.g., near an east or south window, possibly filtered), high humidity (use pebble trays, humidifiers, or group plants), cool winter temperatures (important for dormancy), and using acidic, well-draining potting mix. It likely won’t grow as vigorously or yield as much as an outdoor plant, but it’s definitely achievable.
c. What type of soil is absolutely best?
The non-negotiables are acidic (pH 4.5-6.0) and excellently draining. A sandy loam enriched with plenty of organic matter is ideal in the ground. For containers, a high-quality ericaceous potting mix, perhaps amended with extra perlite or pine bark fines for enhanced drainage and structure, is perfect. Avoid heavy clays or alkaline soils.
d. How often should I water my tea plants?
There’s no fixed schedule. Water when the top 1-2 inches of soil feel dry to the touch. Water thoroughly, allowing excess to drain away. Check more often in hot weather, windy conditions, or if the plant is in a container. Check less often in cool, damp weather or during winter dormancy. The key is consistent moisture, never saturation.
e. Do tea plants need a lot of fertilization?
They are considered moderate to heavy feeders, especially if you harvest leaves regularly (as harvesting removes nutrients). Fertilize during the active growing season (spring/summer) using a balanced, ericaceous fertilizer every 4-8 weeks, following package directions. Reduce or stop feeding in fall/winter. Organic amendments like compost also provide slow-release nutrients.
f. How do I protect tea plants from frost?
Young plants and less hardy varieties (like var. assamica) are most vulnerable. Use frost cloth or burlap covers during frost warnings. Apply a thick layer of organic mulch around the base (not touching the stem). Ensure plants are well-hydrated before a freeze. Move container plants to a sheltered location (garage, porch, indoors) during cold snaps. Established, hardy varieties (var. sinensis) in suitable zones (7+) may only need protection during unusually severe freezes.
g. Is it easier to grow tea plants from cuttings or seeds?
Cuttings are generally easier and faster, producing a plant identical to the parent in about 1-2 years (ready for light harvest sooner). Seed propagation is possible but takes much longer (3+ years to harvest), germination can be erratic, and the resulting plant may have slight variations from the parent.
h. What are the best conditions for harvesting tea leaves?
Harvest the ‘flush’ (terminal bud and top 1-2 young leaves) during active growth periods (mainly spring). Pick in the early morning after dew dries. Handle leaves gently. Harvest regularly but lightly from young plants.
i. How complicated is processing harvested tea leaves?
Processing transforms the freshly picked green leaf into the tea you drink. The steps determine the tea type:
- Green Tea: Withering (brief or none) -> Heating (‘Firing’ – steaming or pan-firing to stop oxidation) -> Rolling/Shaping -> Drying.
- Black Tea: Withering (longer, until limp) -> Rolling/Bruising (to break cell walls) -> Oxidation (allowing leaves to darken in a cool, humid place) -> Drying (‘Firing’ to stop oxidation).
- White Tea: Often just Withering -> Drying (minimal handling).
- Oolong Tea: Partial Withering -> Shaking/Bruising -> Partial Oxidation (various levels) -> Firing -> Rolling/Shaping -> Drying.
While the principles are simple, achieving specific flavour profiles requires practice and precision, particularly regarding withering times and oxidation levels. Home processing is a fascinating experiment!
Comments (2)
Hi where is best to buy our own tea bush, in the uk
Your best bet is probably checking online specialist nurseries. Places like:
Thompson & Morgan
Suttons
The RHS Plant Finder tool is also great for seeing who stocks it.
You could also try bigger local garden centres, but it’s worth phoning first to see if they have any in stock to save yourself a trip.
Just a heads up, the main thing it needs is acidic (ericaceous) soil, like a rhododendron. The easiest way is to just grow it in a pot with ericaceous compost.
Hope that helps. Good luck with it.