 Skip to content
The Complete Guide to Growing Roselle (Hibiscus sabdariffa)
Roselle (Hibiscus sabdariffa), also known as Florida Cranberry, Red Sorrel, or Jamaican Sorrel, is a striking plant prized for its
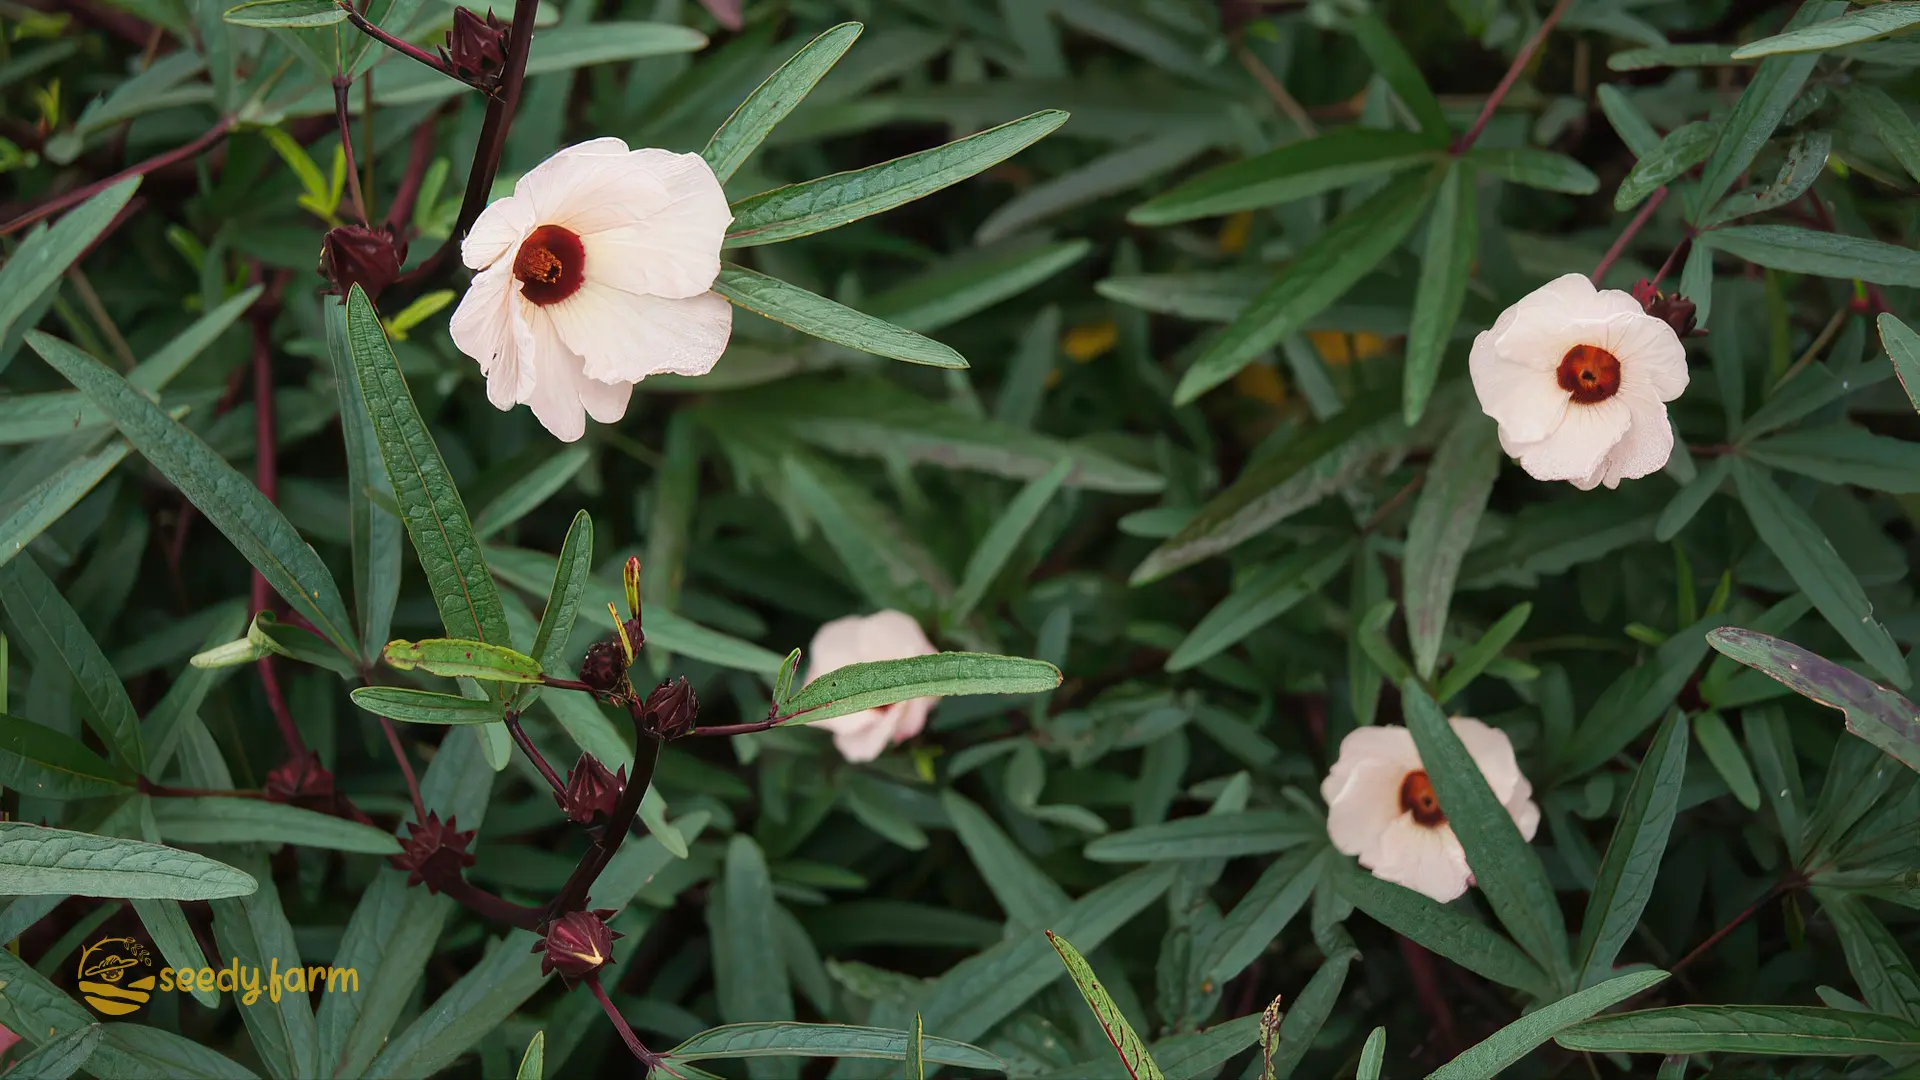
Roselle (Hibiscus sabdariffa), also known as Florida Cranberry, Red Sorrel, or Jamaican Sorrel, is a striking plant prized for its vibrant red calyces, used to make a tart, refreshing tea and other culinary delights. A member of the mallow family (Malvaceae), related to okra and cotton, it’s a short-lived perennial in warm climates (USDA Zones 8-11) but often grown as an annual in cooler regions. This guide provides evidence-based instructions for successfully cultivating roselle, from seed to harvest and beyond.
I. Introduction and Background
1. History and Origin
Roselle originated in West and Central Africa and spread worldwide via trade routes. It’s a culturally significant plant, known by various names reflecting its global journey. Beyond its culinary uses, roselle has a history of traditional medicinal applications, including use as a diuretic and mild laxative. It plays a role in various cultural dishes and beverages, such as Bissap, Senegal’s national drink.
2. Varieties
Choosing the right variety can impact your harvest and culinary applications. Here are some notable types:
- Thai Red: A popular choice for calyx production, featuring red stems, deep red calyces, and often red-veined leaves.
- Burmese Roselle (Chin Baung): Primarily grown for its sour, slightly acidic leaves, used in salads and cooked dishes.
- West African Green: Produces edible green calyces, offering a different flavor profile.
- Victor: An heirloom variety well-suited to southern Florida, known for its large, bright red calyces.
- Early-Blooming Varieties: While claims exist, consistent evidence of truly early-blooming varieties is limited. Experimentation is encouraged if you find one, particularly in short-season climates.
Identifying True Roselle
Crucial Note: Not all Hibiscus plants are Roselle. Ornamental varieties like Tropical Hibiscus, Hawaiian Hibiscus, or Chinese Hibiscus (Hibiscus rosa-sinensis) are grown for their flowers, not their calyces. Always purchase seeds or plants from a reputable source, specifying Hibiscus sabdariffa to ensure you get the correct, edible species.
## II. Growing Requirements and Site Selection
1. Environmental Needs
- Light: Full sun (at least 6 hours of direct sunlight daily) is essential for optimal flower and calyx production. While some sources suggest afternoon shade in extremely hot climates might be beneficial, shade will significantly reduce yields. Assess the sun’s intensity in your specific location.
- Temperature and Humidity: Roselle thrives in warm, humid conditions. - Germination: 75-85°F (24-29°C) - Overall Growth: 65-95°F (18-35°C) - Frost Sensitivity: Roselle is highly sensitive to frost and freezing temperatures, which will kill the plant. - Humidity: High humidity (above 60%) is beneficial but not mandatory with adequate watering. In dry climates, consider grouping plants or using indoor humidifiers.
- Hardiness Zones: 8-11. Microclimates within your garden can influence suitability, so observe your specific conditions.
2. Soil and Water Requirements
- Soil Type: Well-drained soil is critical. A sandy loam is ideal, but roselle tolerates various soil types (clay, loam, sand) as long as drainage is sufficient. - Drainage Test: After heavy rain, water should drain within an hour. - Soil Amendments: Amend heavy clay soils with compost and perlite to improve drainage. - pH Preference: A fairly neutral pH (around 6.0-7.0) is preferred. - Fertility: Fertile soil is beneficial, but overly rich soil can lead to excessive vegetative growth at the expense of calyx production.
- Watering: Consistent moisture is crucial, especially during establishment and dry periods. - Drought Tolerance: Roselle develops some drought tolerance due to its deep root system, but regular watering, especially during extended dry spells, maximizes harvest. - Overwatering: Avoid overwatering, which leads to root rot. - Watering Technique: Water deeply when the top inch of soil feels dry. Soaker hoses or drip irrigation are highly recommended to deliver water directly to the roots, minimizing waste and reducing fungal disease risk.
III. Propagation
Roselle can be propagated from seed or stem cuttings, with seed being the most common and generally most successful method.
1. Propagation from Seed
- Timing: - Indoor Starting: 6-8 weeks before the last expected frost in cooler climates. - Direct Sowing: Once soil temperatures consistently reach 75-85°F (24-29°C) in warmer climates. (e.g., March-May in the low desert of Arizona).
- Seed Scarification: To improve germination, scarify the seeds: - Method 1 (Preferred): Gently nick the seed coat with fine sandpaper. This provides precise control. - Method 2: Soak seeds in freshly boiled water, cooled slightly to about 140°F (60°C), for 10-15 minutes, then soak in the cooling water for 12-24 hours. - Caution: Do not over-scarify. The goal is a small opening for water penetration.
- Sowing: - Depth: ½ inch deep. - Seeds per Pot/Location: 2-3, thinning to the strongest seedling after the emergence of true leaves (the second set of leaves, distinct from the seed leaves). - Growing Medium: Use a seed-starting mix for best results.
- Germination: - Timeframe: Typically within 2 weeks in warm, moist soil. - Moisture: Maintain consistent moisture, but avoid sogginess. - Heat Mat: A heat mat can help maintain consistent soil temperature for optimal germination.

2. Propagation from Stem Cuttings
While less common, this method is useful for propagating desirable plants.
- Cutting Selection: Take 5-6 inch cuttings from healthy, actively growing stems (not flowering), cutting just below a node (where a leaf/branch emerges).
- Leaf Removal: Remove lower leaves, leaving a few smaller leaves at the top to reduce transpiration (water loss).
- Rooting: - Rooting Hormone: Dip the cut end in rooting hormone (optional but beneficial for faster, more robust root development). - Potting Mix: Use well-draining potting soil (e.g., perlite and peat moss or vermiculite mix). Insert the cutting, burying the bottom 3-4 inches.
- Root Development: - Timeframe: Roots should form in 2-3 weeks with consistent moisture and warmth. - Moisture: Keep the soil consistently moist, but not soggy. - Humidity: A humid environment (e.g., a plastic bag with ventilation holes) can improve success. Place cuttings in bright, indirect light. - Note: Plants from cuttings may produce fewer flowers.
IV. Growing Roselle: Two Approaches
Roselle can be successfully grown in two primary ways: directly in the ground or in containers. The best method depends on your climate, available space, and desired level of control.
- Growing in the Ground: Ideal for warmer climates (Zones 8-11) with ample space, allowing roselle to reach its full potential.
- Growing in Containers: Essential for colder climates with frost risk, allowing for overwintering indoors. Also suitable for limited spaces.
1. Growing in the Ground
a. Planting Out
- Timing: Plant seedlings or rooted cuttings outdoors after the last frost, when weather is consistently warm (similar to tomatoes and peppers). Soil temperature should be at least 70°F (21°C).
- Spacing: - Plants: 24-36 inches apart. Wider spacing (3-6 feet) is recommended for larger plants and potentially higher yields. - Rows: At least 5 feet apart. Wider spacing improves air circulation, reducing disease risk.
- Soil Preparation: Amend the soil with compost or a balanced, slow-release fertilizer before planting, incorporating it into the top 6-8 inches.
b. Ongoing Care
- Watering: Keep newly planted roselle well-watered until established. Water deeply and regularly, especially during dry spells. Soaker hoses or drip irrigation are highly recommended.
- Weeding: Maintain a weed-free area, especially when plants are young. Early weed competition can stunt growth. Hand-pull weeds carefully to avoid disturbing roselle roots.
- Mulching: Apply organic mulch (straw, wood chips, shredded leaves) to retain moisture, suppress weeds, and regulate soil temperature. Keep mulch a few inches away from the stem to prevent rot.
- Fertilizing: Additional fertilization is usually unnecessary and may even reduce flower production. Avoid over-fertilizing, especially with nitrogen. If fertilizing, a balanced, slow-release fertilizer or compost incorporated before planting is generally sufficient. Some suggest potassium fertilizer during active growth to encourage bloom and calyx development, but follow product directions carefully. A soil test can identify nutrient deficiencies.
- Pruning: Pruning young plants can encourage bushier growth. When stems reach about 18 inches, remove 2-3 inches, cutting just above a node. For established perennial bushes, prune all but the first two buds on a branch in Spring. Remove dead, discolored, or diseased material throughout the season. Pruning improves air circulation.
- Support: Roselle plants can become large and heavy. Provide support (stakes, cages) at planting time to prevent branch breakage.
c. Companion Planting
- Beneficial Companions: Brightly colored annuals (zinnias, coleus, nasturtiums) can be planted with roselle. Nasturtiums and roselle are both edible. Pollinators (bees, butterflies, hummingbirds, hoverflies) are attracted to roselle. Consider herbs like basil or dill, which can deter some pests. Hibiscus can boost pollination in nearby coffee plants. Marigolds can suppress nematodes, so consider them as a companion or cover crop.
- Plants to Avoid: No specific negative companions are definitively documented. However, avoid planting roselle where it will shade out other sun-loving plants. Avoid planting near heavy feeders, which may compete for nutrients.
2. Growing Roselle in Containers
a. Choosing the Right Container
- Size: This is critical. Roselle develops a deep taproot and a substantial overall size. Choose a container that is at least 15 gallons (57 liters), but ideally 20 gallons (76 liters) or larger. A half-barrel planter is a good option. Smaller containers will restrict growth and drastically reduce yield.
- Material: Porous materials like terracotta can help with drainage, but they dry out faster. Plastic or glazed ceramic pots retain moisture longer, which can be beneficial in hot climates, but require careful watering to avoid root rot. Ensure the container has ample drainage holes.
- Color: In very hot climates, lighter-colored pots will reflect sunlight and keep the roots cooler. Dark-colored pots absorb heat, which can be beneficial in cooler climates but may overheat roots in intense sun.
b. Soil Mix for Containers
- Well-Draining: Just as with in-ground planting, excellent drainage is paramount. Do not use garden soil alone, as it compacts in containers, impeding drainage and root growth.
- Recommended Mix: A good mix consists of: - 1 part high-quality potting mix (avoid mixes with excessive fertilizer) - 1 part compost (provides nutrients and improves soil structure) - 1 part perlite or vermiculite (improves drainage and aeration) - Optional: A small amount of slow-release, balanced fertilizer can be incorporated at planting time, but follow package directions carefully. Avoid high-nitrogen fertilizers.
c. Planting and Care in Containers
- Planting: Follow the same guidelines as for in-ground planting (Section IV). Ensure the root ball is planted at the same level it was in its previous container.
- Watering: Container-grown plants dry out much faster than those in the ground. Monitor soil moisture daily\, especially during hot weather. Water deeply when the top inch of soil feels dry. Consider a self-watering container or drip irrigation system to maintain consistent moisture.*
- Fertilizing: Because nutrients leach out more quickly from containers, supplemental feeding *may be needed, but proceed with caution. A dilute solution of a balanced liquid fertilizer, or a fertilizer formulated for flowering plants (higher in phosphorus and potassium), can be applied every few weeks during active growth. Always err on the side of less fertilizer rather than more. Observe the plant; pale leaves or poor growth may indicate a nutrient deficiency.
- Sunlight: Place the container in a location that receives at least 6 hours of direct sunlight daily.
- Support: Even in containers, roselle can become top-heavy. Provide support (a sturdy stake or tomato cage) at planting time.
- Pruning: Pruning as described in Section V (Ongoing Care) can be beneficial to encourage bushier growth and better air circulation within the container.
- Pest and Disease Management: Monitor pests as described in Section VII. Container may have restricted air flow, so be vigilant for fungal diseases.
d. Overwintering Container-Grown Roselle
- Moving Indoors: The primary advantage of container growing is the ability to extend the harvest season. Before the first frost, move the container to a bright, sunny location indoors. A south-facing window is ideal.
- Indoor Conditions: - Light: Provide as much light as possible. Supplemental grow lights may be necessary to maintain adequate light levels, especially during winter. - Temperature: Maintain a temperature above 60°F (15°C). Avoid placing the plant near cold drafts or heat sources. - Watering: Reduce watering frequency during the winter months, but do not allow the soil to dry out completely. - Humidity: Indoor air can be dry, especially during winter. Increase humidity by grouping plants together, placing a tray of water near the plant, or using a humidifier.
- Dormancy: Roselle may enter a semi-dormant state during the winter, with reduced growth and flowering. This is normal.
- Spring Transition: After the last frost, gradually acclimate the plant to outdoor conditions before returning it to its full-sun location. This “hardening off” process prevents shock. Start by placing it in a sheltered, shady spot for a few hours each day, gradually increasing the time and sunlight exposure over a week or two.
e. Repotting
- Frequency: Roselle may need to be repotted every 1-2 years, depending on its growth rate and the size of the container.
- Timing: The best time to repot is in the spring, before the start of active growth.
- Procedure: Choose a container that is slightly larger than the current one. Gently remove the plant from its old container, loosen any circling roots, and replant it in the new container with fresh potting mix.
V. Pest and Disease Management & Troubleshooting
Roselle is generally resilient, but vigilance is key to addressing potential issues.
1. Common Pests
- Aphids: Small, sap-sucking insects that cluster on stems and leaves, causing distortion and potentially spreading viruses. They leave behind “honeydew,” attracting sooty mold. - Control: Strong water spray; insecticidal soap or neem oil (apply in early morning or late evening).
- Mealybugs: Sap-sucking insects that appear as white, cottony masses on stems and undersides of leaves. - Control: Wipe away; neem oil or insecticidal soap.
- Root Knot Nematodes: Microscopic, soil-dwelling worms that infect roots, causing galls (swellings) that impair nutrient and water uptake. Symptoms include stunted growth, yellowing leaves, and reduced yields. - Control: Crop rotation is the best preventative. Avoid planting roselle (or susceptible plants like tomatoes, peppers, okra) in the same location repeatedly. Soil solarization before planting can help. Planting marigolds as a companion or cover crop is beneficial.
2. Common Diseases
- Root Rot: A fungal disease caused by overwatering or poor drainage.Symptoms include wilting, yellowing leaves, and soft, mushy roots. - Control: Prevention is key.Ensure well-draining soil and avoid overwatering.Allow the top inch of soil to dry between waterings.If suspected, carefully dig up the plant and inspect roots.If mostly brown and mushy, the plant is likely unsalvageable. If some healthy roots remain, replanting in a new location with well-drained soil may be attempted, but success is not guaranteed.
- Powdery Mildew: Fungal disease appearing on leaves, can spread throughout the plant. - Control: Ensure good air circulation. Remove infected leaves and discard. If the infection spreads, the whole plant may need removal.
3. Troubleshooting Table
| Problem | Possible Cause(s) | Solution |
|---|---|---|
| Few/no flowers/calyces | Lack of sunlight, over-fertilization, late planting, incorrect Hibiscus species | Ensure full sun (6+ hours), avoid excessive nitrogen, plant earlier (if possible), confirm Hibiscus sabdariffa. |
| Stunted growth | Cool temperatures, poor drainage, pests/diseases, nutrient deficiency | Plant after last frost, ensure well-drained soil, address pests/diseases promptly, consider a soil test. |
| Yellowing leaves | Overwatering, nutrient deficiency, pests, root rot | Check soil moisture (avoid overwatering), assess for nutrient deficiencies (consider a soil test), inspect for pests, check for signs of root rot. Yellowing can also indicate nitrogen deficiency. |
| Wilting | Underwatering, root rot, extreme heat | Water deeply during dry spells, ensure well-draining soil, provide afternoon shade in very hot climates, check for root rot. |
| Broken branches | Lack of support, heavy calyx load | Provide support (stakes, cages) at planting time. |
| Plant dies | Frost | Harvest all calyces before the first fall frost. Not suited for frosty climates without protection (e.g., greenhouse). |
| Powdery Masses on Leaves | Powdery Mildew | Remove infected leaves; if it spreads, remove the entire plant. Ensure good air circulation. |
| Soft or Blackened Roots | Root Rot | Prevention is key. Potted plants may be salvageable by repotting in fresh soil, but success is not guaranteed. |
| Aphids/Scale/Mealybugs | Pest Infestation | Manual removal (wiping with a damp cloth, sometimes with a tiny bit of rubbing alcohol); neem oil or insecticidal soap as needed. Hard-shelled scale can be popped off. |
## VI. Harvesting, Utilization, and Preservation
1. Harvesting
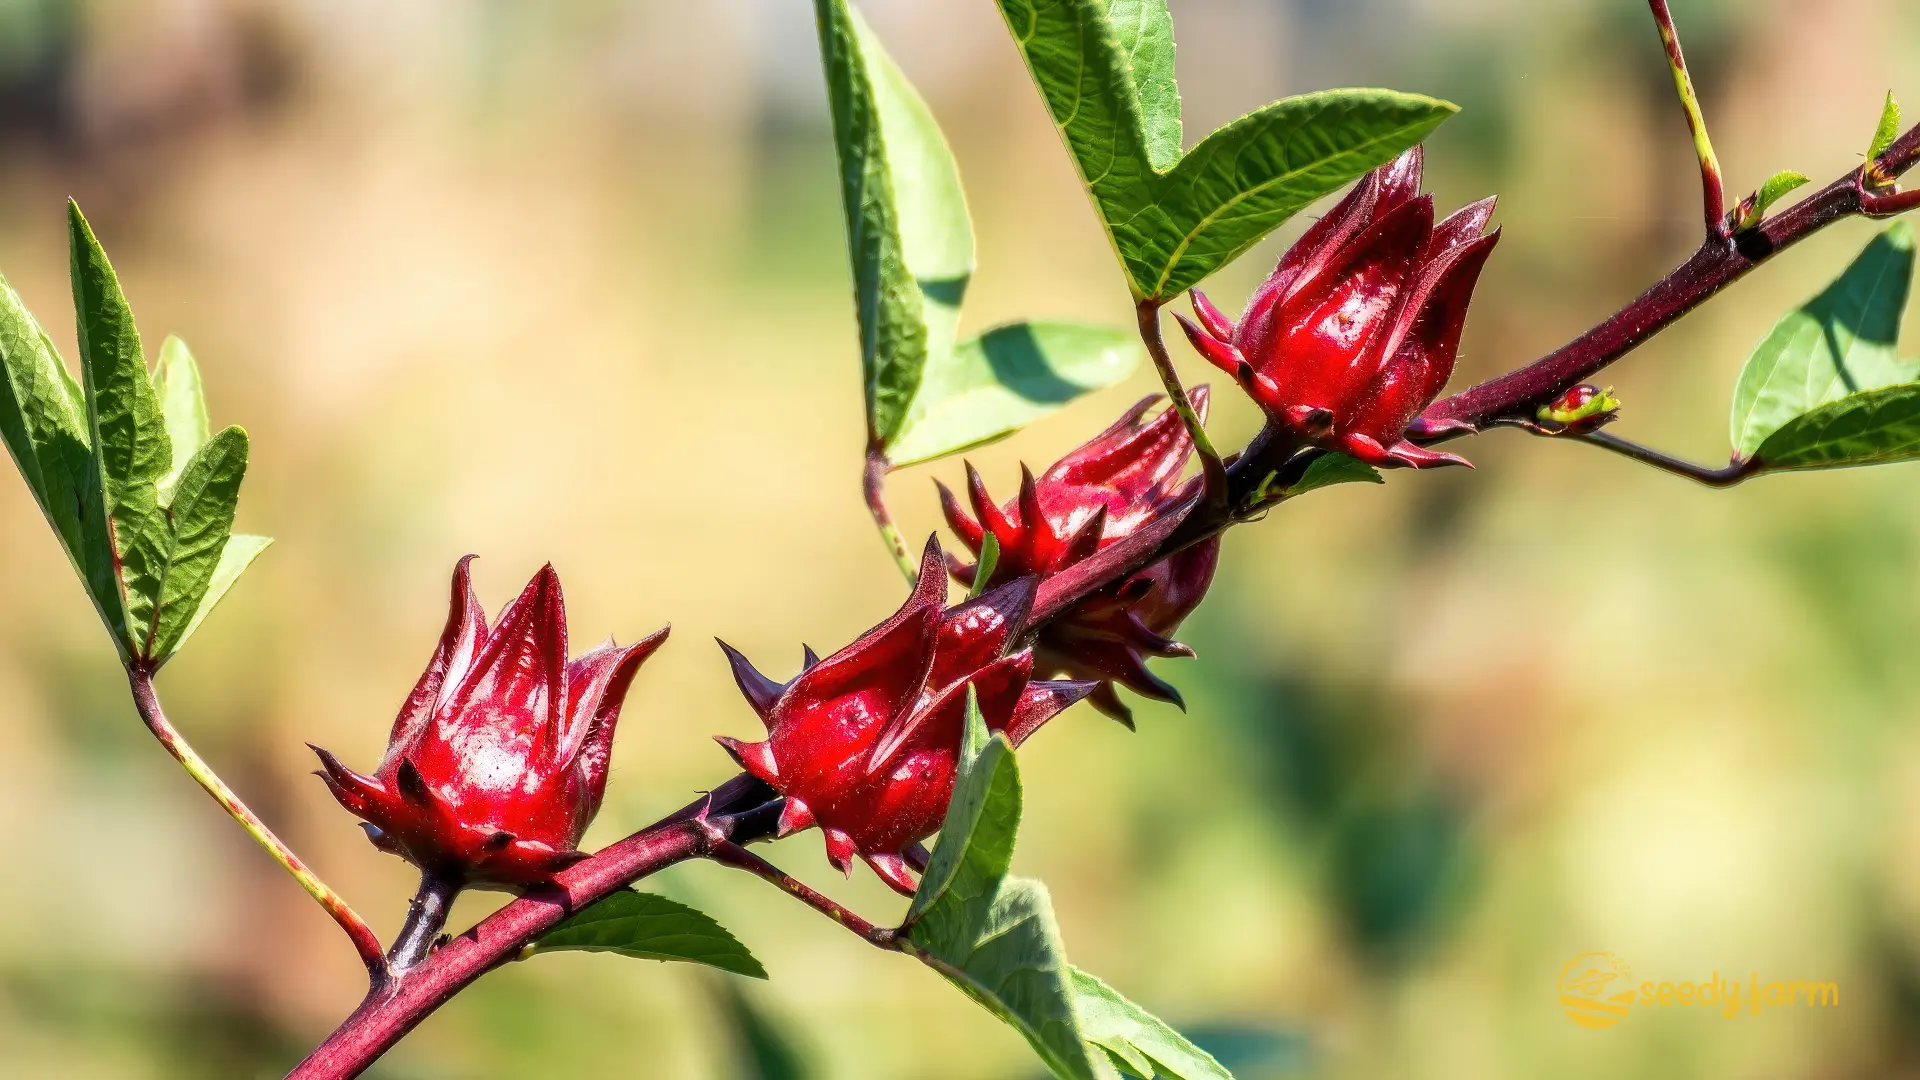 - Timing: Calyces are ready 7-10 days after the flower blooms and falls off. The calyx should be about 1 inch wide (or slightly larger), and the seed pod inside should be tender and easily pierced with a fingernail. Harvest before temperatures drop below 40°F.
- Technique: Use clippers or sharp scissors to cut calyces close to the base, avoiding branch damage. Wear gloves, as calyces can have small, prickly hairs.
- Frequency: Frequent harvesting encourages more flower and calyx production. “The more you pick, the more you get.”
2. Culinary Uses
- Tea: The most popular use is for “Jamaica” tea. Recipe: 2 cups fresh, deseeded calyces (or ½ cup dried) in 8 cups water; bring to a boil, remove from heat, cover, steep 15-20 minutes. Strain and add sweetener (honey, sugar) and/or lemon/lime to taste. Serve hot or iced.
- Other Beverages: Roselle is used in various beverages worldwide, including Bissap.
- Jellies, Jams, Syrups, Sauces: The calyces’ tartness and natural pectin make them excellent for preserves.
- Other Culinary Applications: Young leaves are used like spicy spinach. Calyces can be used in pies, chutneys, and other recipes, often as a cranberry substitute.
- Edible parts: Roselle’s flowers, leaves and pods are all edible.
| Nutrient | Amount per 100g (3.5 oz) | % Daily Value* |
|---|---|---|
| Calories | 49 kcal | N/A |
| Water | 87.2 g (3.08 oz) | N/A |
| Protein | 0.96 g (0.034 oz) | 1.9% |
| Carbohydrates | 11.31 g (0.399 oz) | 3.8% |
| Dietary Fiber | 1.8 g (0.063 oz) | 7.2% |
| Total Fat | 0.49 g (0.017 oz) | 0.6% |
| Vitamin C | 12.3 mg (0.0004 oz) | 13.7% |
| Calcium | 215 mg (0.0076 oz) | 21.5% |
| Iron | 1.48 mg (0.00005 oz) | 8.2% |
*Percent Daily Values are based on a 2,000 calorie diet. Your daily values may be higher or lower depending on your calorie needs.
3. Preservation
- Drying: Separate seed pods from calyces. Rinse calyces and dry them on a screen or in a dehydrator (135°F/57°C for 4-5 hours) until completely dry and brittle. Store in airtight containers in a cool, dark place.
- Freezing: Remove seed pods, rinse calyces, freeze on a cookie sheet, then transfer to freezer bags. This preserves color and flavor well.
4. Seed Saving
Allow some calyces to dry completely on the plant. When pods crack open easily, shake out seeds and store them in a cool, dark place. Ensure seeds are completely dry before storing to prevent mold.
Additional Tips and Considerations for Planting Roselle
- Day-Length Sensitivity: Roselle is day-length sensitive; flower production is triggered by shortening days in the fall. Earlier planting (when conditions allow) leads to a larger plant and potentially larger harvest. In short-season areas, indoor seed starting is crucial.
- Edible Parts: While all parts are technically edible, calyces are most commonly used. Seed pods are edible but usually removed before using the calyces due to texture.
- Container Growing: In colder climates, grow roselle in a large container that can be moved indoors before the first frost to extend the harvest season.
Comments (4)
Hi , I’m in NW Florida . I was trying to find info about early blooming Roselle which I’ve apparently acquired this year as my bushes are beginning to bloom a lot and making full size calyx’s.
But it sounds like you have no experience with the early variety.
I guess I will begin harvesting and freezing now and continue throughout the summer till they stop forming.
Hi Keith,
Thanks for the message and for sharing what’s happening with your roselle in NW Florida.
You’re right, the guide is a bit careful about early blooming types because most roselle varieties need the shorter days of fall to start making flowers. It’s really helpful to hear that you have a type that’s already producing full size calyces now. It confirms that those earlier varieties are definitely out there and work well.
Your plan sounds perfect. Harvesting them as they’re ready and freezing them is exactly the right thing to do. Keep picking them, and the plant should keep making more for you. Since you’ve got a good one, you might want to let a few pods dry out on the plant later in the season to save the seeds for next year. That way, you’re sure to have the same early variety again.
P/S: If you happen to know the name of the variety or where you got the seeds, I’d be very interested to learn more. No worries at all if you don’t, though.
Thanks again for the info, it’s always good to hear what’s actually working for people in their gardens. Happy harvesting
I inquired to the person that I bought them from. They’ve been growing this summer blooming variety for a few years but do not recall how they came to have it.
Hi Keith,
Thank you for checking. It’s common for the names of good plants to get lost over time. It’s good to know it’s a reliable summer-blooming variety. You should definitely save seeds from it for next year.
Thanks again for the information.