 Skip to content
How to Grow Jicama: A Comprehensive Guide for Gardeners
Jicama, a delightfully crispy and refreshing root vegetable, is a culinary star in many global cuisines. Renowned for its mildly
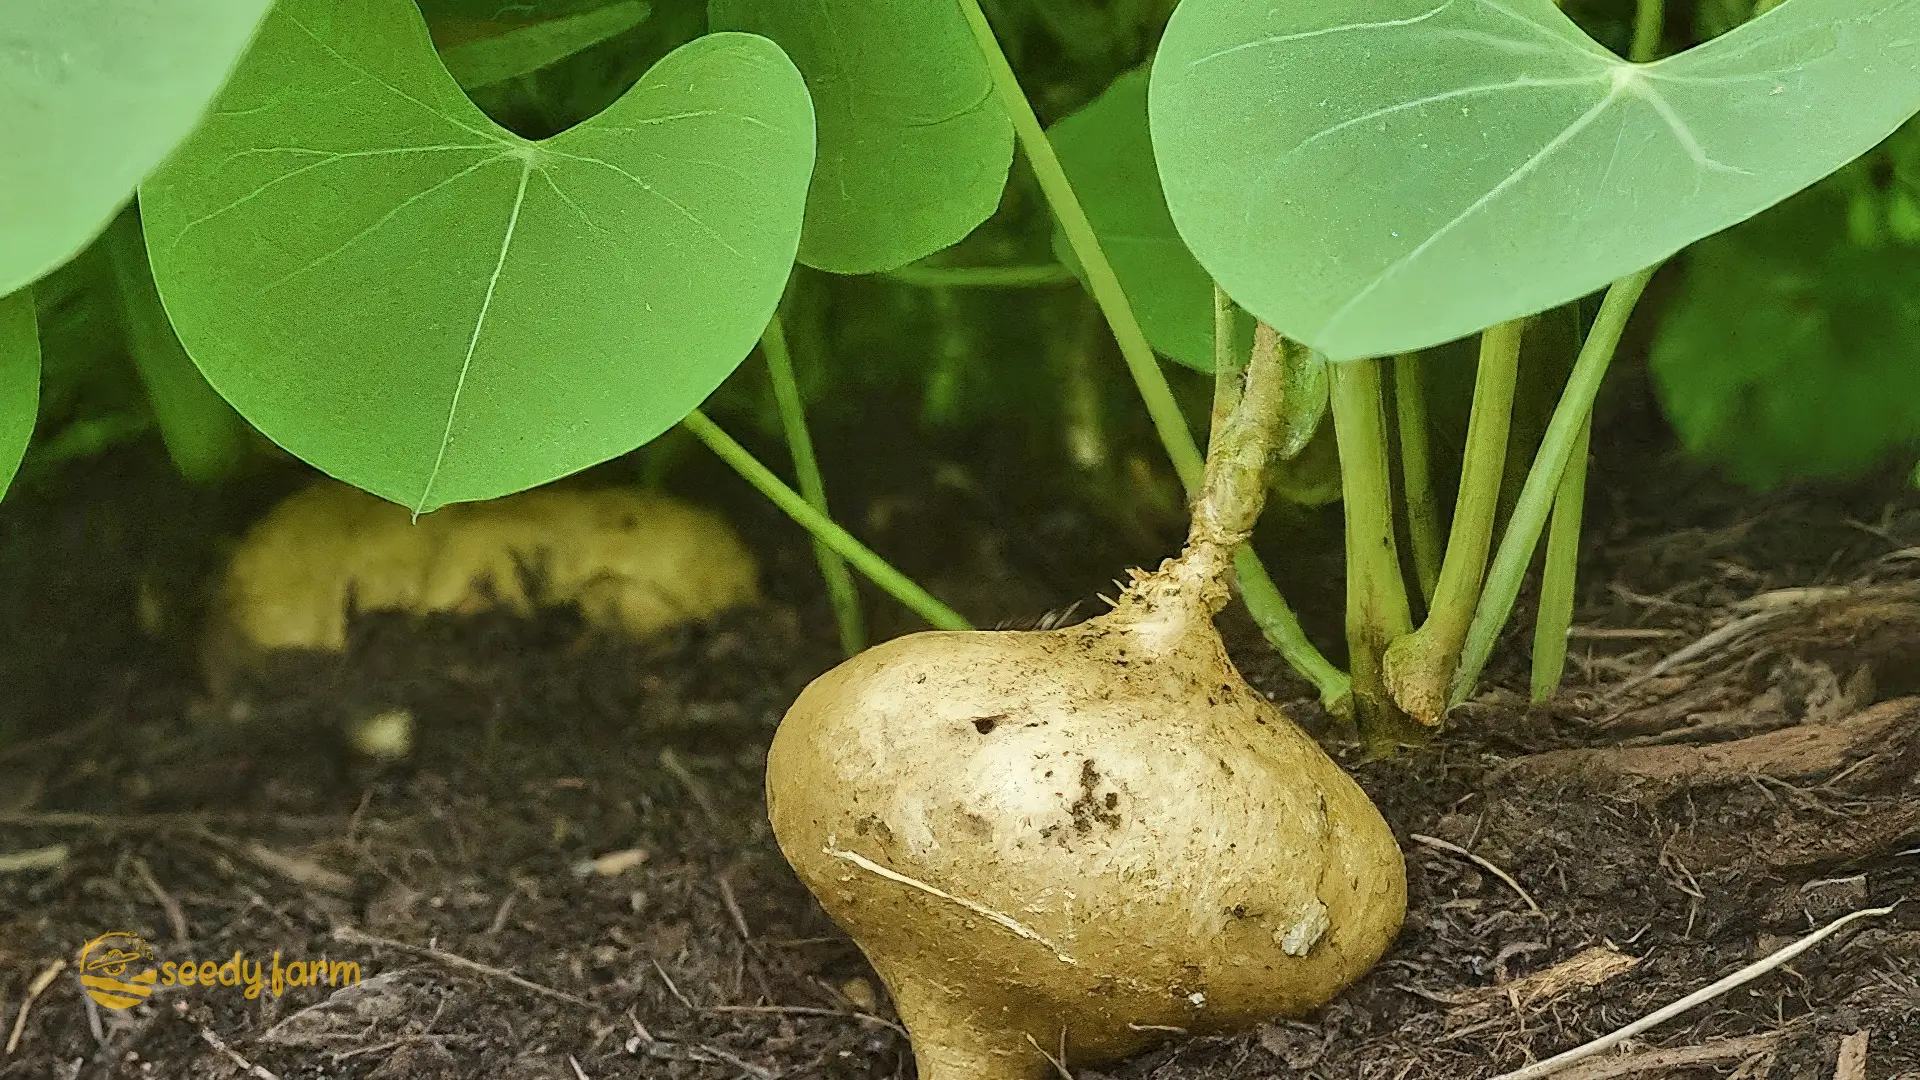
Jicama, a delightfully crispy and refreshing root vegetable, is a culinary star in many global cuisines. Renowned for its mildly sweet, nutty flavor and satisfying crunch, it’s incredibly versatile in salads, salsas, stir-fries, and more. Adding jicama (Pachyrhizus erosus) to your garden can be a truly rewarding experience. Whether you are a seasoned horticulturist or a beginner eager to cultivate something unique, growing jicama is an achievable and productive goal. This guide provides everything you need to know for success, from preparing the perfect soil and mastering planting techniques to managing potential challenges and harvesting your delicious tubers.
I. The Joys and Benefits of Growing Jicama
1. Brief Overview of Jicama
a. Origin and History
Jicama, botanically known as Pachyrhizus erosus, and commonly called yam bean or Mexican turnip, originated in Mexico and Central America. It has been cultivated in these regions for centuries, valued both as a staple food source and for its perceived health benefits.
Spanish explorers introduced jicama from Mexico to the Philippines, where it adopted the name singkamas (derived from the Nahuatl word xicamatl). Its cultivation subsequently spread throughout Southeast Asia, including China. Raw jicama is a popular ingredient in many regional dishes, such as popiah, bola-bola (meatballs), and fresh lumpia in the Philippines, and salads like yusheng and rojak in Indonesia, Singapore, and Malaysia. As a member of the legume family (Fabaceae), jicama thrives in tropical and subtropical climates, making it a widely available food in these areas.
Interestingly, Padang, the capital of West Sumatra, Indonesia, is affectionately known as “the city of bengkuang” (the local name for jicama). Its widespread cultivation and integration into local culture have led many residents to consider it an indigenous crop.
| Specification | Details |
|---|---|
| Scientific Name | Pachyrhizus erosus |
| Family | Fabaceae (Legume or Pea family) |
| Plant Type | Herbaceous vine grown for its edible tuberous root |
| Root Description | Large, typically turnip-shaped or elongated, with thin, brown, fibrous skin |
| Root Size | Commonly 4-8 inches (10-20 cm) diameter; can occasionally reach much larger sizes, potentially weighing up to 20 pounds (9 kg) under optimal, long-season conditions |
| Flesh Color | Crisp white |
| Flesh Texture | Juicy, crisp, slightly starchy, similar to a water chestnut or pear |
| Flavor | Mildly sweet, nutty, and refreshing |
| Cultivation | Requires warm tropical or subtropical climates; long growing season needed |
| Growing Season | Requires 5-9 months of frost-free weather for tuber development |
| Important Safety Note: Edible Parts | Only the tuberous root is edible. All other parts of the plant, including stems, leaves, flowers, pods, and seeds, contain rotenone, a natural insecticide, and are toxic if ingested. |
| Nutritional Value | Excellent source of dietary fiber (including prebiotic inulin), high in vitamin C, good source of potassium, low in calories. |
| Origins | Native to Mexico and Central America |
| Common Names | Jicama, Yam Bean, Mexican Turnip, Mexican Potato, Singkamas (Philippines), Bengkuang (Indonesia/Malaysia) |
| Uses | Consumed raw (salads, slaws, crudités), cooked (stir-fries, soups), snacks (jicama sticks with chili-lime), substitute for water chestnuts. |
#### b. Nutritional Benefits
Jicama is a true nutritional powerhouse. It’s notably high in dietary fiber, particularly prebiotic inulin, which nourishes beneficial gut bacteria and supports digestive health. It’s an excellent source of vitamin C, a vital antioxidant, and contains important minerals like potassium. Despite its nutrient density, jicama is low in calories and carbohydrates, and its high water content contributes to hydration, making it an excellent choice for health-conscious individuals.
| Nutrient | Value per 100g (approximate) | % Daily Value (DV)* |
|---|---|---|
| Energy | 38 kcal | 2% |
| Carbohydrates | 8.8g | 3% |
| Protein | 0.7g | 1% |
| Fat | 0.1g | 0% |
| Dietary Fiber | 4.9g | 18% |
| Vitamin C | 20.2mg | 22% |
| Folate (Vitamin B9) | 12μg | 3% |
| Calcium | 12mg | 1% |
| Iron | 0.6mg | 3% |
| Magnesium | 12mg | 3% |
| Phosphorus | 18mg | 1% |
| Potassium | 150mg | 3% |
| Zinc | 0.2mg | 1% |
* Percent Daily Values are based on a 2,000 calorie diet. Your daily values may be higher or lower depending on your calorie needs.

2. Why Grow Jicama in Your Garden
- Exceptional Culinary Versatility: Jicama’s delightfully crisp texture and subtly sweet flavor enhance a wide array of dishes. Enjoy it raw for a refreshing crunch in salads, slaws, and salsas, or incorporate it into stir-fries and soups where it retains some crispness, similar to water chestnuts.
- Relatively Low-Maintenance Crop: Once established in warm conditions, jicama requires minimal fuss. Basic watering, occasional feeding, and support for its vining growth are generally sufficient, making it suitable for gardeners of various experience levels.
- Adaptable Growing Range (with caveats): While jicama is fundamentally a warm-climate plant needing a long growing season (5-9 months), it can be grown in cooler regions if started indoors several weeks before the last frost or cultivated in containers that can be moved to protected locations.
- Unique Garden Addition: Cultivating jicama adds diversity to your garden harvest, providing a vegetable that might not be readily available or fresh in local markets.
- Direct Access to Freshness & Nutrition: Growing your own ensures the freshest possible jicama, maximizing its crispness, flavor, and nutritional benefits right from your garden.
- Potential Soil Benefits: As a legume (Fabaceae family), jicama plants have root nodules containing nitrogen-fixing bacteria, which can potentially enrich the soil with nitrogen, benefiting subsequent crops.
II. Choosing the Right Jicama Variety
Selecting an appropriate jicama variety is a key step toward a successful harvest. While distinct named cultivars aren’t as common in the general seed trade as they are for vegetables like tomatoes or peppers, understanding potential variations and sourcing reliable seed is important. Often, seeds are sold simply as “Jicama” or “Pachyrhizus erosus“.
1. Common Jicama Types (Variations often based on origin/local selections)
While specific named varieties like ‘Beni’, ‘Tamayo’, ‘White Queen’, ‘Cristalina’, or ‘San Juan’ are sometimes mentioned, they are often not widely available commercially, especially outside specialized or regional markets. Most commercially available jicama seed is simply labeled Pachyrhizus erosus. Potential variations might include:
- *Water Jicama (Jicama de Agua):* Often refers to the standard type known for its round shape and high water content. This is the most common type found.
- *Milk Jicama (Jicama de Leche):* Sometimes described as having a more elongated shape and potentially slightly less water content, though distinctions can be subtle.
- Note: Regional names and selections exist, but consistent, named cultivars with distinct, verifiable traits readily available to home gardeners are limited. Focus on acquiring quality seeds from a reputable source.
2. Factors to Consider When Selecting Jicama
- Climate Suitability & Growing Season Length: This is the most critical factor. Jicama requires a long, warm growing season (minimum 5 months, ideally 7-9 months of frost-free weather). Ensure your climate can provide this window. If your season is shorter, plan to start seeds indoors 6-8 weeks before the last expected frost.
- Intended Use: Since most available jicama offers similar crispness and mild sweetness ideal for raw or cooked uses, this is less of a deciding factor than climate.
- Source Reputation: Purchase seeds from reputable seed companies known for quality control and viable seeds. This is more crucial than seeking a specific, often unavailable, named variety.
- Seed Freshness: Use seeds that are relatively fresh (within 1-3 years). Older seeds may have reduced viability.
3. Choosing Seeds or Tubers
- Seeds (Recommended): Starting jicama from seeds is the standard and most reliable method for home gardeners. Seeds are widely available, offer genetic diversity, and allow you to control the start of your growing season, especially important in cooler climates by starting indoors. Look for seeds that appear plump, uniformly dark (often black or dark brown), and free from cracks or visible damage.
- Tubers (Less Common/Practical): While technically possible to grow jicama from small, sprouted tubers (similar to planting potatoes), this is not common practice. It requires obtaining disease-free “seed” tubers, which are rarely sold. Using store-bought jicama for planting is unreliable as they are often treated to prevent sprouting and may carry diseases. Growing from seed is strongly recommended.
- Seed Preparation for Planting: Jicama seeds have a hard seed coat. To improve germination speed and success rate, consider these steps: - Scarification: Gently nick or scrape the seed coat with a file or sandpaper, being careful not to damage the inner part of the seed. This allows water to penetrate more easily. - Soaking: After scarifying (or even without it), soak the seeds in warm water for 12-24 hours before planting. Discard any seeds that float after soaking, as they are likely not viable. The seeds should swell slightly.
- Seed Viability: Jicama seeds typically remain viable for 2-3 years if stored in cool, dry, dark conditions. For older seeds, perform a germination test: place a few seeds between moist paper towels in a sealed plastic bag in a warm place (around 70-80°F / 21-27°C). Check for sprouts within 7-14 days. If germination rates are low, sow more seeds than initially planned.
III. Preparing the Soil and Planting
Creating the right foundation is crucial for jicama’s vigorous vine growth and tuber development. Proper soil preparation and planting techniques set the stage for a healthy and productive crop.
1. Ideal Soil Conditions for Jicama Growth
Jicama thrives in soil that is loose, fertile, and drains exceptionally well. Key soil characteristics include:
- Soil Texture: A light, sandy loam is ideal. This texture allows water to drain freely, preventing root rot, while still holding enough moisture and nutrients. Heavy clay soils must be amended to improve drainage and tilth; otherwise, tubers may rot or be poorly formed.
- Drainage: Excellent drainage is non-negotiable. Jicama roots are highly susceptible to rot in waterlogged conditions. Consider raised beds or planting on mounds if your natural soil drainage is poor.
- Organic Matter: Incorporate generous amounts of well-rotted compost or aged manure before planting. This improves soil structure (both drainage in heavy soils and water retention in sandy soils), provides essential nutrients slowly over the season, and encourages beneficial soil microbes. Aim for compost that looks dark, crumbly, and smells earthy – avoid fresh manure, which can burn plants.
- Soil pH: Jicama prefers slightly acidic to neutral soil, ideally with a pH between 6.0 and 7.0. Conduct a soil test to determine your pH and nutrient levels. Amend according to test recommendations (e.g., add lime to raise pH or sulfur to lower it) well in advance of planting.
- Soil Depth: The soil needs to be workable to a good depth to accommodate tuber expansion. Loosen the soil to at least 12-18 inches (30-45 cm) deep where the plants will grow.
2. Site Selection and Preparation
- Sunlight Exposure: Choose a location that receives full sun – meaning at least 6 to 8 hours of direct sunlight per day. Ample sunlight is essential for photosynthesis, fueling vine growth and tuber development.
- Wind Protection: While needing sun, the site should ideally offer some protection from strong, persistent winds, which can damage the fragile vines. Planting near a fence or using windbreaks can help.
- Soil Preparation Steps: 1. Clear the area of weeds and debris. 2. Spread a 2-4 inch (5-10 cm) layer of compost or aged manure over the planting area. 3. If your soil test indicated a need for pH adjustment or specific nutrient additions (like phosphorus from bone meal for root development), add those amendments now. 4. Thoroughly till or dig the amendments into the soil to a depth of 12-18 inches (30-45 cm), creating a loose, uniform bed. Rake the surface smooth. 5. If using raised beds, fill them with a high-quality soil mix combining topsoil, compost, and potentially coarse sand or perlite for drainage.
- Soil Temperature: Jicama is a warm-season crop. Do not plant seeds outdoors until the soil temperature consistently reaches at least 65-70°F (18-21°C). Planting in cold soil will lead to poor germination and weak growth. Using black plastic mulch can help warm the soil faster in spring, especially in cooler zones.
- Crop Rotation: Avoid planting jicama where other legumes (beans, peas) have grown in the past 1-2 years to minimize the risk of soil-borne diseases specific to this family.
3. Growing Jicama from Seeds
- Timing: Sow seeds directly into the garden after all danger of frost has passed and soil temperatures are reliably warm (65-70°F / 18-21°C). In regions with short growing seasons, start seeds indoors 6-8 weeks before the last frost date in biodegradable pots (to minimize transplant shock).
- Spacing: Plant seeds about 8-12 inches (20-30 cm) apart within rows. Space rows 2-3 feet (60-90 cm) apart. This spacing provides adequate room for tuber development underground and air circulation for the vines above ground.
- Planting Depth and Technique: Sow seeds about 1 inch (2.5 cm) deep. Planting too shallowly can expose seeds to drying out or birds; planting too deeply can hinder emergence. Cover lightly with soil and firm gently. Water the area thoroughly but gently after planting to ensure good seed-to-soil contact.
- Germination: Keep the soil consistently moist (but not soggy) during the germination period. Seeds typically sprout in 7-21 days, depending on soil temperature and seed condition. Warmer soil leads to faster germination.
- Pre-Sowing Treatment (Recommended): Scarify and/or soak seeds as described in Section II.3 to encourage faster and more uniform germination. Plant the slightly swollen, treated seeds immediately.
- Thinning: Once seedlings are about 3-4 inches (7.5-10 cm) tall and have developed their first true leaves, thin them to the final spacing (8-12 inches apart). Select the strongest, healthiest seedlings to remain. Snip the unwanted seedlings off at the soil line with scissors rather than pulling them, to avoid disturbing the roots of the remaining plants.
4. Growing Jicama from Tubers (Not Recommended Practice)
While possible, this method is generally not advised due to the difficulty in sourcing suitable planting tubers and the risk of disease. If attempting:
- Timing and Spacing: Plant small, healthy, sprouted tubers after frost danger has passed and soil is warm, using the same spacing as for seeds (8-12 inches apart).
- Planting Depth and Technique: Plant tubers just below the soil surface, about 1-2 inches (2.5-5 cm) deep, with the sprouts pointing upwards. Water well.
- Tuber Selection: Use only firm, disease-free tubers explicitly intended for planting, if available. Avoid grocery store tubers.
5. Growing Jicama in Containers
Jicama can be grown in containers, which is a good option for extending the season in cooler climates or if garden space is limited.
- Container Size: Choose a large container, at least 15-20 gallons in volume, and minimum 18 inches (45 cm) deep and 20 inches (50 cm) wide per plant. Jicama needs ample space for its tuber to develop. Ensure the container has excellent drainage holes.
- Soil Mix: Use a high-quality, well-draining potting mix amended with compost. Avoid using heavy garden soil, which compacts easily in containers. Adding perlite or coarse sand can further improve drainage. Maintain a pH between 6.0-7.0.
- Planting: Plant scarified/soaked seeds 1 inch (2.5 cm) deep after the container soil is warm. You might plant 2-3 seeds per large container and thin to the strongest one or two seedlings later, ensuring they are spaced at least 10-12 inches apart if keeping more than one.
- Watering: Containers dry out much faster than garden beds. Check the soil moisture daily by sticking your finger about an inch deep. Water thoroughly whenever the top inch feels dry, allowing excess water to drain out the bottom. Avoid letting the soil become completely dry or constantly waterlogged.
- Fertilization: Potting mixes contain limited nutrients. Start feeding with a diluted balanced liquid fertilizer about 3-4 weeks after germination. Switch to a fertilizer slightly higher in phosphorus and potassium (like a “bloom booster” formula, e.g., 5-10-10) every 3-4 weeks once the vines are well-established to encourage tuber growth rather than excessive foliage. Follow package instructions for dilution rates. Slow-release fertilizer mixed in at planting can also be used.
- Sunlight and Location: Place the container in the sunniest location possible, receiving at least 6-8 hours of direct sun daily.
- Support: Provide a sturdy trellis, cage, or stakes within or next to the container at planting time for the vines to climb. Jicama vines can grow quite long (10-20 feet / 3-6 meters).
- Mobility: Using a plant dolly can make it easier to move large containers to follow the sun or bring them indoors temporarily if unexpected frost threatens.
Additional Planting Tips
- Support System: Install trellises, stakes, or netting at planting time to avoid disturbing roots later. Jicama vines need support to climb, which improves air circulation and keeps fruit (pods – remember they are toxic!) off the ground.
- Companion Planting: Consider planting jicama near corn (provides a natural trellis), bush beans (nitrogen fixation), or radishes (help break up soil, mature quickly). Aromatic herbs like marigolds or nasturtiums nearby may help deter some pests.
- Mulching: Once seedlings are established (a few inches tall), apply a 2-3 inch (5-7.5 cm) layer of organic mulch, such as straw, shredded leaves, or wood chips, around the base of the plants (keeping it an inch away from the stems). Mulch helps conserve soil moisture, suppress weeds, and regulate soil temperature. This is particularly beneficial in hot climates.
- Sustainable Soil Enrichment: Rely primarily on compost and aged manure for fertility. Cover cropping with nitrogen-fixing plants like vetch or clover in the off-season can also build soil health naturally.
## IV. Caring for Your Jicama Plants
Consistent care throughout the growing season is key to developing healthy vines and large, tasty tubers. Attentive watering, appropriate fertilization, vine support, and proactive pest management are essential components of successful jicama cultivation.
1. Watering and Irrigation
Jicama needs consistent moisture, especially during tuber formation, but dislikes soggy feet. Striking the right balance is crucial.
- Frequency and Amount: Provide about 1-1.5 inches (2.5-3.8 cm) of water per week, delivered through rainfall or irrigation. Water deeply rather than shallowly to encourage deep root growth. In very hot, dry weather, or if growing in sandy soil or containers, more frequent watering may be necessary.
- Technique: Use drip irrigation or soaker hoses whenever possible. These methods deliver water directly to the soil surface around the root zone, minimizing water lost to evaporation and keeping the foliage dry. Wet foliage increases the risk of fungal diseases like powdery mildew. If overhead watering is necessary, do it early in the morning so leaves can dry quickly.
- Soil Moisture Monitoring: Don’t rely solely on a schedule. Check the soil moisture before watering. Stick your finger 2-3 inches (5-7.5 cm) deep near the plant base. If the soil feels dry at that depth, it’s time to water. If it feels moist, wait. The goal is consistently moist, but not waterlogged soil.
- Mulching Benefits: A layer of organic mulch (straw, shredded leaves) significantly helps maintain consistent soil moisture by reducing evaporation, in addition to suppressing weeds and moderating soil temperature.
- Water Conservation: Group plants with similar water needs together. Consider using rainwater harvesting systems (like rain barrels) to collect water for irrigation – a sustainable practice that provides chlorine-free water plants often prefer.
2. Fertilization and Soil Amendments
While jicama benefits from fertile soil, over-fertilizing, especially with nitrogen, can lead to excessive vine growth at the expense of tuber development.
- Initial Fertility: If you amended the soil well with compost or aged manure before planting, jicama might need minimal supplemental feeding.
- Fertilizer Type: Focus on balanced nutrients initially, then shift towards phosphorus (P) and potassium (K) which support root and tuber growth. - Organic Options: Continue to rely on the slow release of nutrients from compost. Supplement if needed with well-balanced organic fertilizers or specific amendments like bone meal (for P) or kelp meal (for K and micronutrients). Compost tea applied as a soil drench can also provide a gentle nutrient boost. - Synthetic Options: If using synthetic fertilizers, apply a balanced formula (e.g., 10-10-10) sparingly early in the season if growth seems slow. Once vines are established (around mid-season), switch to a lower-nitrogen fertilizer (e.g., 5-10-10 or similar “root & bloom” formulas) applied according to package directions. Avoid high-nitrogen fertilizers later in the season.
- Timing and Application: Apply granular fertilizers by side-dressing: sprinkle the fertilizer lightly on the soil surface several inches away from the plant base, then gently incorporate it into the top inch of soil and water it in. For liquid fertilizers (organic or synthetic), follow dilution rates carefully and apply around the root zone every 3-4 weeks if needed, primarily during the tuber development phase.
- Observe Your Plants: Plant health is the best indicator. If vines are vigorous and green, additional nitrogen is likely unnecessary. Pale leaves might indicate a need for balanced feeding.
- pH Check: Ensure soil pH remains in the optimal 6.0-7.0 range, as incorrect pH can hinder nutrient uptake even if nutrients are present in the soil.
3. Jicama Companion Plants
Strategic planting can enhance growth, deter pests, and make efficient use of garden space.
- Beneficial Companions: - Corn: Acts as a sturdy, natural trellis for the climbing jicama vines. - Bush Beans or Pole Beans: As fellow legumes, they fix atmospheric nitrogen, potentially benefiting the jicama (though jicama fixes its own). They occupy different vertical spaces. - Root Vegetables (e.g., Radishes, Carrots – planted away from direct tuber zone): These can help loosen soil nearby. Radishes mature quickly and can mark rows. - *Marigolds (Tagetes spp.): Reputed to deter soil nematodes and some flying insects. Choose non-invasive varieties. - Nasturtiums: Can act as a “trap crop,” luring aphids away from the jicama. Flowers and leaves are also edible (for humans!). - Herbs (e.g., Basil, Oregano):* Strong scents may confuse or repel some pests.
Plants to Avoid Planting Near Jicama
- Potatoes: Can compete for space and nutrients and potentially share susceptibility to certain soil pests or diseases.
- Fennel: Known to inhibit the growth of many garden plants, including legumes.
- Strong Alliums (Garlic, Onions): While sometimes used for pest deterrence, some sources suggest they might slightly inhibit legume growth. Use with caution nearby.
### 4. Pruning and Training
Jicama requires support and potentially some minor pruning for optimal production.
- Vine Support (Essential): Provide a sturdy trellis, fence, cage, or stakes for the vines to climb from the beginning. Jicama vines can grow very long (up to 20 feet / 6 meters) and need support to stay off the ground, improve air circulation, maximize sun exposure to leaves, and make management easier. Gently guide young vines towards the support structure.
- Flower Removal (Recommended for Tuber Size): Jicama produces attractive blue or white pea-like flowers, followed by fuzzy pods (Remember: pods and seeds are toxic!). To encourage the plant to direct all its energy into enlarging the edible tuber, it is highly recommended to pinch off the flower stems as soon as they appear. Regularly check the vines (every few days) and remove any developing flower stalks.
- Pruning for Tidiness (Optional): If vines become excessively dense or unruly, you can selectively prune some secondary stems to improve air circulation, but avoid excessive removal of foliage as leaves power tuber growth.
5. Pest and Disease Management
Jicama is relatively hardy, but can occasionally face pest and disease issues. An integrated approach focusing on prevention and organic methods is best.
Common Pests:
- Aphids: Small, pear-shaped insects clustering on new growth. Control with a strong spray of water from a hose, or use insecticidal soap or neem oil. Encourage beneficial insects like ladybugs and lacewings, which prey on aphids.
- Spider Mites: Tiny pests causing stippling (small yellow dots) on leaves, often with fine webbing. Thrive in hot, dry conditions. Increase humidity, spray with water, use insecticidal soap or neem oil.
- Cucumber Beetles (can affect legumes): Yellow beetles with black stripes or spots; feed on leaves and flowers. Handpick them (drop into soapy water). Use floating row covers on young plants, especially at planting time, to prevent initial infestation. Kaolin clay sprays can deter feeding.
- Bean Leaf Beetles: Similar damage to cucumber beetles. Control methods are the same.
Common Diseases:
- Root Rot: Caused by overly wet soil and poor drainage. Symptoms include yellowing, wilting, and mushy roots. Prevention is key: ensure excellent drainage, avoid overwatering. Remove and destroy affected plants immediately. Do not replant jicama or susceptible crops in the same spot for several years.
- Powdery Mildew: White, powdery patches on leaves, usually in humid conditions with poor air circulation. Improve air circulation through proper spacing and trellising. Prune affected leaves if mild. Apply neem oil or organic fungicides based on potassium bicarbonate as a preventive or early treatment.
- Mosaic Viruses: Can be transmitted by aphids. Cause mottled yellow/green patterns, distorted leaves. There is no cure. Remove and destroy infected plants immediately to prevent spread. Control aphids diligently.
Sustainable and Organic Pest/Disease Control:
- Healthy Soil: Start with healthy, biologically active soil rich in organic matter. Healthy plants are naturally more resilient.
- Crop Rotation: Rotate planting locations each year (3-4 year rotation is ideal) to prevent buildup of soil-borne pests and diseases.
- Proper Spacing & Air Circulation: Reduces humidity around plants, discouraging fungal diseases.
- Sanitation: Remove and dispose of diseased plant material promptly. Clean tools between plants if disease is suspected. Keep the garden area free of weeds that can harbor pests.
- Beneficial Insects: Plant flowers (like alyssum, dill, fennel – away from jicama itself) that attract ladybugs, lacewings, hoverflies, and parasitic wasps.
- Physical Barriers: Use floating row covers early in the season to protect seedlings from beetles and some other pests (remove when flowering begins if relying on pollinators, though jicama is self-pollinating).
- Organic Sprays (Use Judiciously): Insecticidal soap, neem oil, horticultural oil, and Bacillus thuringiensis (Bt – for caterpillars, though less common on jicama) can be effective when used correctly and targeted only when necessary. Always follow label instructions.
6. Climate Considerations
Jicama’s primary need is warmth and time.
- Temperature Requirements: Ideal growing temperatures are between 68-85°F (20-29°C). Growth slows significantly below 60°F (15°C). Jicama is not frost-tolerant; plants will be damaged or killed by frost.
- Growing Season Length: Requires a long, warm season – typically 150-270 frost-free days – for good tuber development. Start indoors or use season extension techniques (hoop houses, cold frames early/late season) in areas with shorter summers.
- Heat Management: While it loves warmth, extreme heat (consistently above 95°F / 35°C) can stress plants. Ensure consistent watering and consider providing light afternoon shade in scorching climates, though full sun is generally preferred. Mulch helps moderate soil temperature extremes.
- Humidity: Jicama tolerates a range of humidity levels but does best in moderate humidity. Ensure good air circulation in very humid climates to prevent fungal issues.
V. Harvesting and Storing Jicama
 Harvesting at the right time and storing properly ensures you enjoy jicama at its peak crispness and flavor. Remember, only the underground tuber is edible.
1. Signs of Maturity and Readiness for Harvest
- Timing Based on Planting Date: Jicama typically requires 5 to 9 months of warm weather from planting to harvest. Keep track of your planting date and the typical time needed in your climate. Harvest generally occurs in late summer or fall, before the first frost.
- Vine Appearance: While not always a definitive indicator, the vines may begin to yellow and die back slightly as the plant matures and focuses energy on the tuber. However, harvest should ideally occur before the vines die back completely, especially if frost is approaching.
- Tuber Size Check (Gentle Exploration): Carefully brush away some soil at the base of the plant stem. You should be able to feel the top shoulder of the tuber. Mature tubers typically reach a usable size of 4-6 inches (10-15 cm) in diameter, though they can grow larger if the season is long enough.
- Harvest Before Frost: It is crucial to harvest jicama before the ground freezes or heavy frosts occur, as cold temperatures can damage the tubers.
- Optimal Quality vs. Size: While tubers can get very large, extremely oversized jicama (well beyond 6-8 inches) might develop a slightly woody or fibrous texture. Harvesting when they reach a good, usable size often provides the best quality.
2. Harvesting Techniques and Tools
- Prepare the Soil: If the soil is dry and hard, watering the area moderately a day before harvesting can make digging easier. Avoid soaking the soil, however.
- Tools: A sturdy garden fork is often the best tool, as it’s less likely to slice into the tuber than a spade. A shovel or spade can also be used carefully.
- Technique: 1. First, cut back the vines near the soil level. (Remember vines/leaves are toxic). 2. Begin digging carefully around the plant, starting about 1 foot (30 cm) away from the stem to avoid hitting the tuber directly. 3. Work your way inwards, loosening the soil deeply all around the tuber. Jicama tubers can form deeper than expected. 4. Once the soil is well-loosened, gently use the fork or spade to lift the tuber from underneath. Try to lift the entire root system out. 5. Avoid pulling solely on any remaining stem, as this can break off, leaving the tuber in the ground or damaging its crown.
- Harvesting Multiple Tubers: Each jicama plant typically produces one main enlarged tuber, although sometimes smaller secondary swellings might occur. Focus on harvesting the primary tuber.
3. Post-Harvest Handling
- Cleaning: Gently brush off loose soil using your hands or a soft brush. Do not wash the tubers if you intend to store them for any length of time. Surface moisture encourages rot during storage. Wash them just before use. The harvested tuber should feel firm and heavy for its size, with unbroken skin.
- Curing (Optional but Recommended for Storage): To toughen the skin and improve storage life, you can cure jicama for about 1-2 weeks. Place the unwashed, soil-brushed tubers in a single layer (not touching) in a warm (around 60-70°F / 15-21°C), moderately humid, shaded, and well-ventilated area. This allows minor scrapes to heal and the skin to harden slightly.
- Trimming: Trim off the remaining stem close to the tuber crown (about 1/2 to 1 inch / 1-2.5 cm). Also, trim off the long, thin taproot extending from the bottom, being careful not to cut into the main fleshy part of the tuber.
- Inspection: Check tubers for any deep cuts, bruises, or soft spots. Use any damaged tubers promptly, as they will not store well.
4. Storing Jicama
- Ideal Conditions: Jicama stores best in a cool, dry, dark place with temperatures between 50-60°F (10-15°C). Crucially, do not refrigerate whole, uncut jicama. Temperatures below 50°F (10°C) can cause chilling injury, leading to discoloration, decay, and loss of texture. A cool pantry, basement, or root cellar is ideal.
- Humidity: While it needs cool conditions, excessive dryness can cause shriveling. Moderate humidity (around 65-75%) is good. Avoid damp locations which promote mold.
- Ventilation: Ensure good air circulation around the stored tubers. Do not store them in sealed plastic bags. Use baskets, crates, or store them loosely on shelves.
- Isolation: Store jicama away from ethylene-producing fruits like apples, bananas, and pears, as ethylene gas can accelerate spoilage.
- Storage Duration: When stored properly under these conditions, whole, undamaged, unwashed jicama can last for 1 to 3 months, sometimes longer. Check them periodically for any signs of spoilage (soft spots, mold).
- Cut Jicama: Once cut or peeled, jicama must be stored in the refrigerator. Wrap peeled and sliced jicama tightly in plastic wrap or place in an airtight container. It will last for about 1 week in the fridge, though it may lose some crispness over time. A splash of lime or lemon juice can help prevent discoloration.
5. Processing for Long-Term Storage (Freezing or Dehydrating)
While best enjoyed fresh, jicama can be preserved, although freezing significantly alters its crisp texture.
- Freezing (Texture Change Alert): Frozen and thawed jicama loses its characteristic crunch and becomes softer, making it more suitable for cooked dishes like soups or stews rather than raw preparations. 1. Peel the jicama thoroughly (the skin is fibrous and inedible). 2. Cut into desired shapes (cubes or slices). 3. Blanching (Recommended): Drop the pieces into boiling water for 2-3 minutes. This step helps preserve color and nutrients and deactivates enzymes that degrade quality. 4. Immediately transfer the blanched jicama to an ice water bath to stop the cooking process. 5. Drain thoroughly and pat completely dry with paper towels. Excess moisture leads to ice crystals. 6. Pack into airtight freezer bags or containers, removing as much air as possible. Label with the date. 7. Store in the freezer for up to 6-8 months. Use in cooked dishes directly from frozen.
- Dehydrating (Makes Chips): 1. Peel jicama thoroughly. 2. Slice very thinly and uniformly (about 1/16 to 1/8 inch or 1.5-3 mm thick) using a mandoline slicer for best results. 3. Arrange slices in a single layer on dehydrator trays. 4. Dehydrate at around 125-135°F (52-57°C) for 6-12 hours, or until crisp and brittle. Timing varies based on thickness and dehydrator efficiency. 5. Cool completely before storing. Store the dried jicama chips in an airtight container in a cool, dark, dry place for several months. They make a crunchy, low-calorie snack.
6. Culinary Uses and Preparation
- Raw: Peel and slice or dice jicama for salads, slaws (coleslaw alternative), spring rolls, or serve as crunchy sticks (crudités) with dips like guacamole, hummus, or chili-lime seasoning. Its mild flavor absorbs dressings and seasonings well.
- Cooked: Add cubed or sliced jicama to stir-fries (add near the end to retain some crunch), soups, stews, or sautés. It can be roasted or baked like potatoes, though it remains slightly crisp.
- Pickled: Jicama’s crispness makes it excellent for pickling, creating tangy, crunchy condiments or side dishes.
- Alternative Uses: Use as a low-carb substitute for water chestnuts in recipes or as a base for fresh salsas. Can also be blended into smoothies for added fiber and hydration.
VI. Troubleshooting Common Issues and FAQ
Even attentive gardeners may encounter occasional problems with jicama. This section outlines common issues, their solutions, and answers frequently asked questions to help you navigate challenges.
1. Identifying and Addressing Nutrient Deficiencies
Observe your plants closely for signs that might indicate nutrient imbalances:
- Nitrogen (N) Deficiency: - Symptoms: Overall stunted growth, pale green or yellowish leaves, especially older leaves (bottom of the plant). - Solution: Apply a balanced organic fertilizer, compost tea, or a nitrogen-rich amendment like fish emulsion or well-rotted manure tea, following application rates carefully. Avoid over-applying nitrogen, particularly later in the season.
- Phosphorus (P) Deficiency: - Symptoms: Slow growth, potentially purplish tint on leaves (especially undersides), poor flowering (if allowing flowers), and potentially poor tuber development. - Solution: Ensure soil pH is optimal (6.0-7.0), as incorrect pH locks up phosphorus. Amend soil with bone meal or rock phosphate (apply according to soil test results) before planting or carefully side-dress established plants.
- Potassium (K) Deficiency: - Symptoms: Yellowing or browning along the edges of older leaves, weak stems, potentially reduced tuber size. - Solution: Apply potassium-rich organic amendments like kelp meal, greensand, or wood ash (use wood ash sparingly and only if soil pH allows, as it raises pH). Ensure soil pH is appropriate for potassium uptake.
- General Solution: Healthy soil rich in compost usually provides a balanced range of nutrients. Regular additions of compost can often prevent specific deficiencies. Get a soil test for accurate diagnosis if problems persist.
2. Dealing with Watering Issues
- Overwatering (Most Common Issue): - Symptoms: Yellowing leaves (starting with lower leaves), wilting despite moist soil, slow growth, stem rot near the soil line, mushy or rotted tubers upon harvest. - Solution: Improve drainage immediately! Amend heavy soil with compost. Ensure containers have ample drainage holes. Reduce watering frequency. Allow the top 2-3 inches of soil to dry out between waterings. In severe cases of waterlogged soil, gently lifting the plant slightly (if possible without breaking roots) to aerate might help, but prevention is far better.
- Underwatering: - Symptoms: Wilting leaves that recover after watering, dry or crispy leaf edges, slow vine growth, potentially smaller tubers. - Solution: Water more deeply and consistently, ensuring water penetrates the root zone. Check soil moisture more frequently, especially during hot, dry periods or in containers. Apply mulch to conserve soil moisture.
3. Managing Pests and Diseases Without Harmful Chemicals
Focus on Integrated Pest Management (IPM) – a sustainable approach prioritizing prevention and least-toxic methods:
- Prevention First: Healthy soil, crop rotation, proper spacing, good air circulation, and choosing resistant varieties (if available) are the foundation.
- Monitoring: Regularly inspect plants (tops and undersides of leaves, stems) for early signs of pests or diseases. Early detection makes management much easier.
- Cultural Controls: Remove weeds that harbor pests. Use trellising to keep vines off the ground. Remove diseased plant parts promptly.
- Physical/Mechanical Controls: Handpick larger insects (like beetles) and drop them into soapy water. Use strong water sprays to dislodge aphids. Employ row covers on young plants.
- Biological Controls: Encourage beneficial insects (ladybugs, lacewings, predatory mites, parasitic wasps) by planting diverse flowers and avoiding broad-spectrum pesticides. Purchase and release beneficials if necessary for severe infestations.
- Least-Toxic Chemical Controls (Use as Last Resort): If necessary, use targeted, biodegradable options like insecticidal soap, horticultural oil, or neem oil. Apply according to label directions, targeting the specific pest, and preferably in the evening to minimize impact on beneficial insects.
4. Frequently Asked Questions (FAQ) about Growing Jicama
How much sun does jicama need?
Jicama needs full sun, which means a minimum of 6-8 hours of direct sunlight per day for optimal growth and tuber development. More sun is generally better, though in extreme heat, some late afternoon shade might reduce stress.
What type of soil is best for jicama?
The ideal soil is a well-drained, loose, sandy loam rich in organic matter, with a pH between 6.0 and 7.0. Excellent drainage is critical to prevent root rot. Amend heavy clay or compacted soils thoroughly.
When is the best time to harvest jicama?
Harvest jicama 5-9 months after planting, typically in the late summer or fall, before the first frost. Check tuber size by gently probing the soil near the stem base; aim for tubers around 4-6 inches in diameter for best quality. Watch for slight yellowing of vines as a potential indicator.
Can jicama be grown in containers?
Yes, jicama can be grown successfully in large containers. Choose pots at least 15-20 gallons in volume and 18 inches deep with excellent drainage. Use a quality potting mix, water consistently (as containers dry out faster), provide sturdy support for vines, and fertilize periodically.
How long does it take to grow jicama?
Jicama has a long growing season. It typically takes 150 to 270 days (5 to 9 months) from planting seed to harvesting mature tubers, depending on the variety (though distinct varieties are uncommon) and, more importantly, the climate and growing conditions (especially warmth and day length).
How do I store harvested jicama?
Store whole, uncut, unwashed jicama in a cool (50-60°F / 10-15°C), dry, dark place with good air circulation (NOT the refrigerator). Properly stored, it can last 1-3 months. Once cut or peeled, refrigerate tightly wrapped and use within a week.
Are jicama flowers and leaves edible?
NO! Absolutely not. Only the tuberous root of the jicama plant is edible. All other parts – including the leaves, stems, flowers, pods, and seeds – contain rotenone, a natural pesticide that is toxic to humans and animals if ingested. Always remove flowers to promote tuber growth and ensure pods/seeds do not develop or get accidentally consumed.
Comments (0)
No comments yet. Be the first to share your thoughts.